
How Do I Enable IPv6 on My VPS?
You can enable IPv6 at two moments:
In this article, we explain how to enable IPv6 on your VPS through the VPS panel.
You can enable IPv6 at two moments:
- during the installation of a new VPS;
- later through the Network page of your existing VPS.
What do you need?
- Access to the VPS panel via cloud.ping64.net
- An Etheron VPS
Enabling IPv6 on an existing VPS
-
Go to cloud.ping64.net and log in.
-
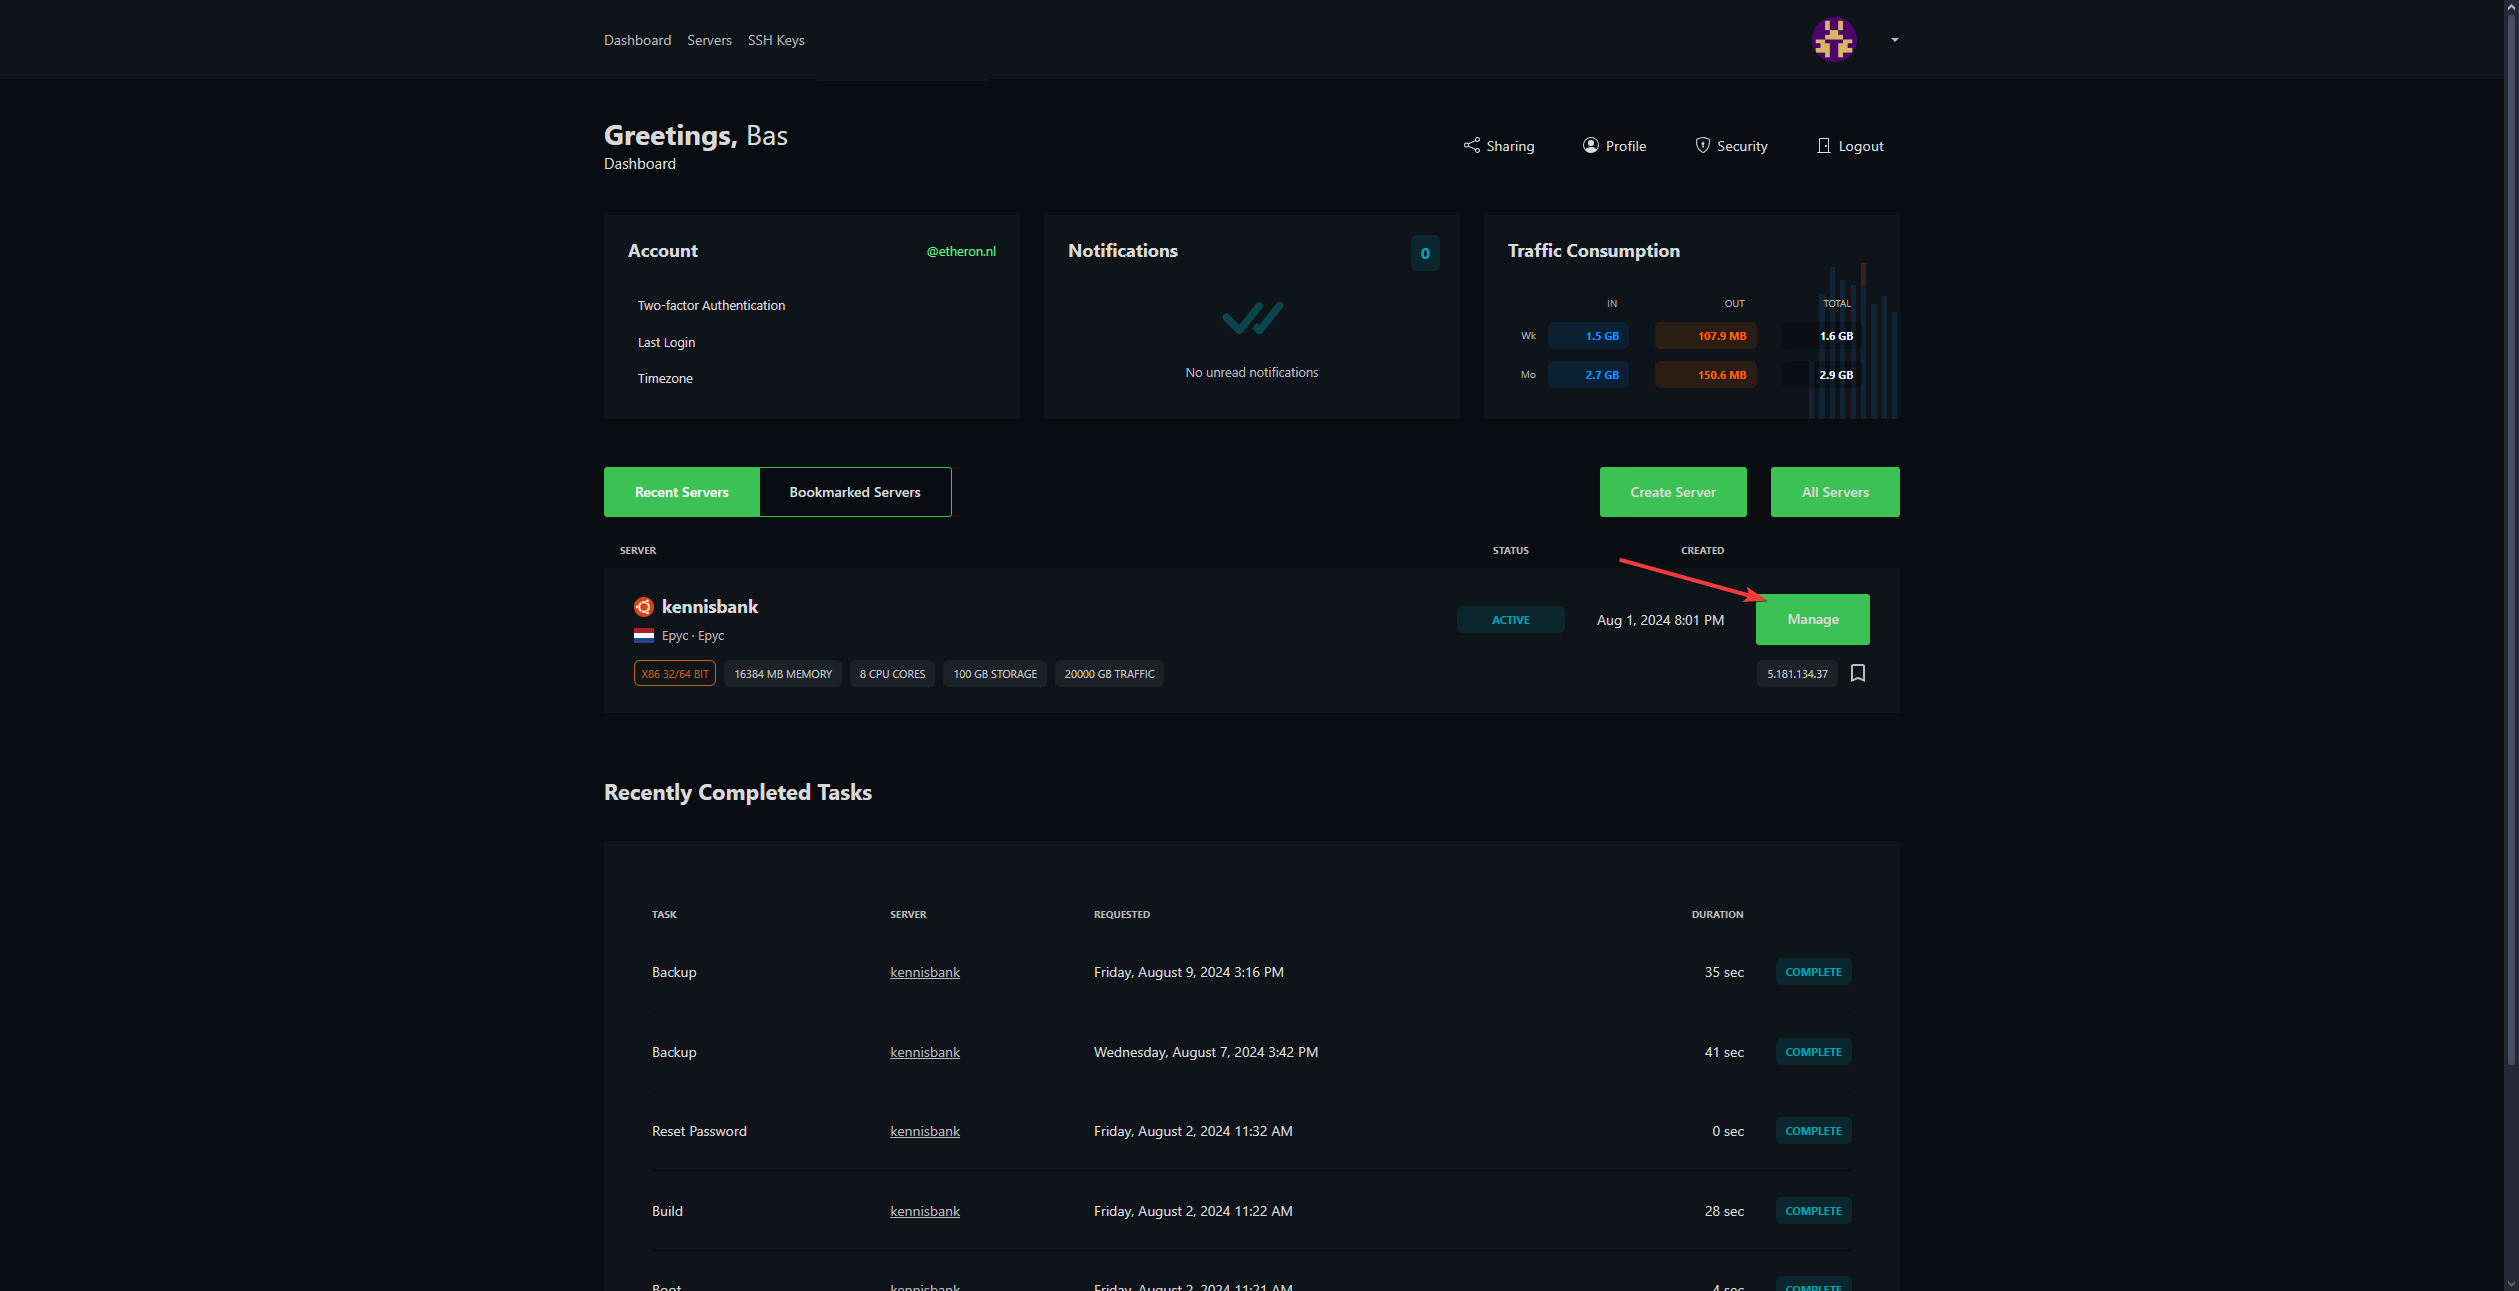
Choose the VPS you want to enable IPv6 for and click Manage.
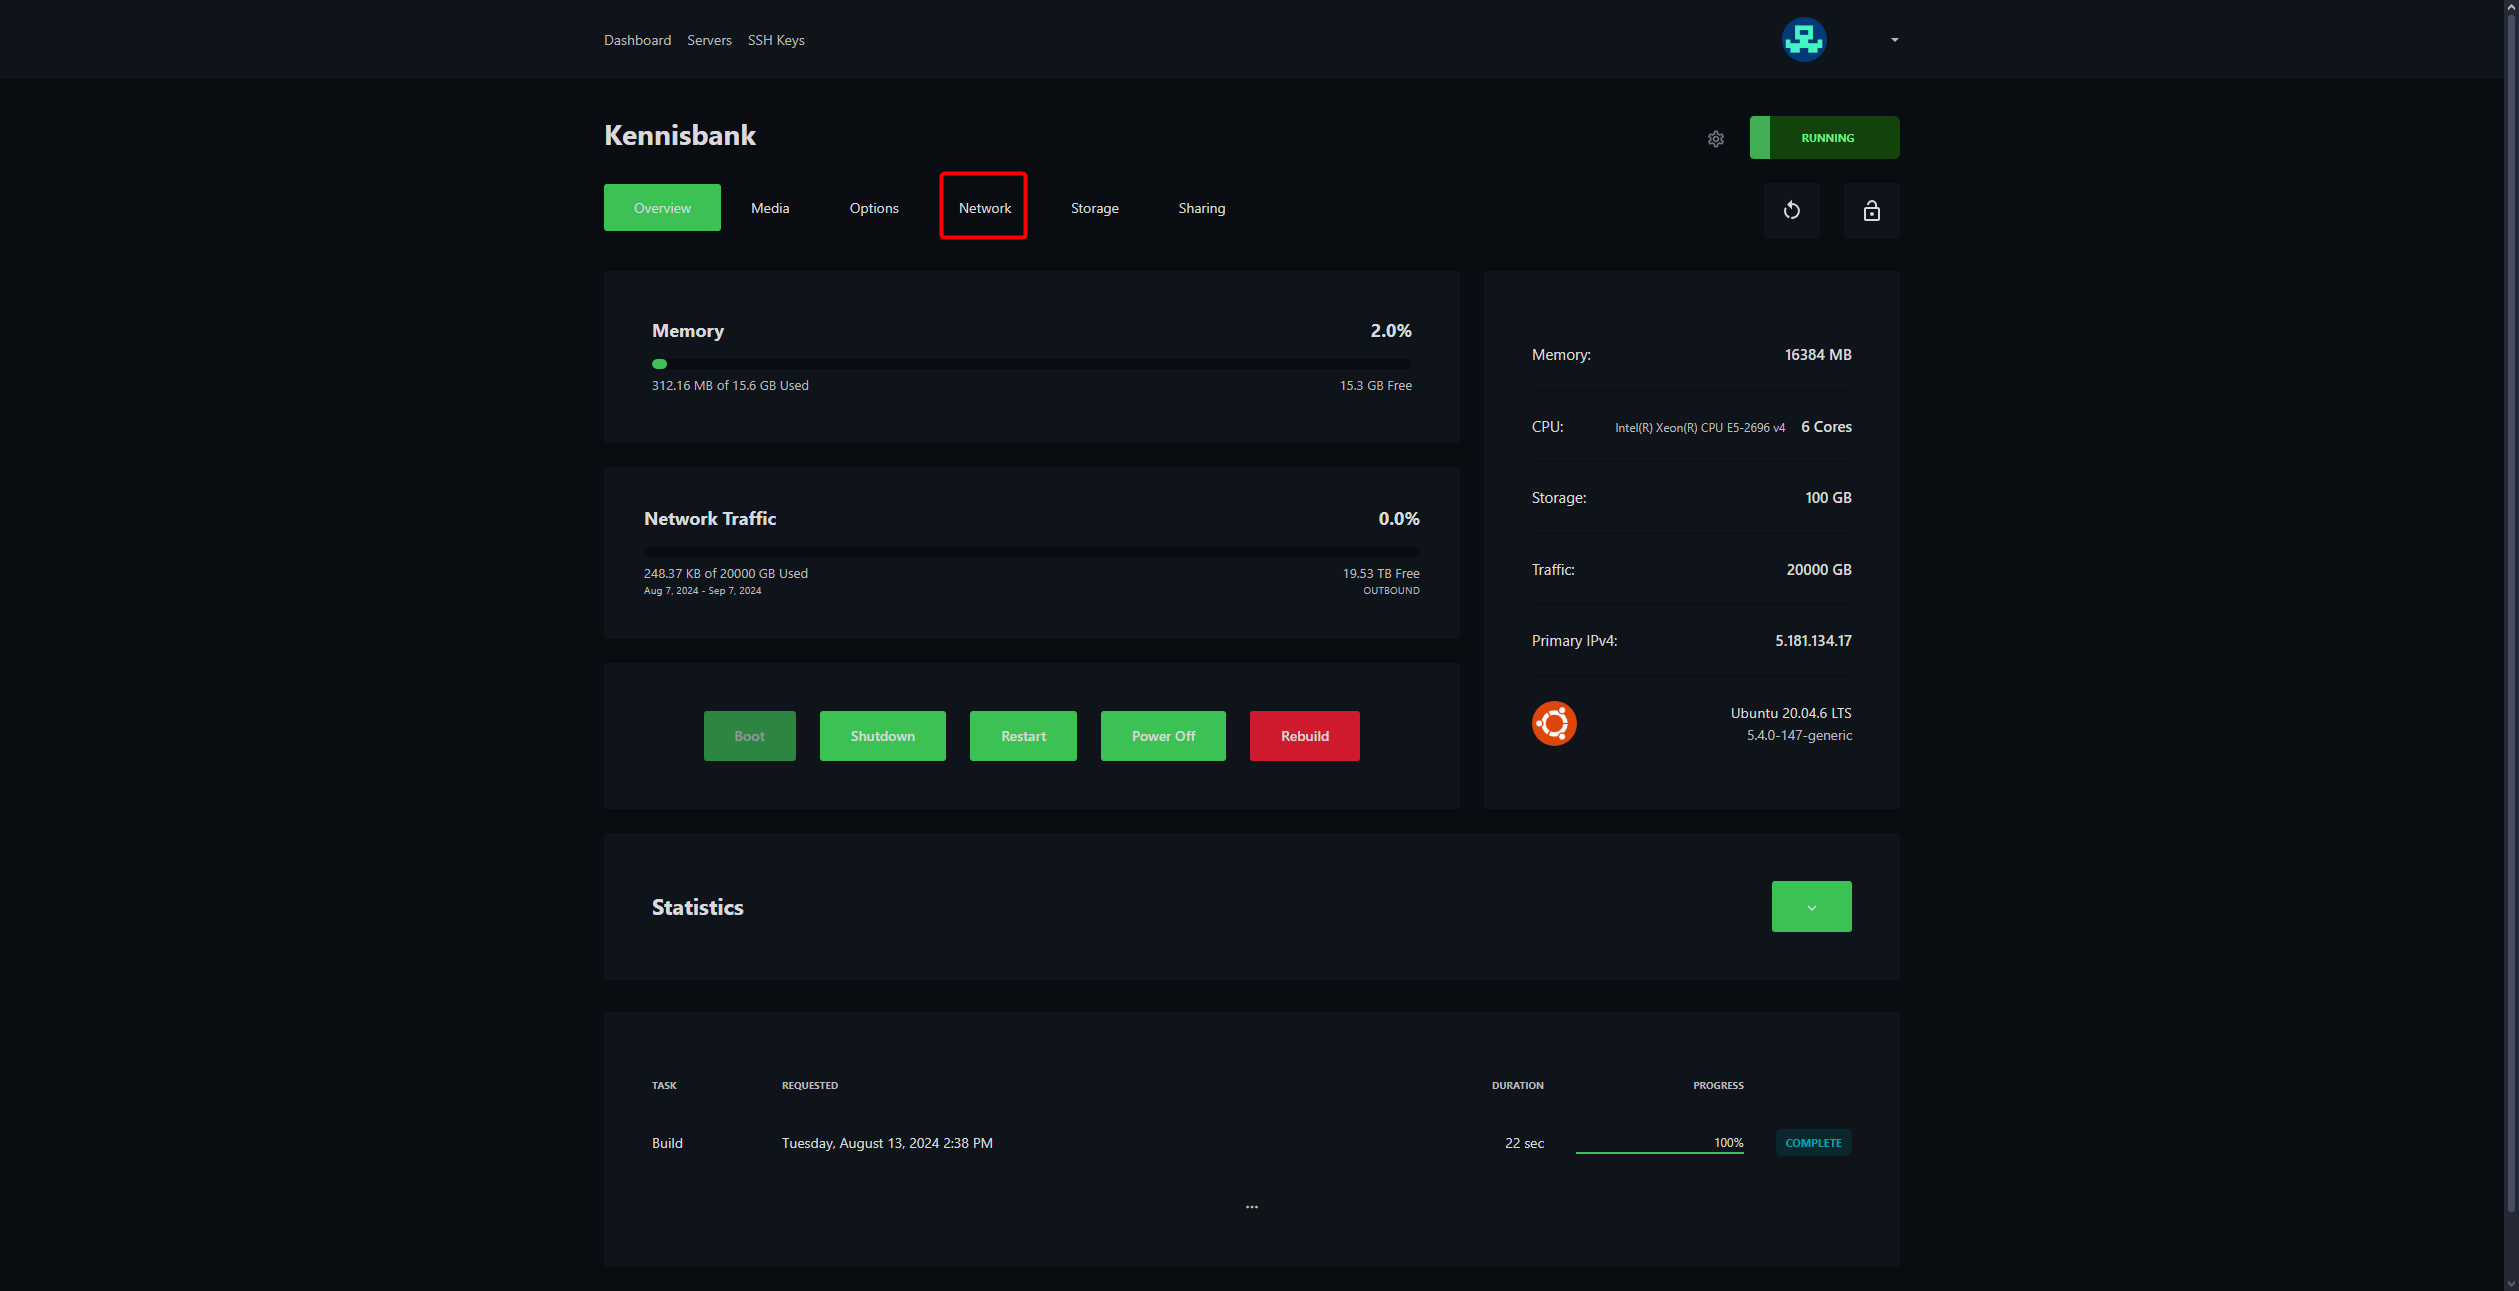
- Click Network at the top of the VPS panel.
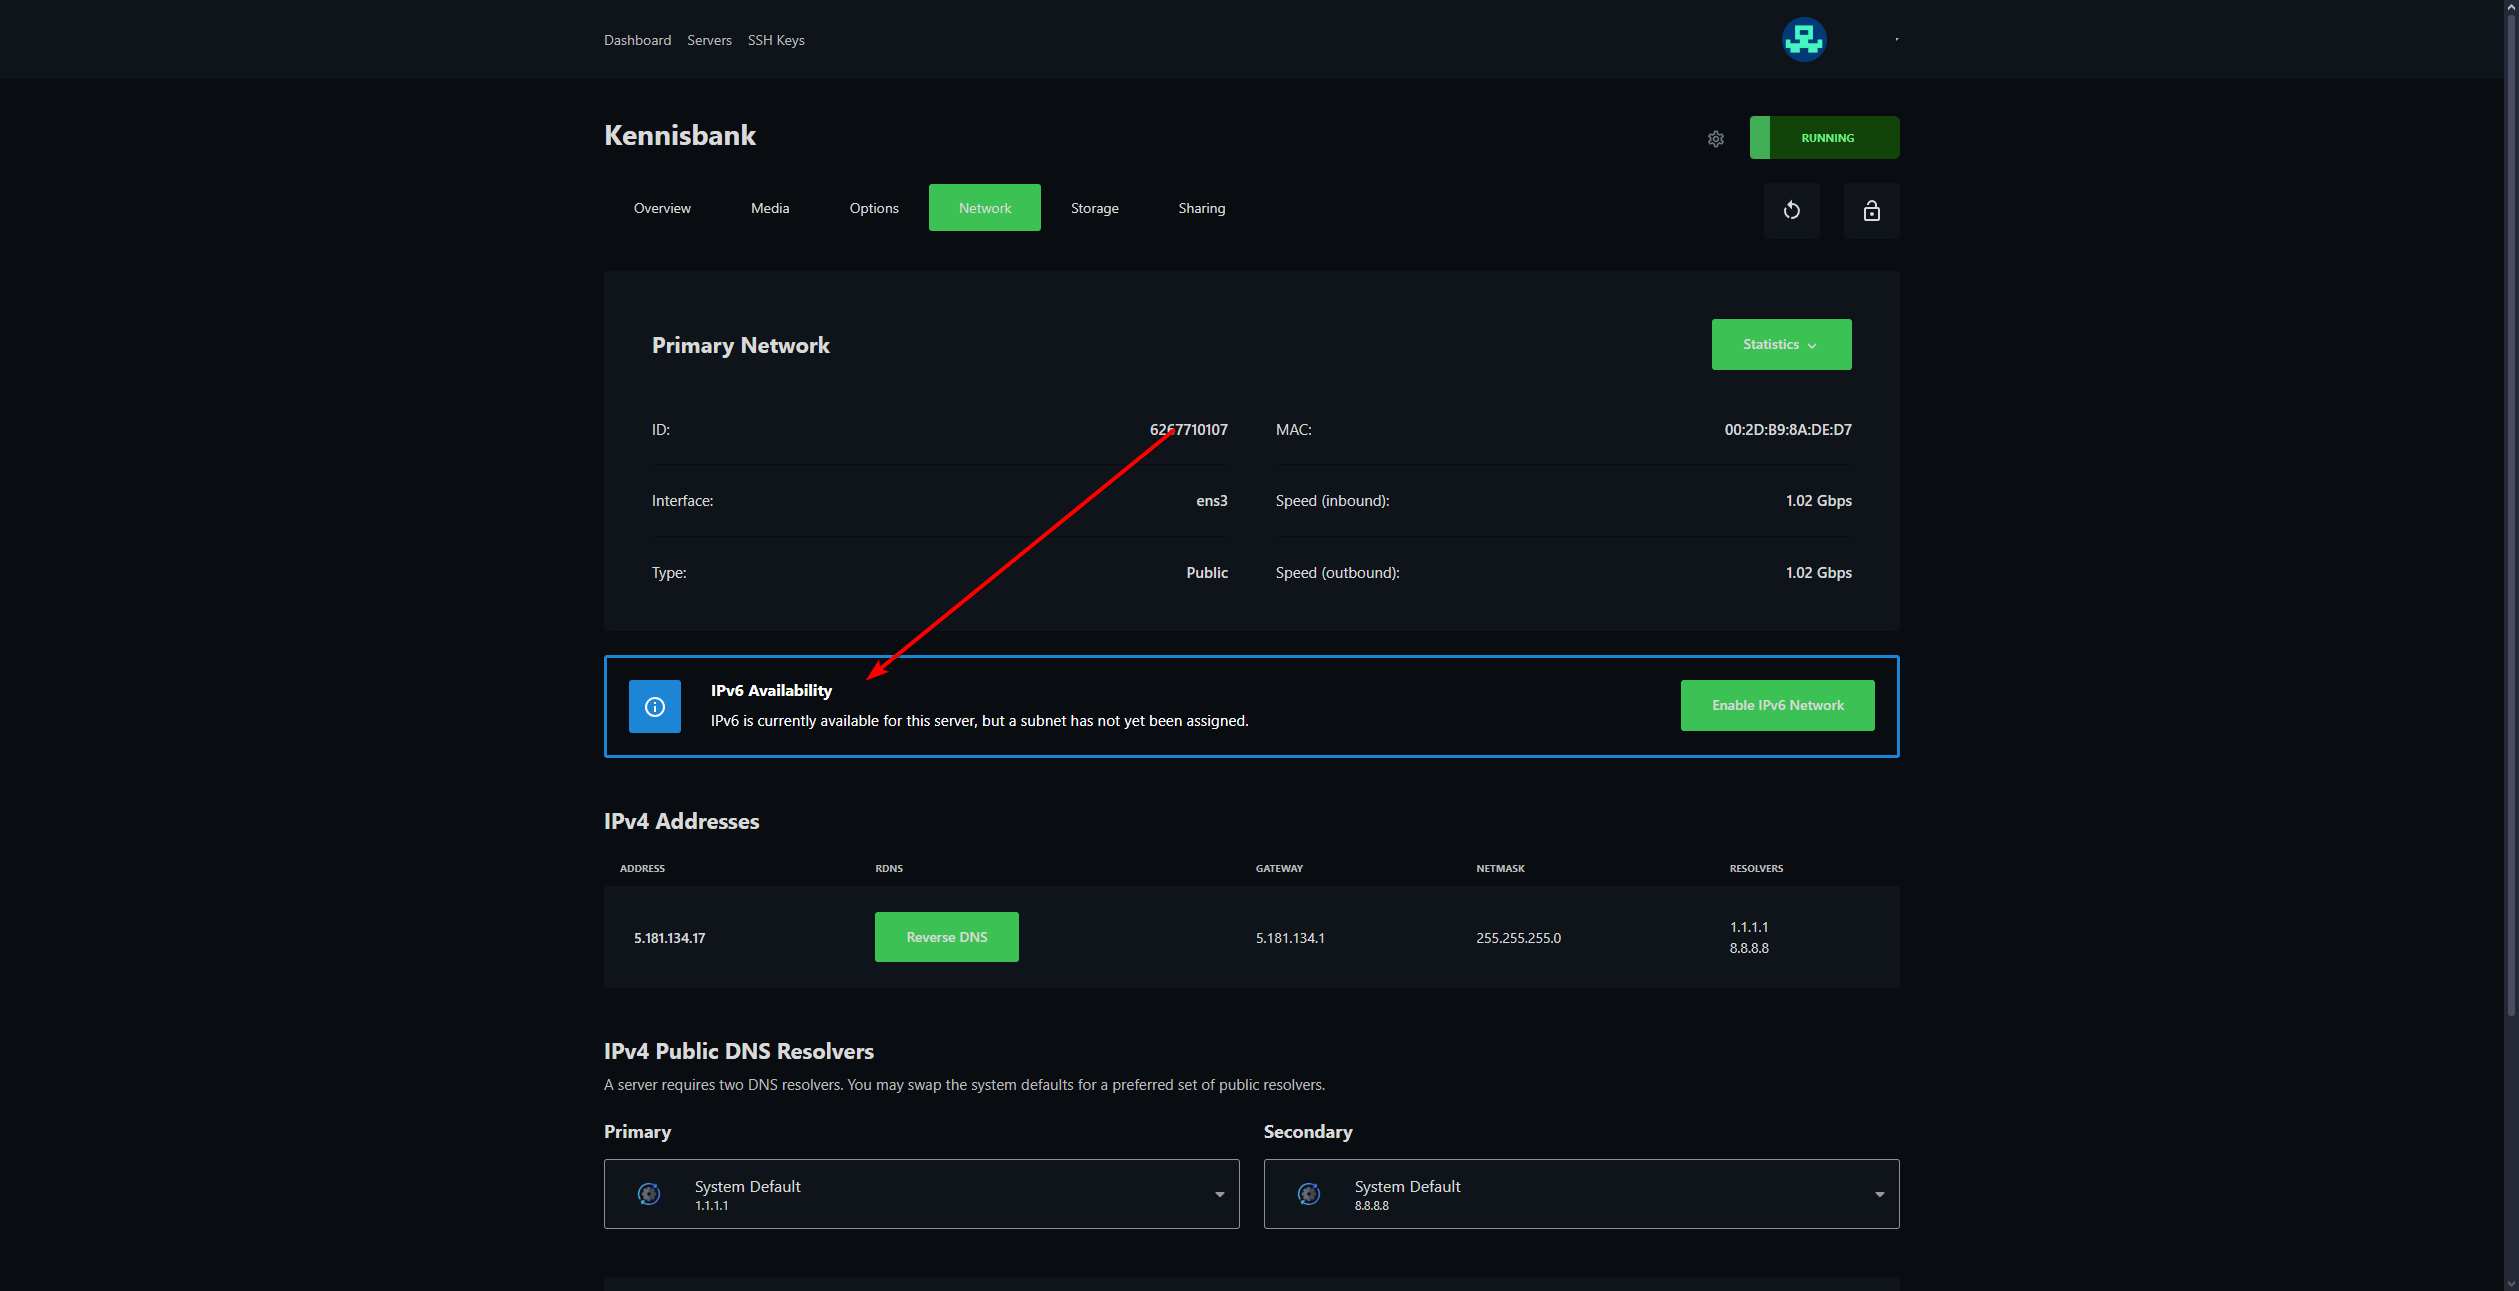
- Find the IPv6 Availability section.
If IPv6 is available for your VPS, you will see the option to enable IPv6 here.
- Click Enable IPv6 Network.
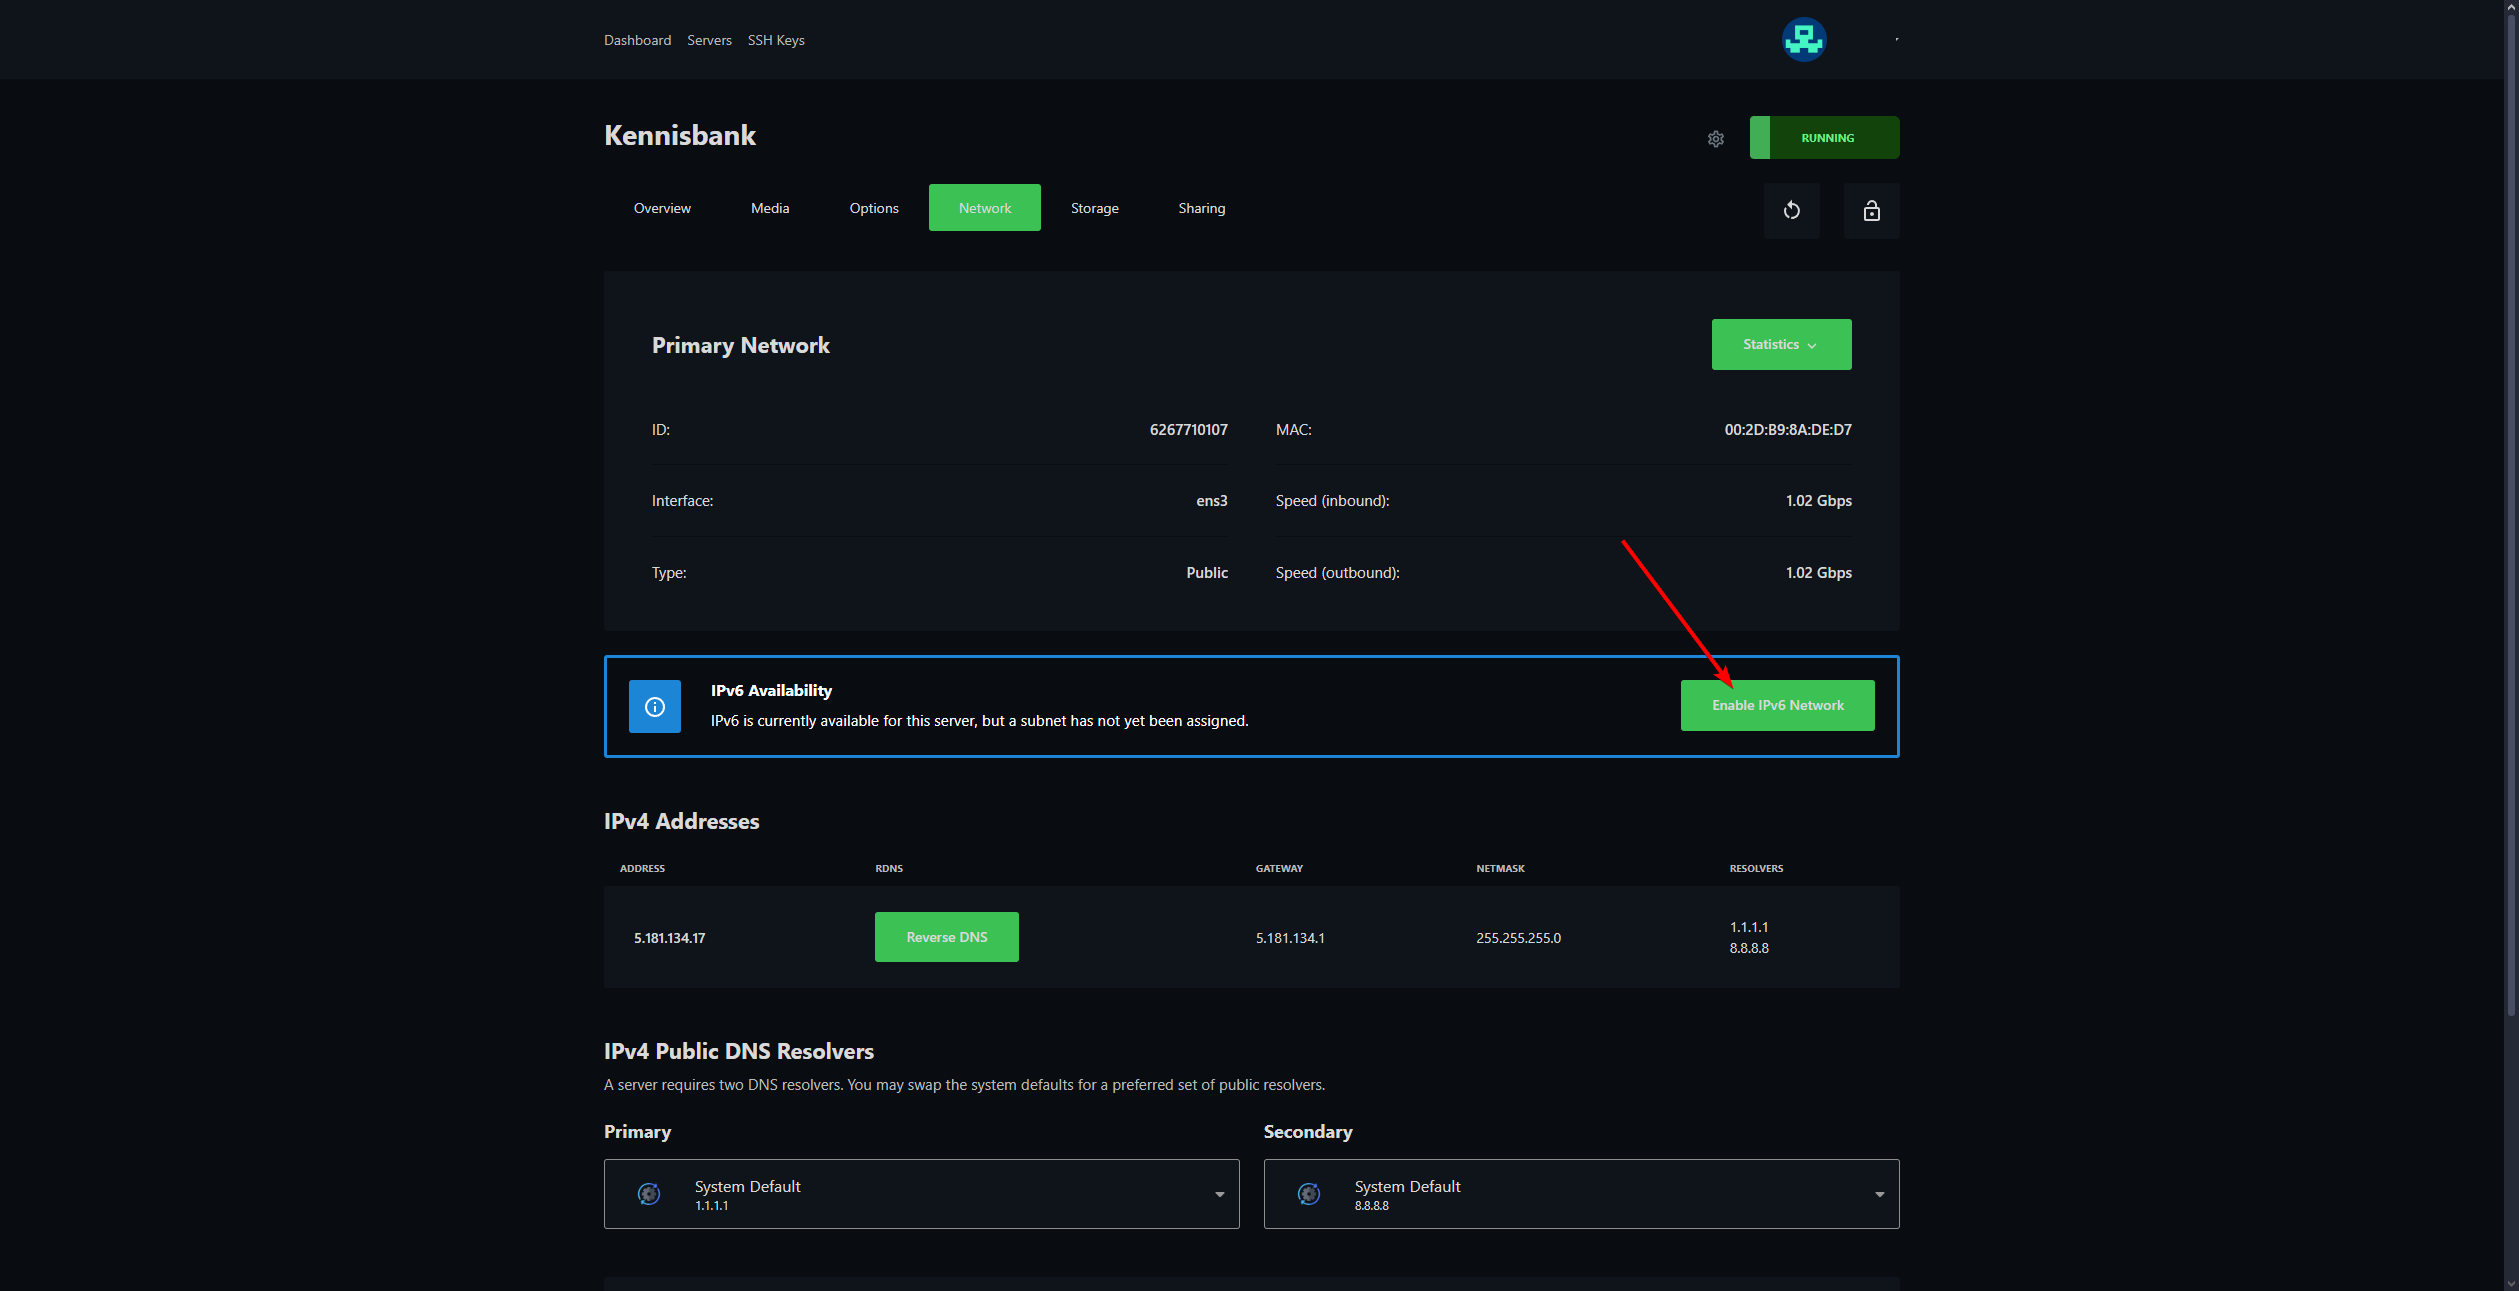
IPv6 will now be enabled for your VPS. It may take a short moment before the change is fully active.
Enabling IPv6 during installation
Are you installing a new VPS or rebuilding an existing VPS? You can also enable IPv6 during the installation flow. After choosing the operating system, you will see an option for IPv6 Network.
IPv6 not working right away?
First, check the following:
- Wait a few minutes after enabling IPv6.
- Check whether the VPS needs to be restarted.
- Check the firewall settings on your VPS.
- Check whether your software is listening on IPv6 as well.
If it still does not work, feel free to reach out via Discord or create a support ticket.
Lars
Updated on: 09/09/2026
Was this article helpful?