How do you enable redis cache?
Here’s how to enable Redis cache
Here’s how to enable Redis cache
-
Go to the website and log in to the WordPress admin panel.
-
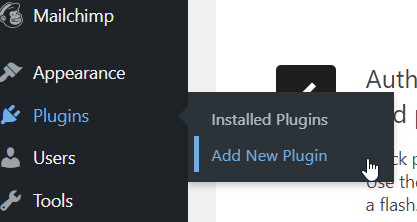
Navigate to Plugins and click on Add New.
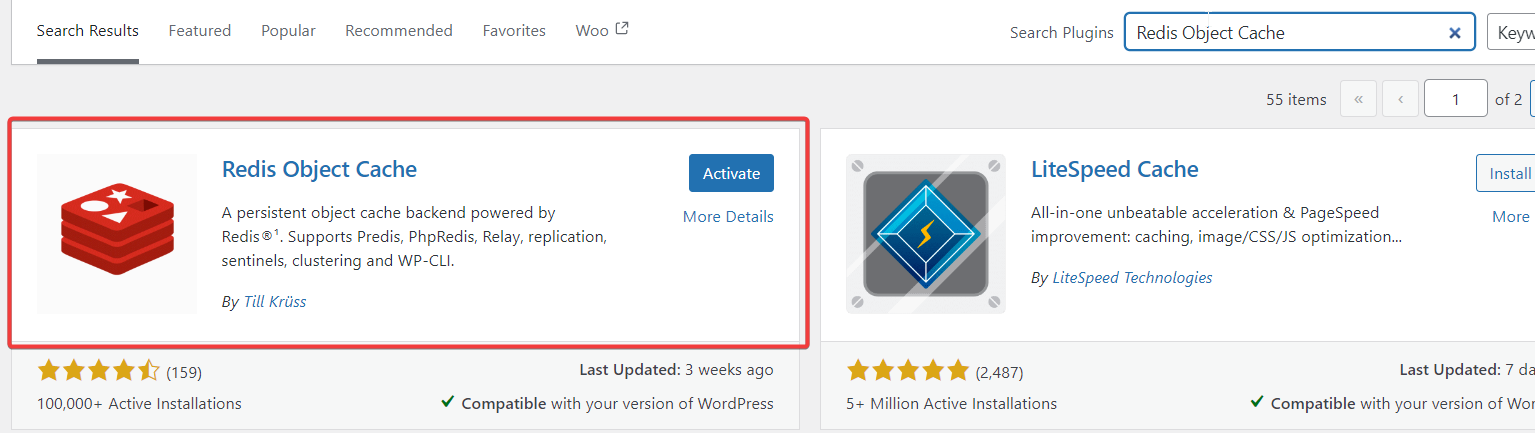
- Search for Redis Object Cache, install the plugin, and once it’s done, click Activate.
-
Go to your website's DirectAdmin panel by addomg :2222 at the end of your URL (e.g., yourwebsite.com:2222).
-
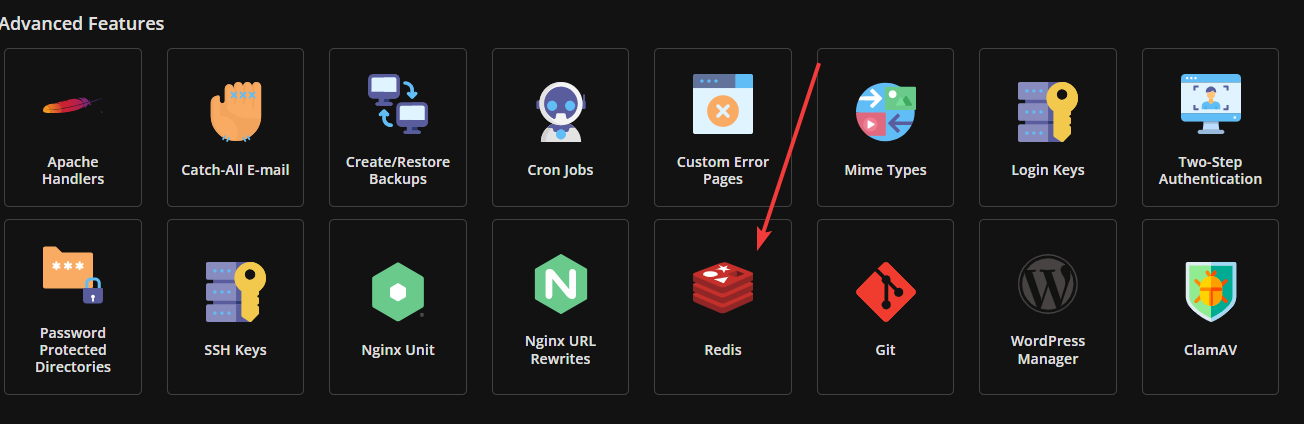
Go to Advanced Features > Redis.
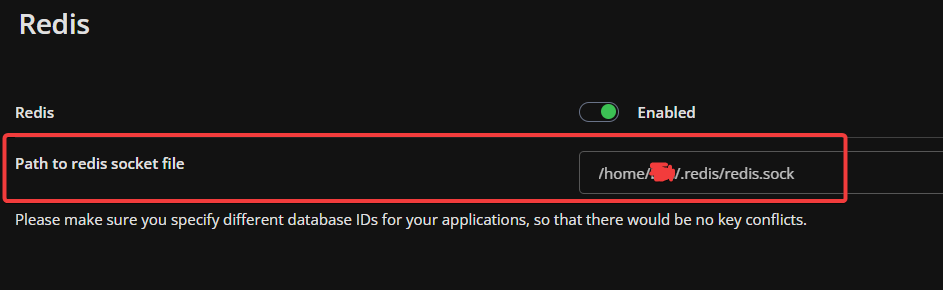
- Enable Redis and save the Path to Redis socket file for later.
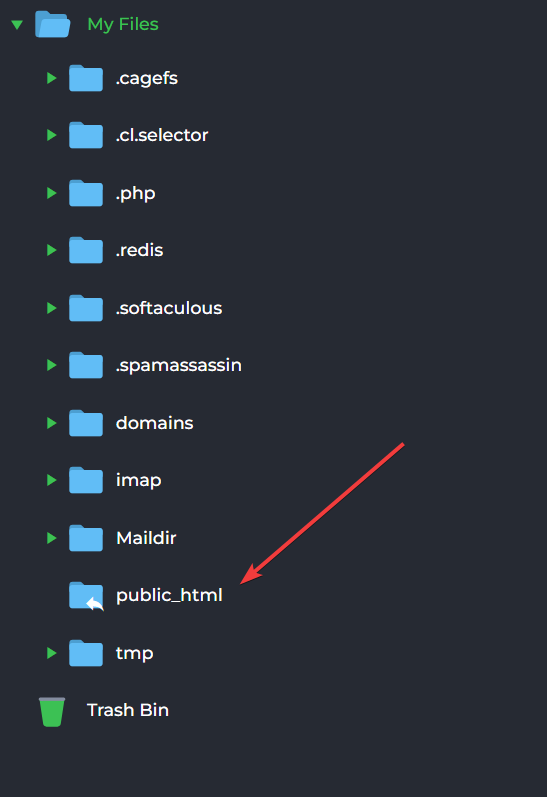
- Return to the main dashboard and navigate to System Info & Files > File Manager.

- Open the public_html folder by double-clicking.
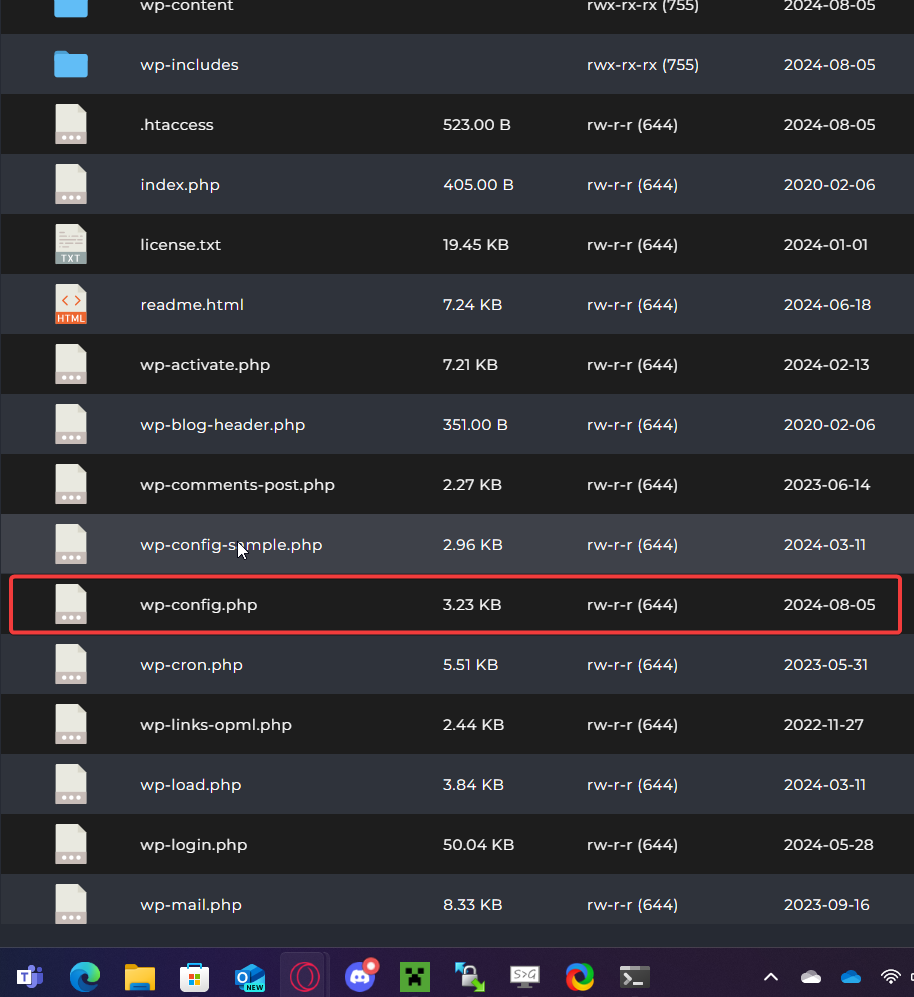
- Open the wp-config.php file.
-
Scroll down until you see *"/ That's all, stop editing! Happy publishing. */**".
-
Add the following code right above that line:
define('WP_REDIS_PATH', '**');
define('WP_REDIS_SCHEME', 'unix');
- Replace the
**with the Redis socket path you saved in step 6.

- Go back to the WordPress dashboard. Navigate to Plugins > Installed Plugins. Under Redis Object Cache, click Settings.

- Click Enable Object Cache.
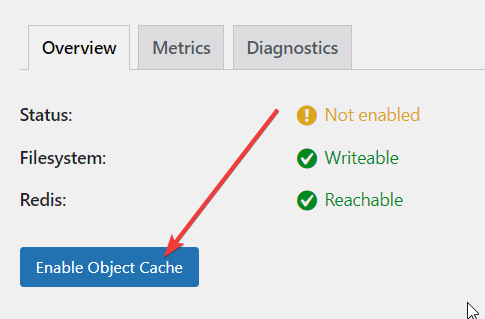
If the status shows Connected, Redis is working!If you encounter any issues, feel free to reach out via Discord or create a support ticket through this link.
Lars
Updated on: 05/06/2026
Was this article helpful?