
Enabling VNC on Your VPS
In this article, we explain how to enable VNC on your VPS and why you should disable it after use.
In this article, we explain how to enable VNC on your VPS. This is useful when installing Windows Server, using a custom ISO, or when you do not have normal SSH/RDP access.
Note: Only use VNC when you need it. Disable VNC again after use so the console does not remain available longer than necessary.
What do you need?
- Access to the VPS panel via cloud.ping64.net
- An Etheron VPS
Enabling VNC
-
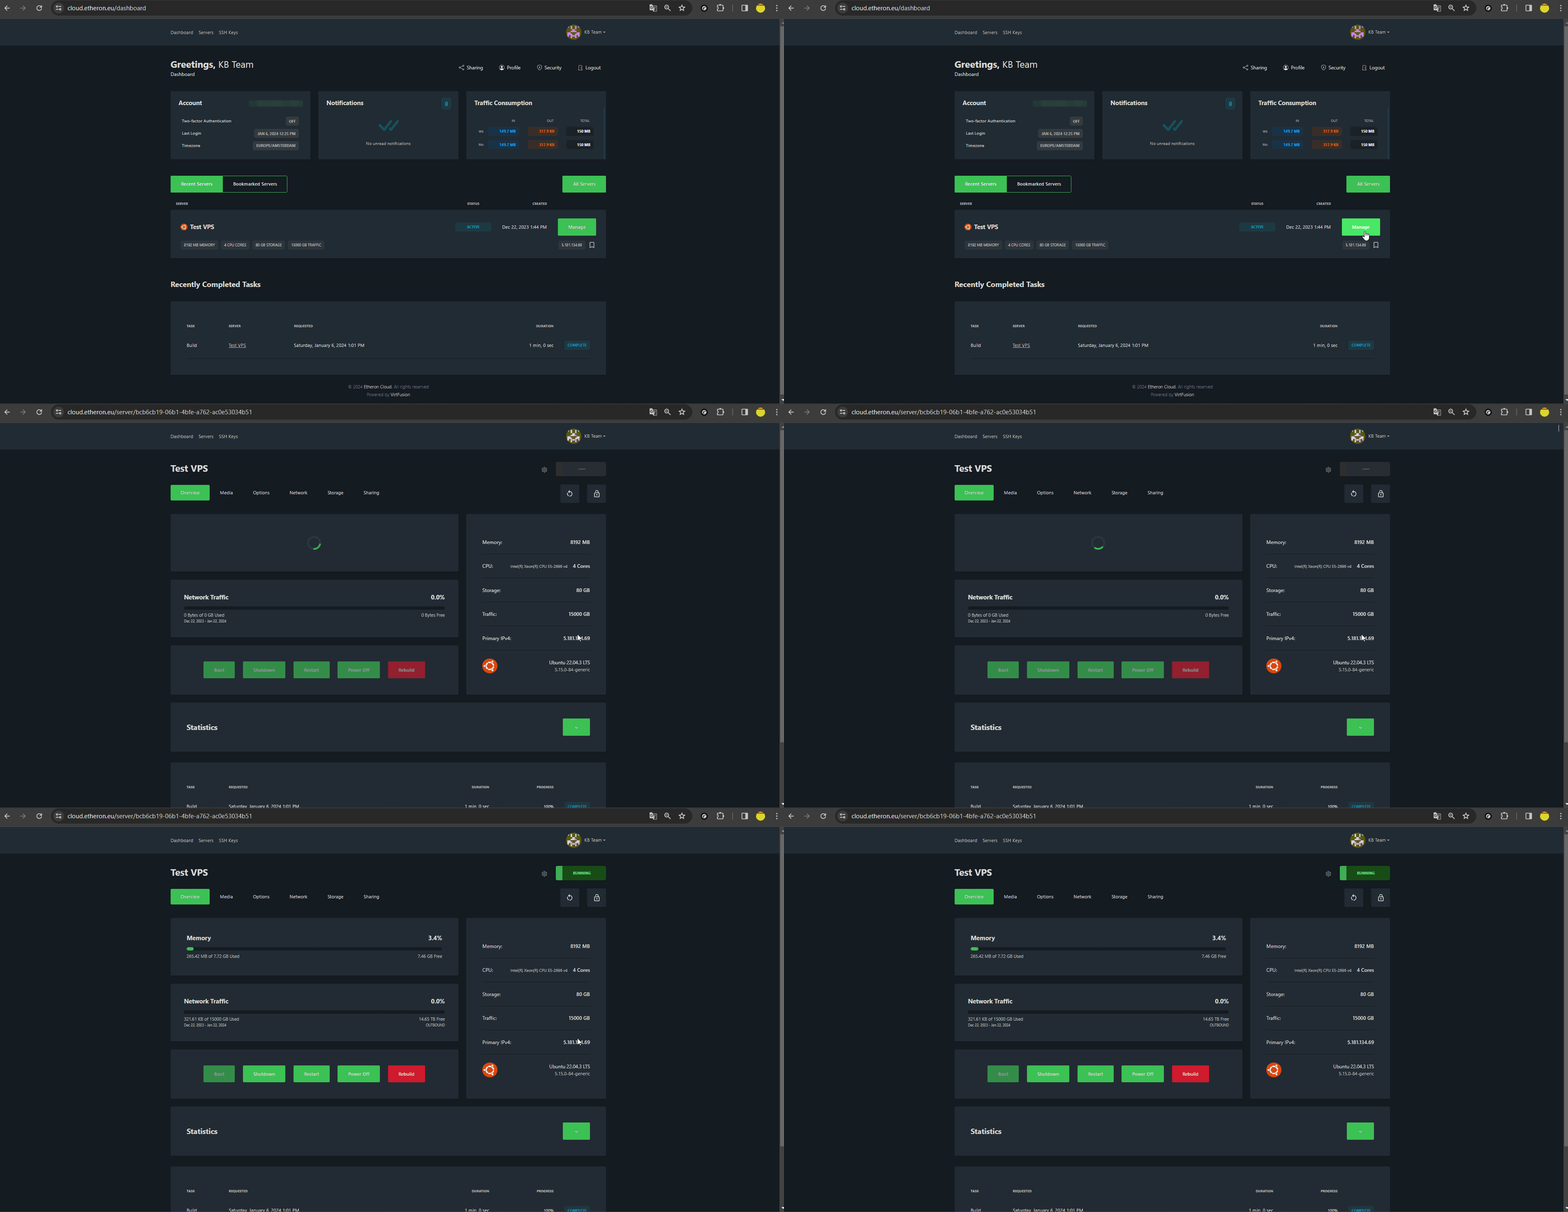
Go to cloud.ping64.net and log in.
-
Choose the VPS you want to use VNC for and click Manage.
-
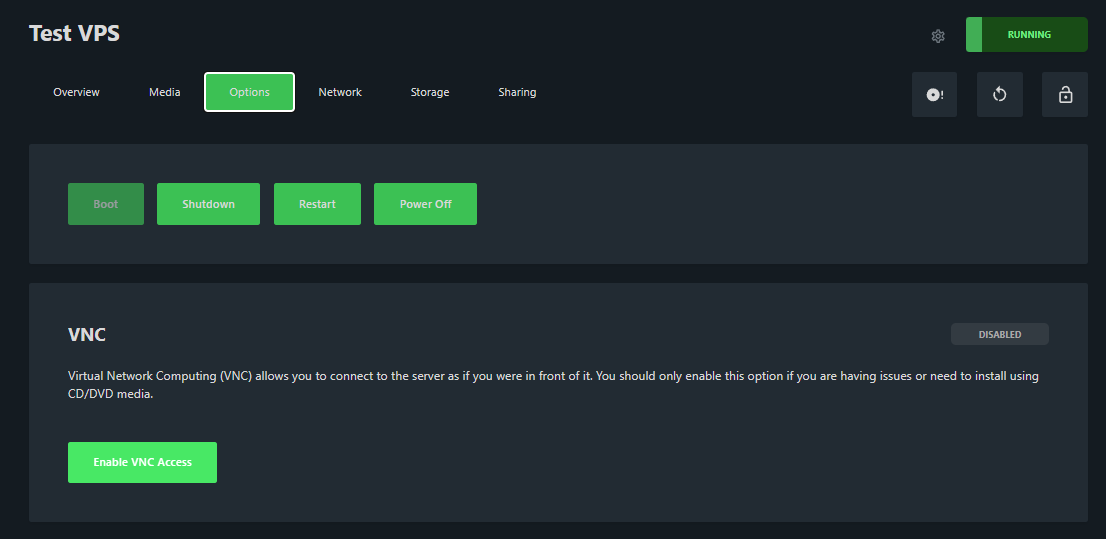
Click Options at the top of the VPS panel.
-
Open the VNC section and click Enable VNC Access.
- Once VNC is enabled, click Browser VNC to open the console in your browser.
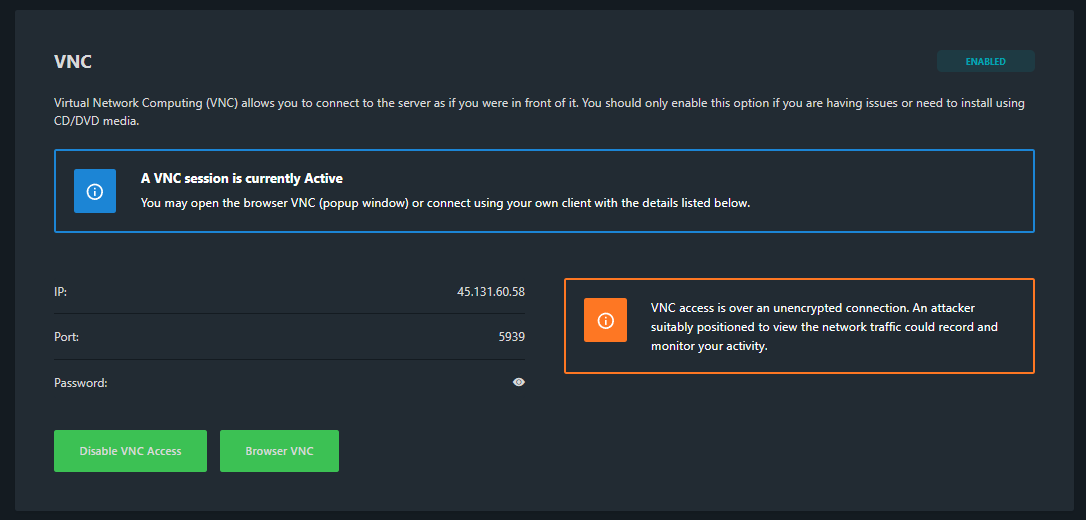
You can now view and control the VPS through VNC, as if you were using the server screen directly.
Disabling VNC again
Are you done with the installation or check? Go back to Options → VNC and click Disable VNC Access.
This prevents VNC from staying enabled unnecessarily.
If VNC does not work, feel free to reach out via Discord or create a support ticket.