Here’s how to install LiteSpeed Cache on your WordPress site
1. Go to your website and log in to the WordPress admin panel.
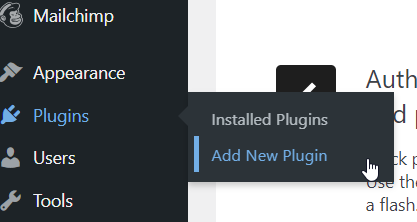
2. Navigate to Plugins and click Add New.
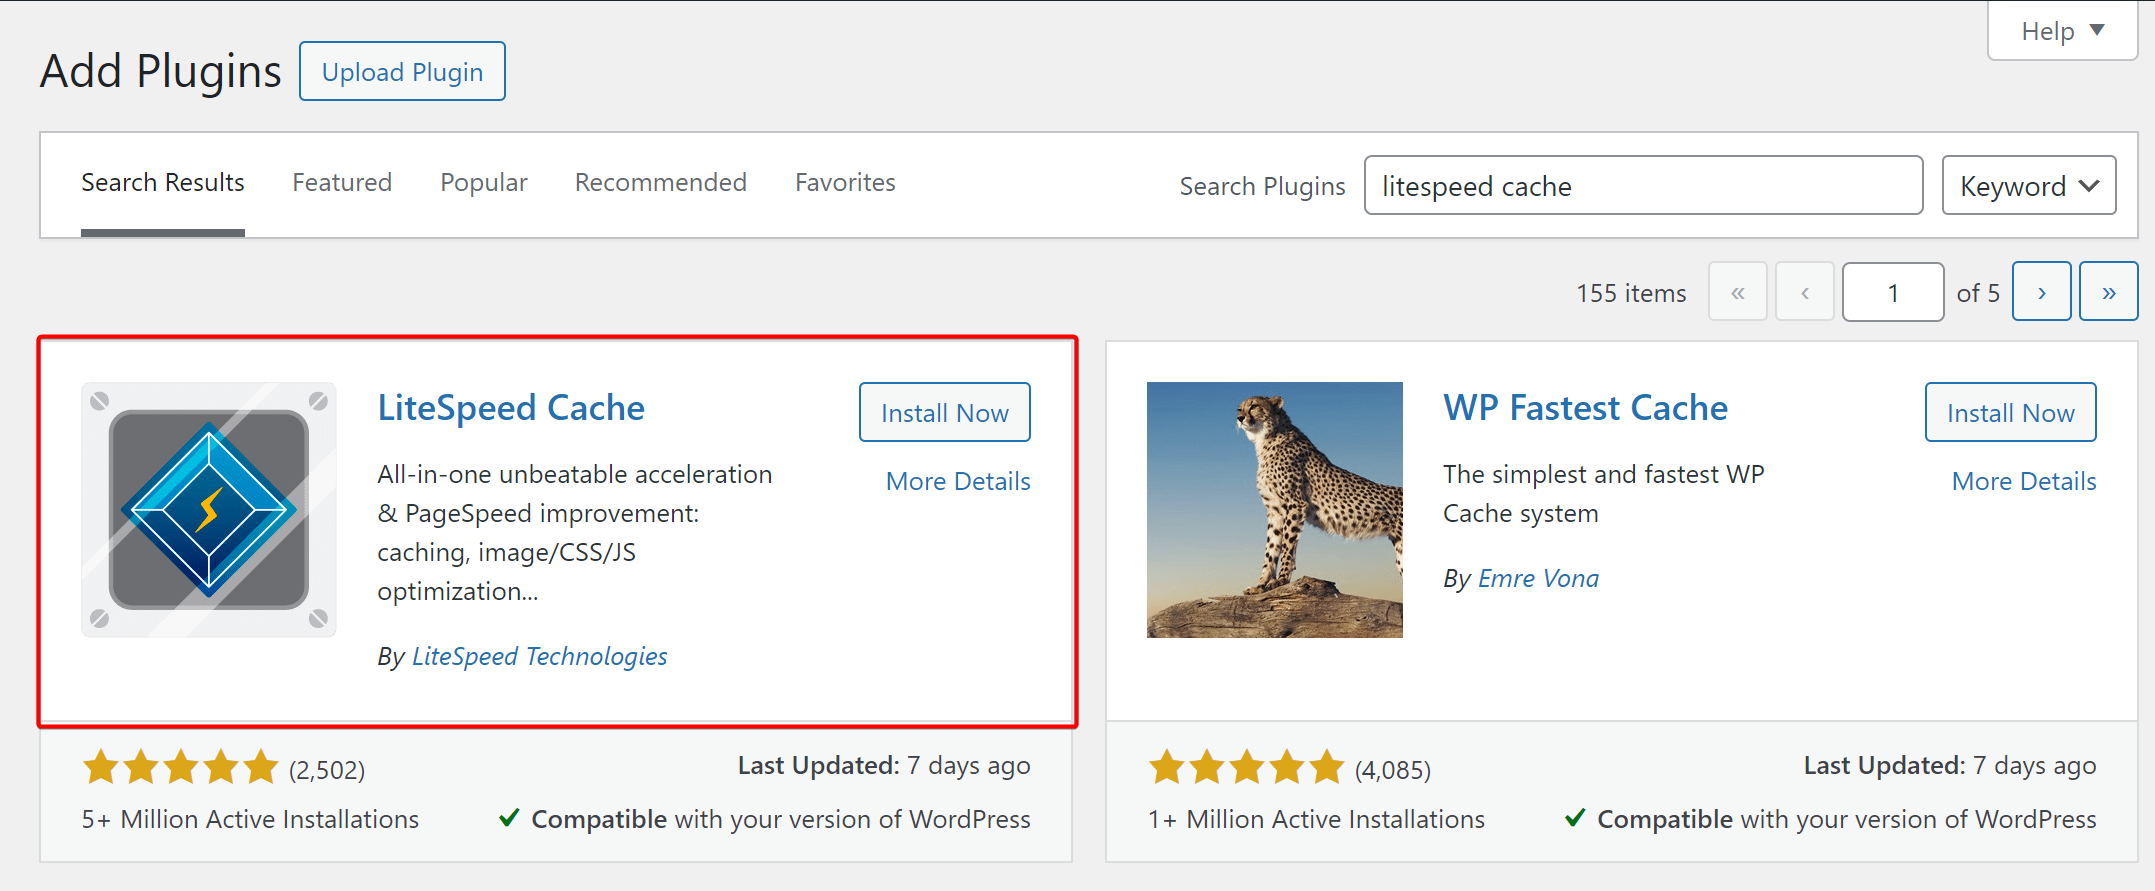
3. Search for LiteSpeed Cache, install the plugin, and then click Activate.
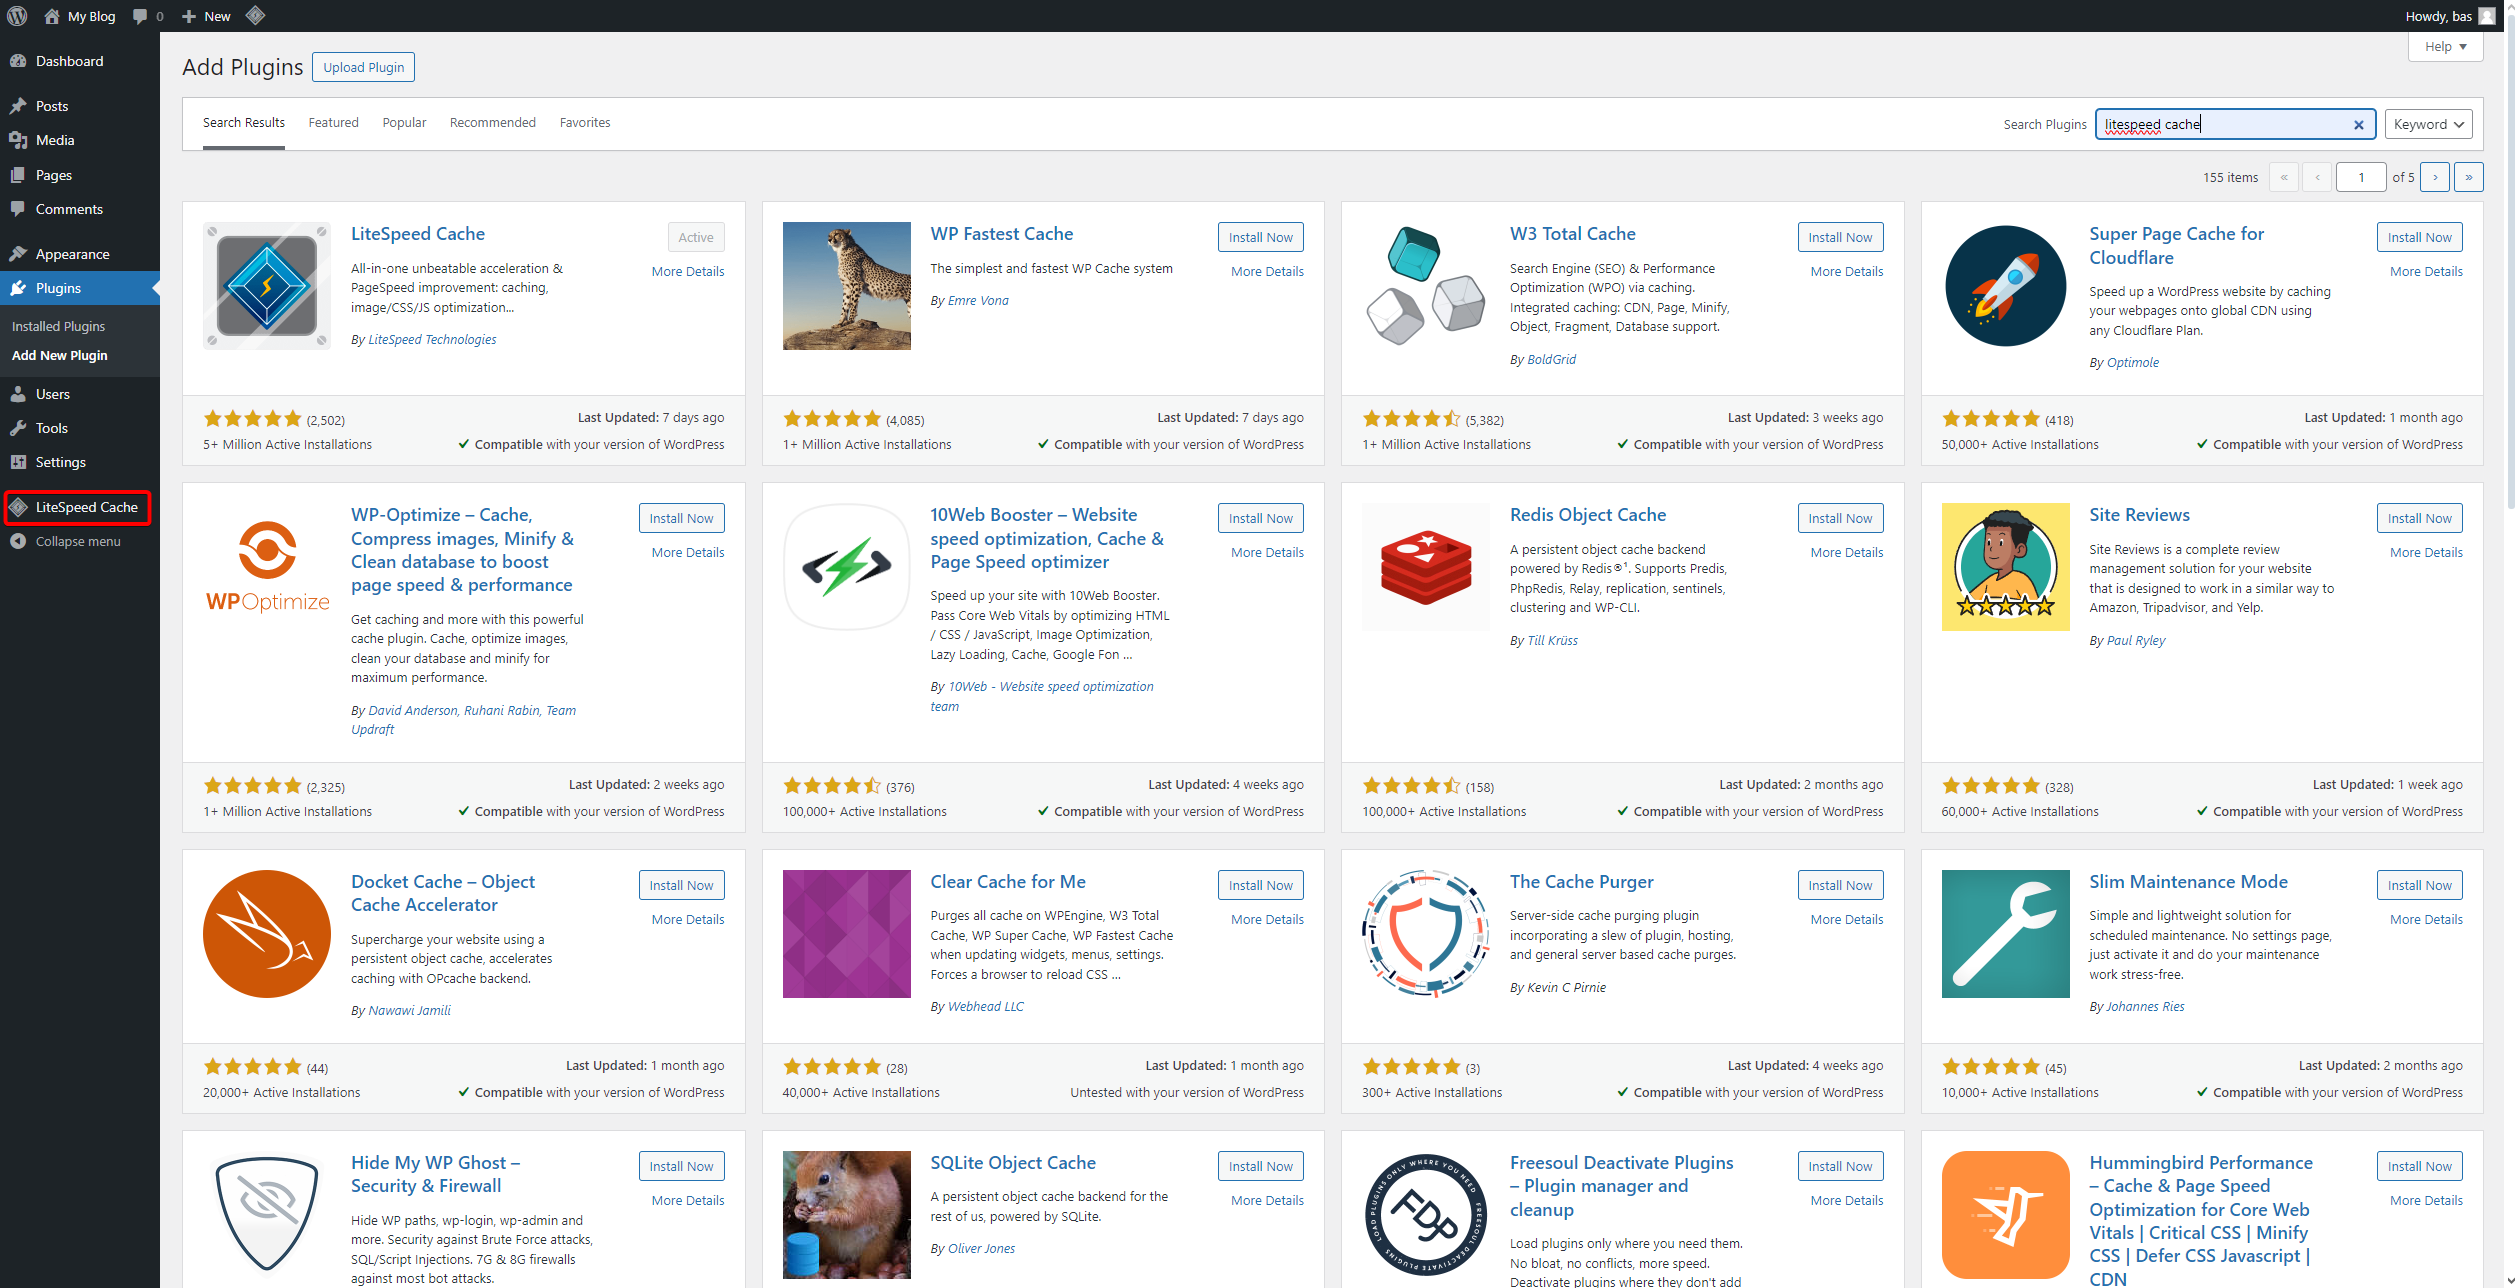
4. On the left side of the screen, click on LiteSpeed Cache.
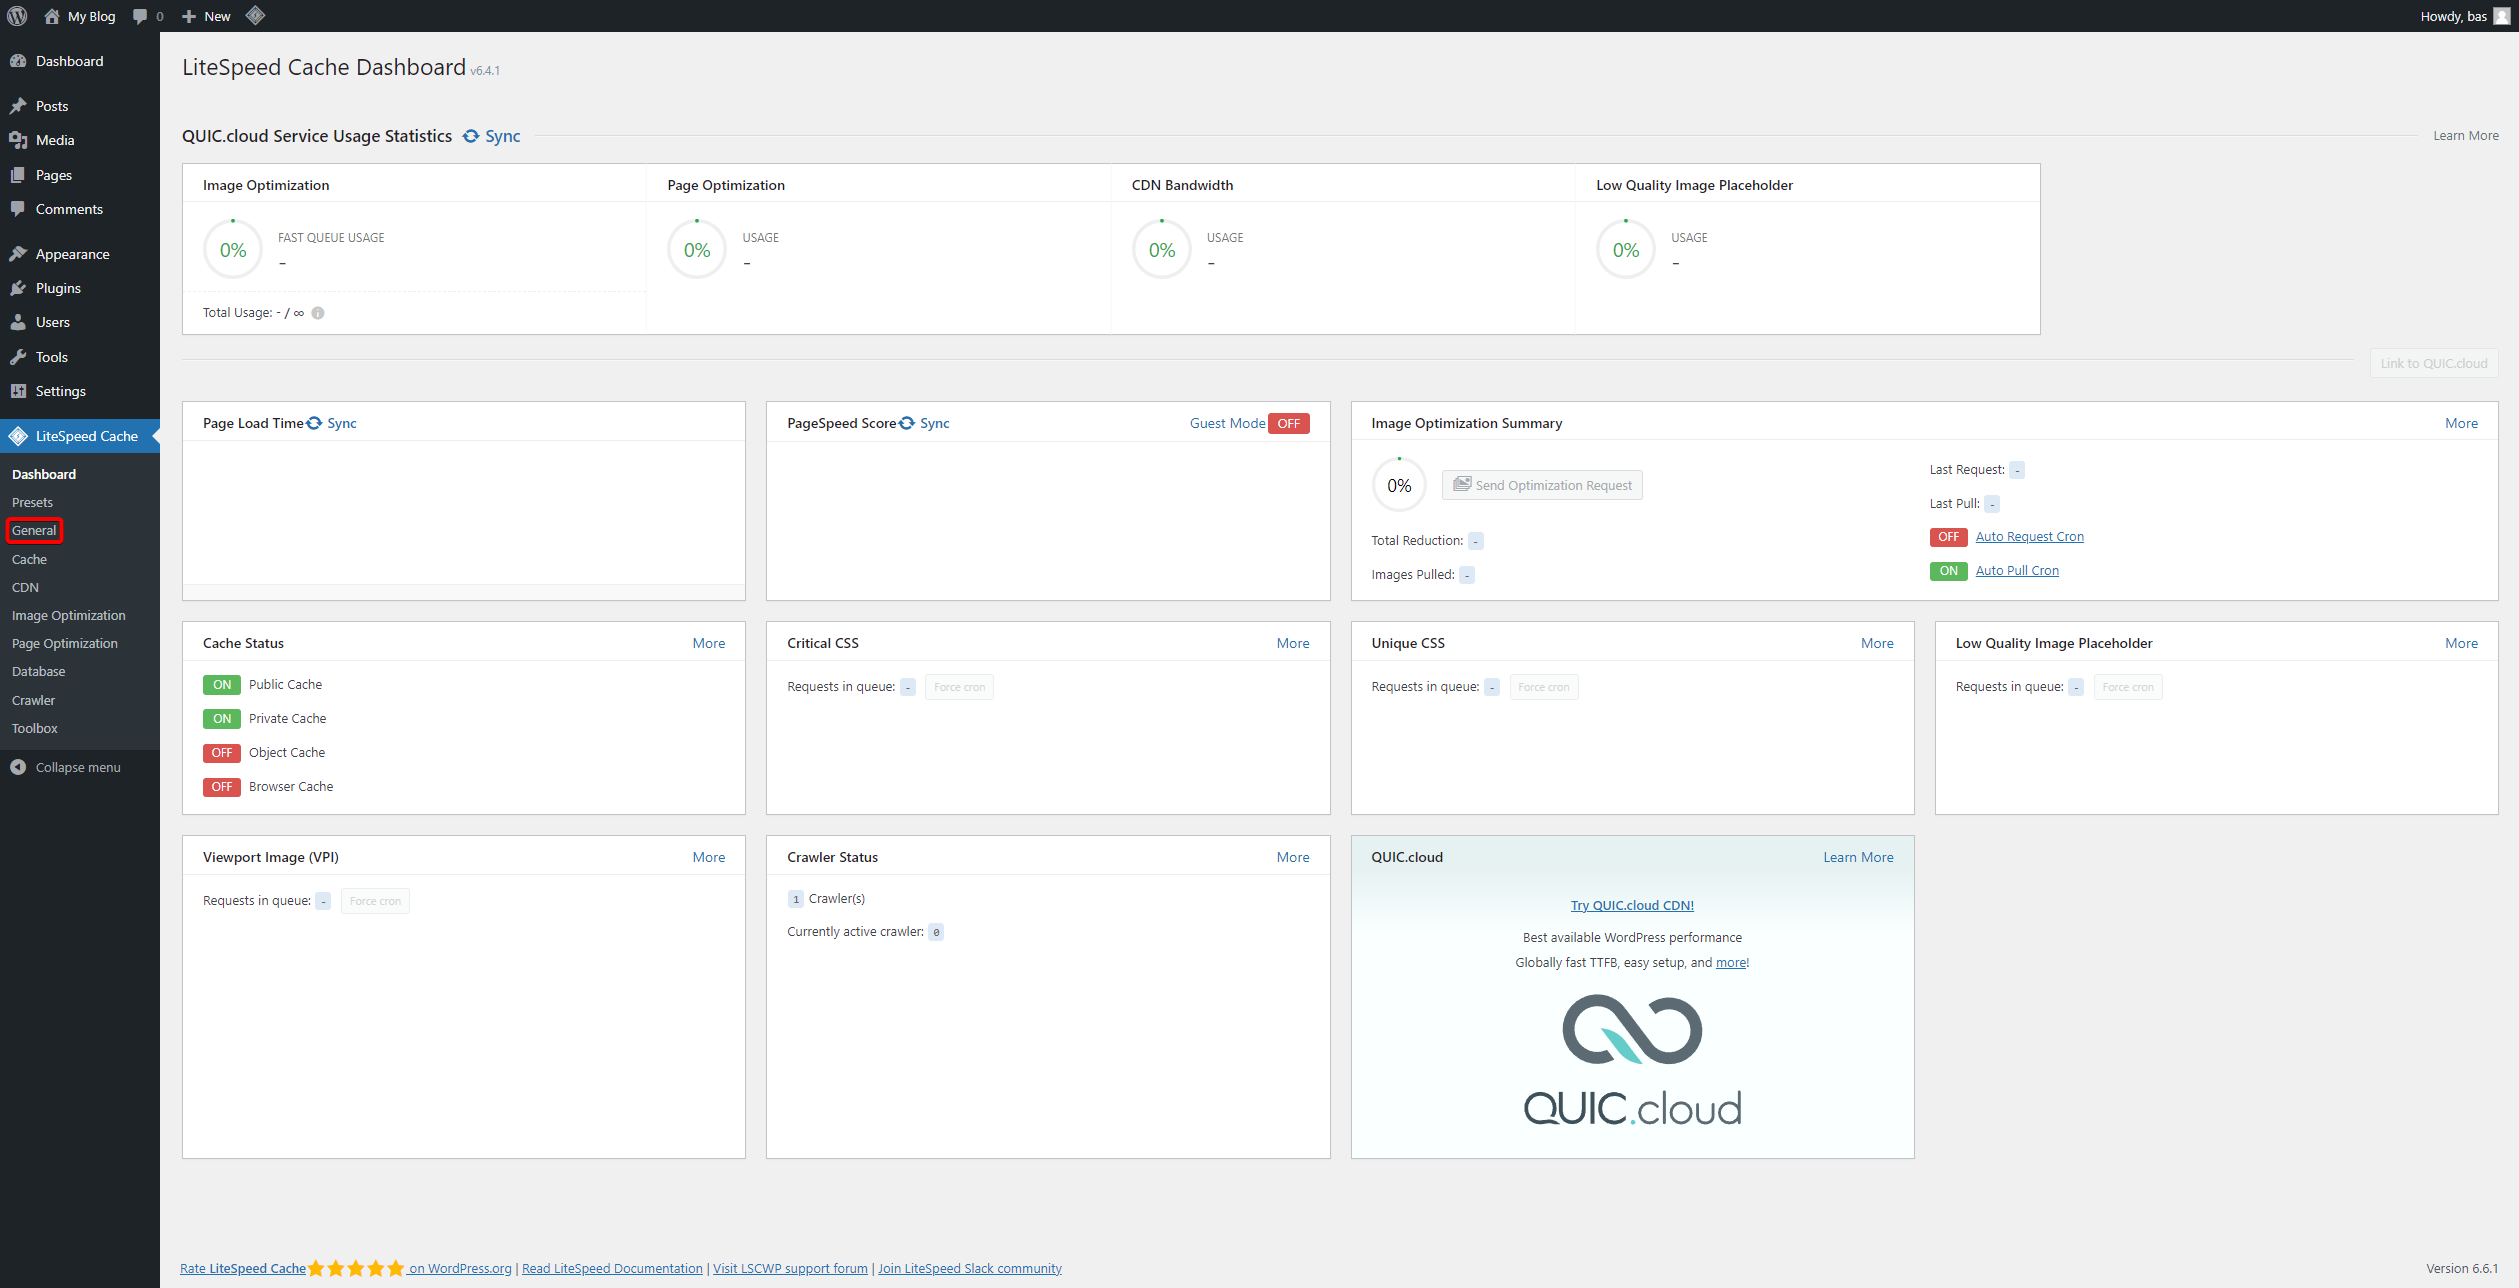
5. Go to the General tab.
6. Under Domain Key, click on Request Domain Key.
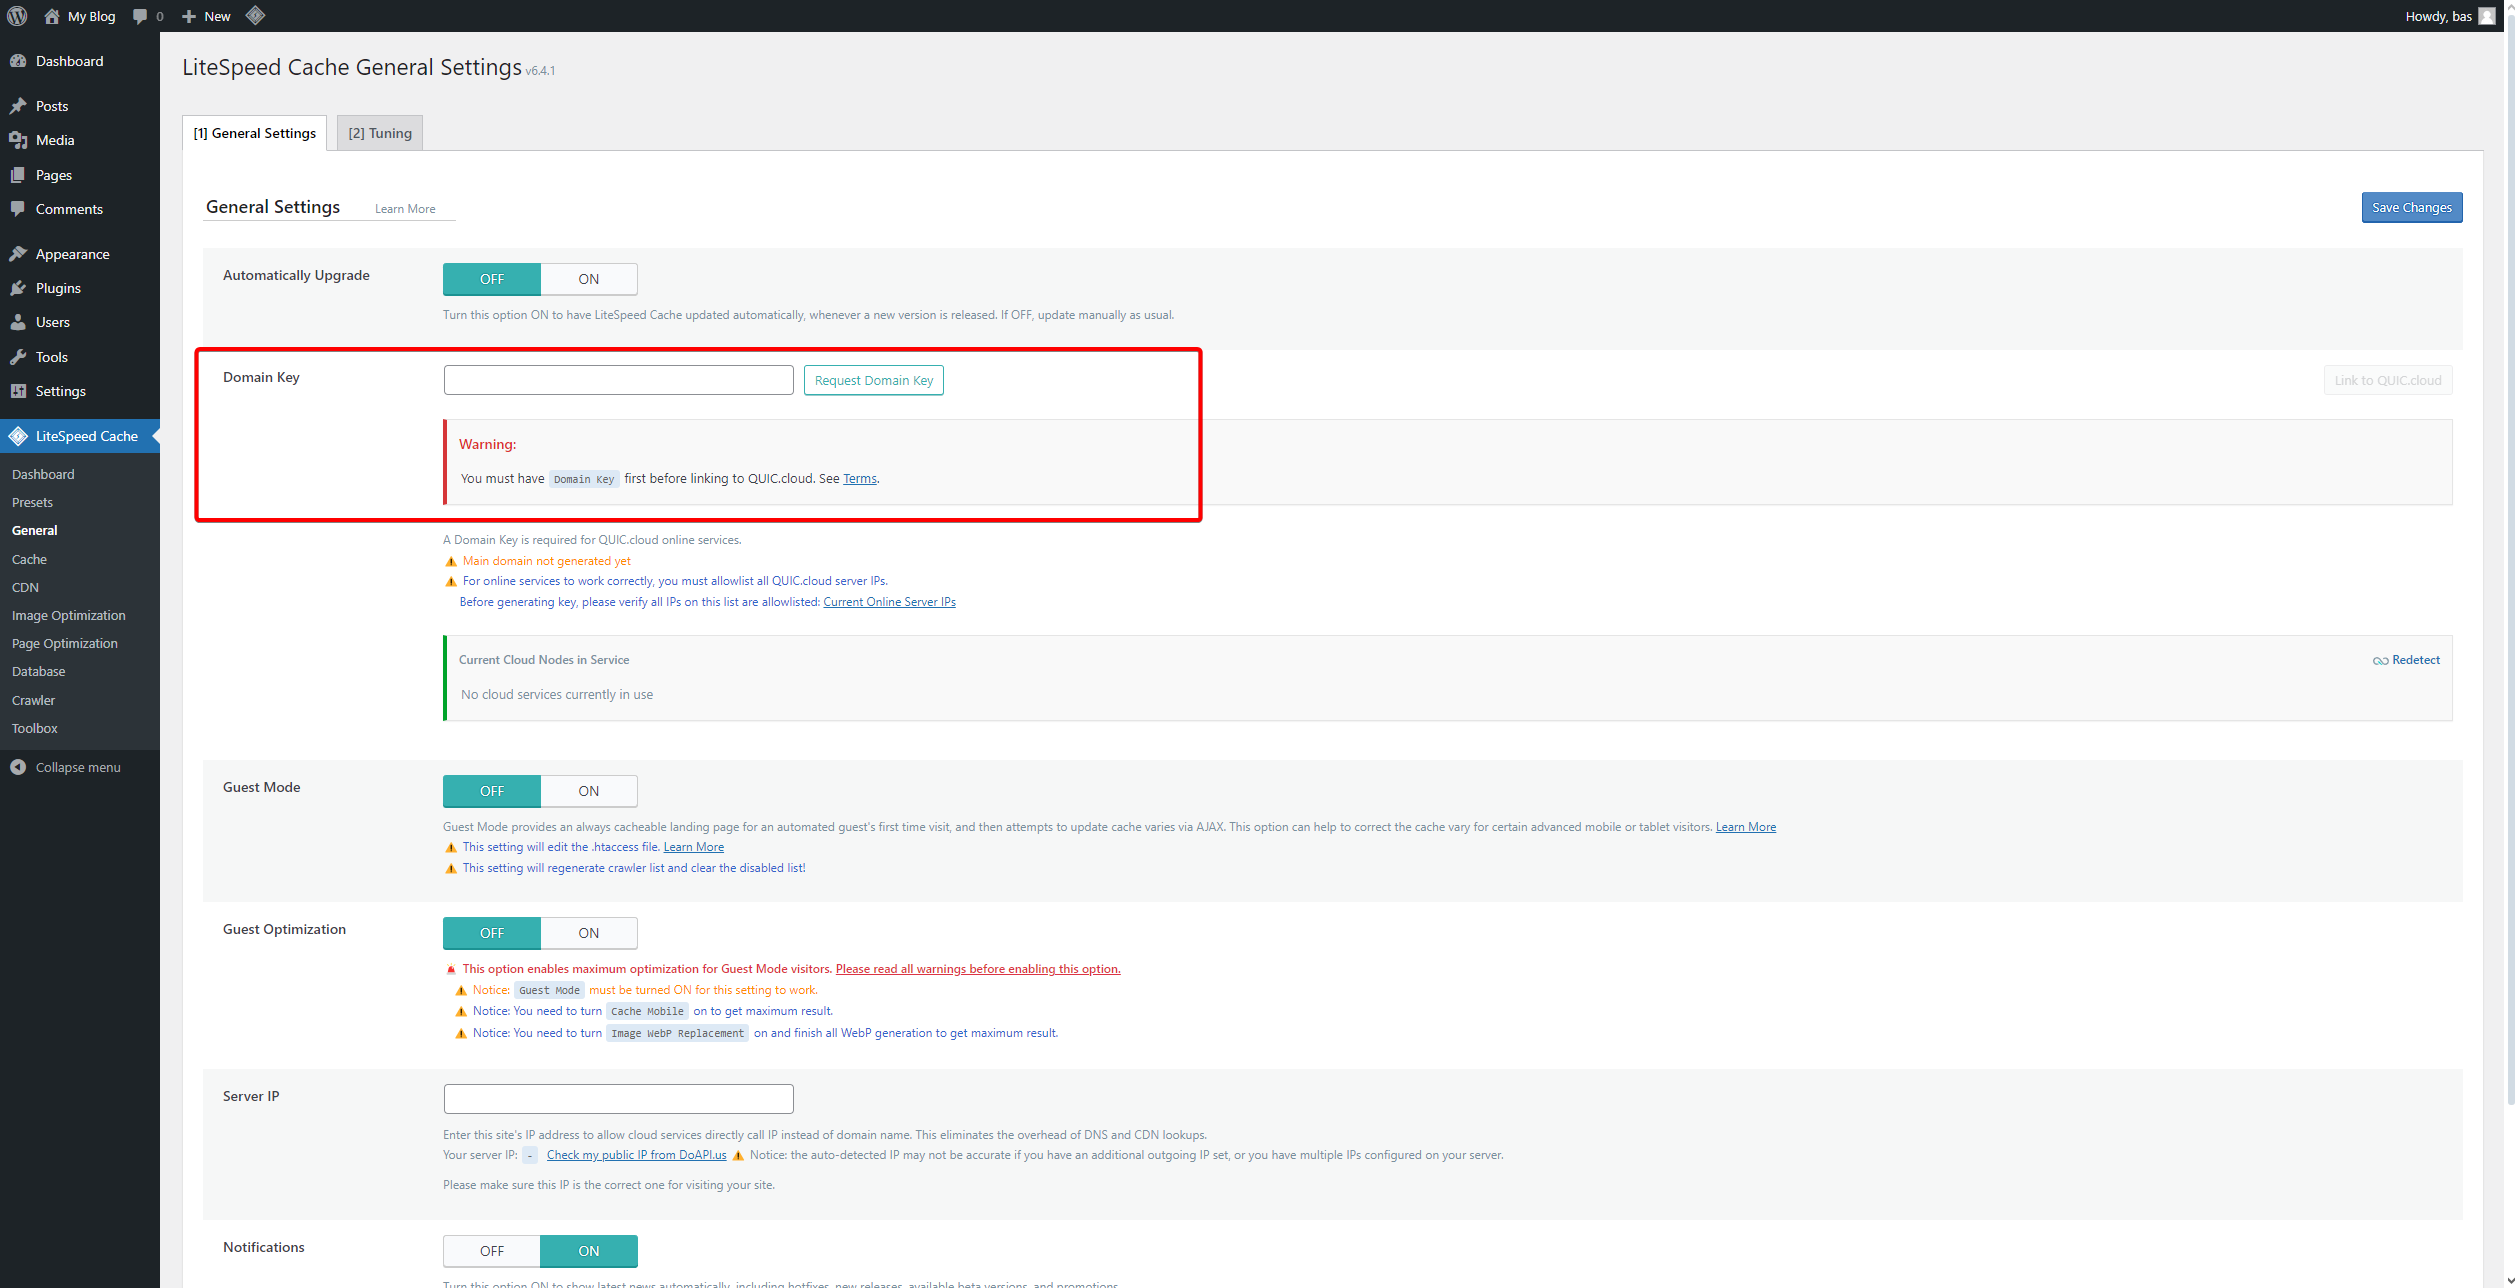
7. You will see the following screen.
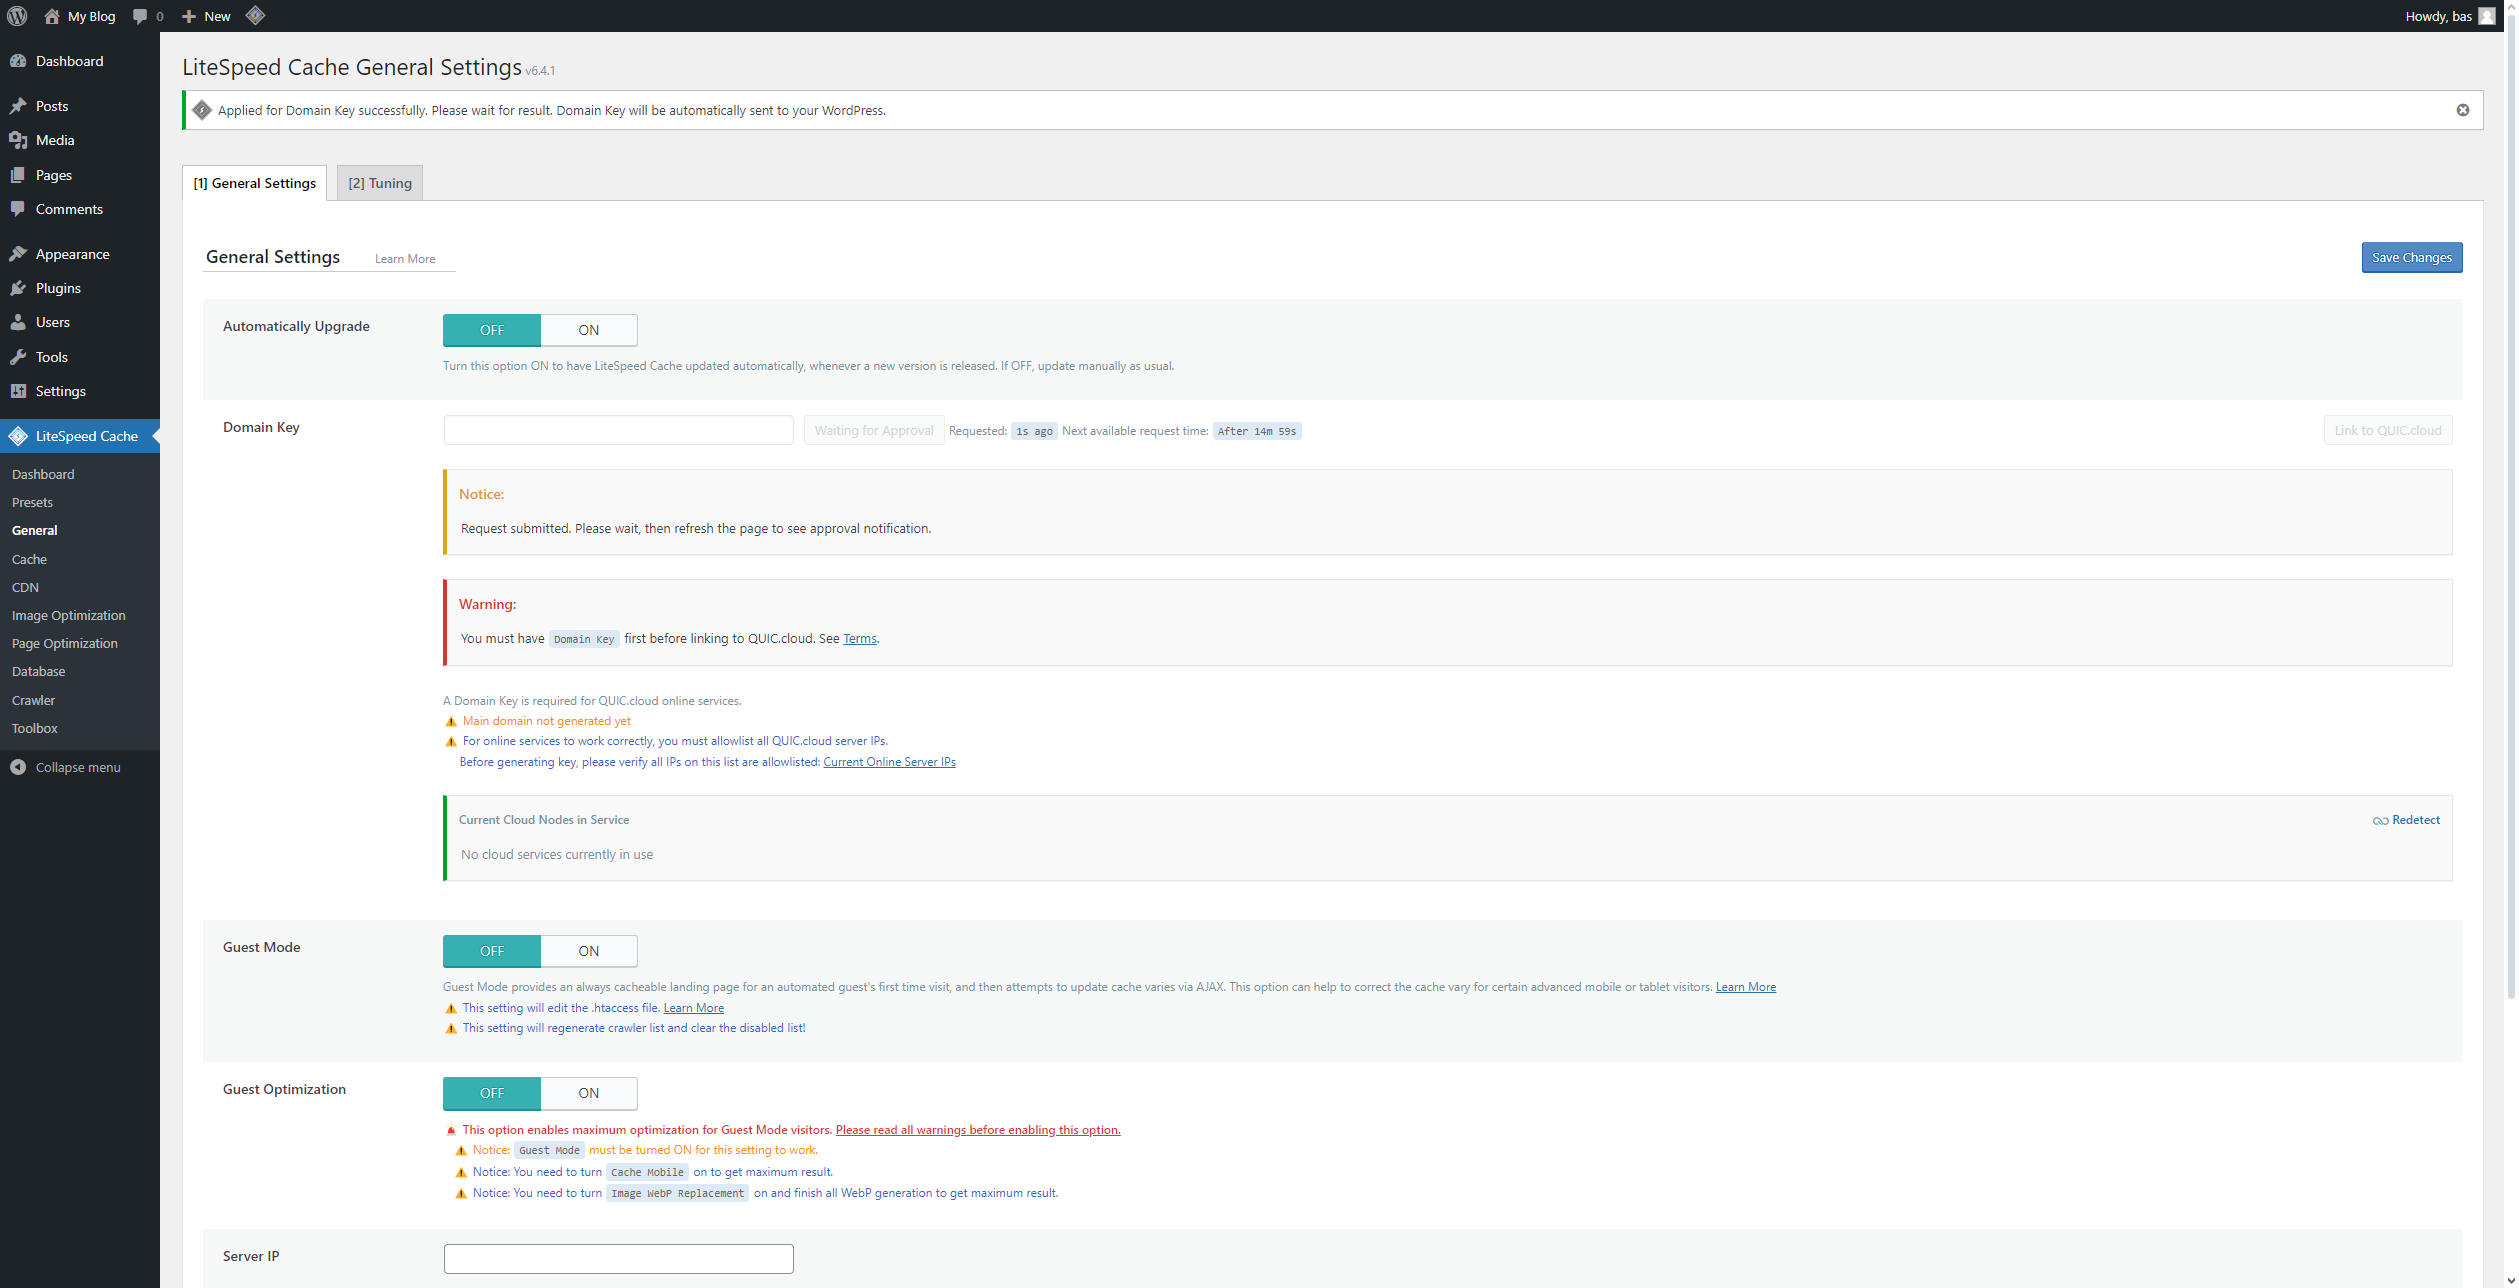
8. A message will appear. Reload the page occasionally until you see the confirmation that your request has been approved (this will appear at the top of your screen).

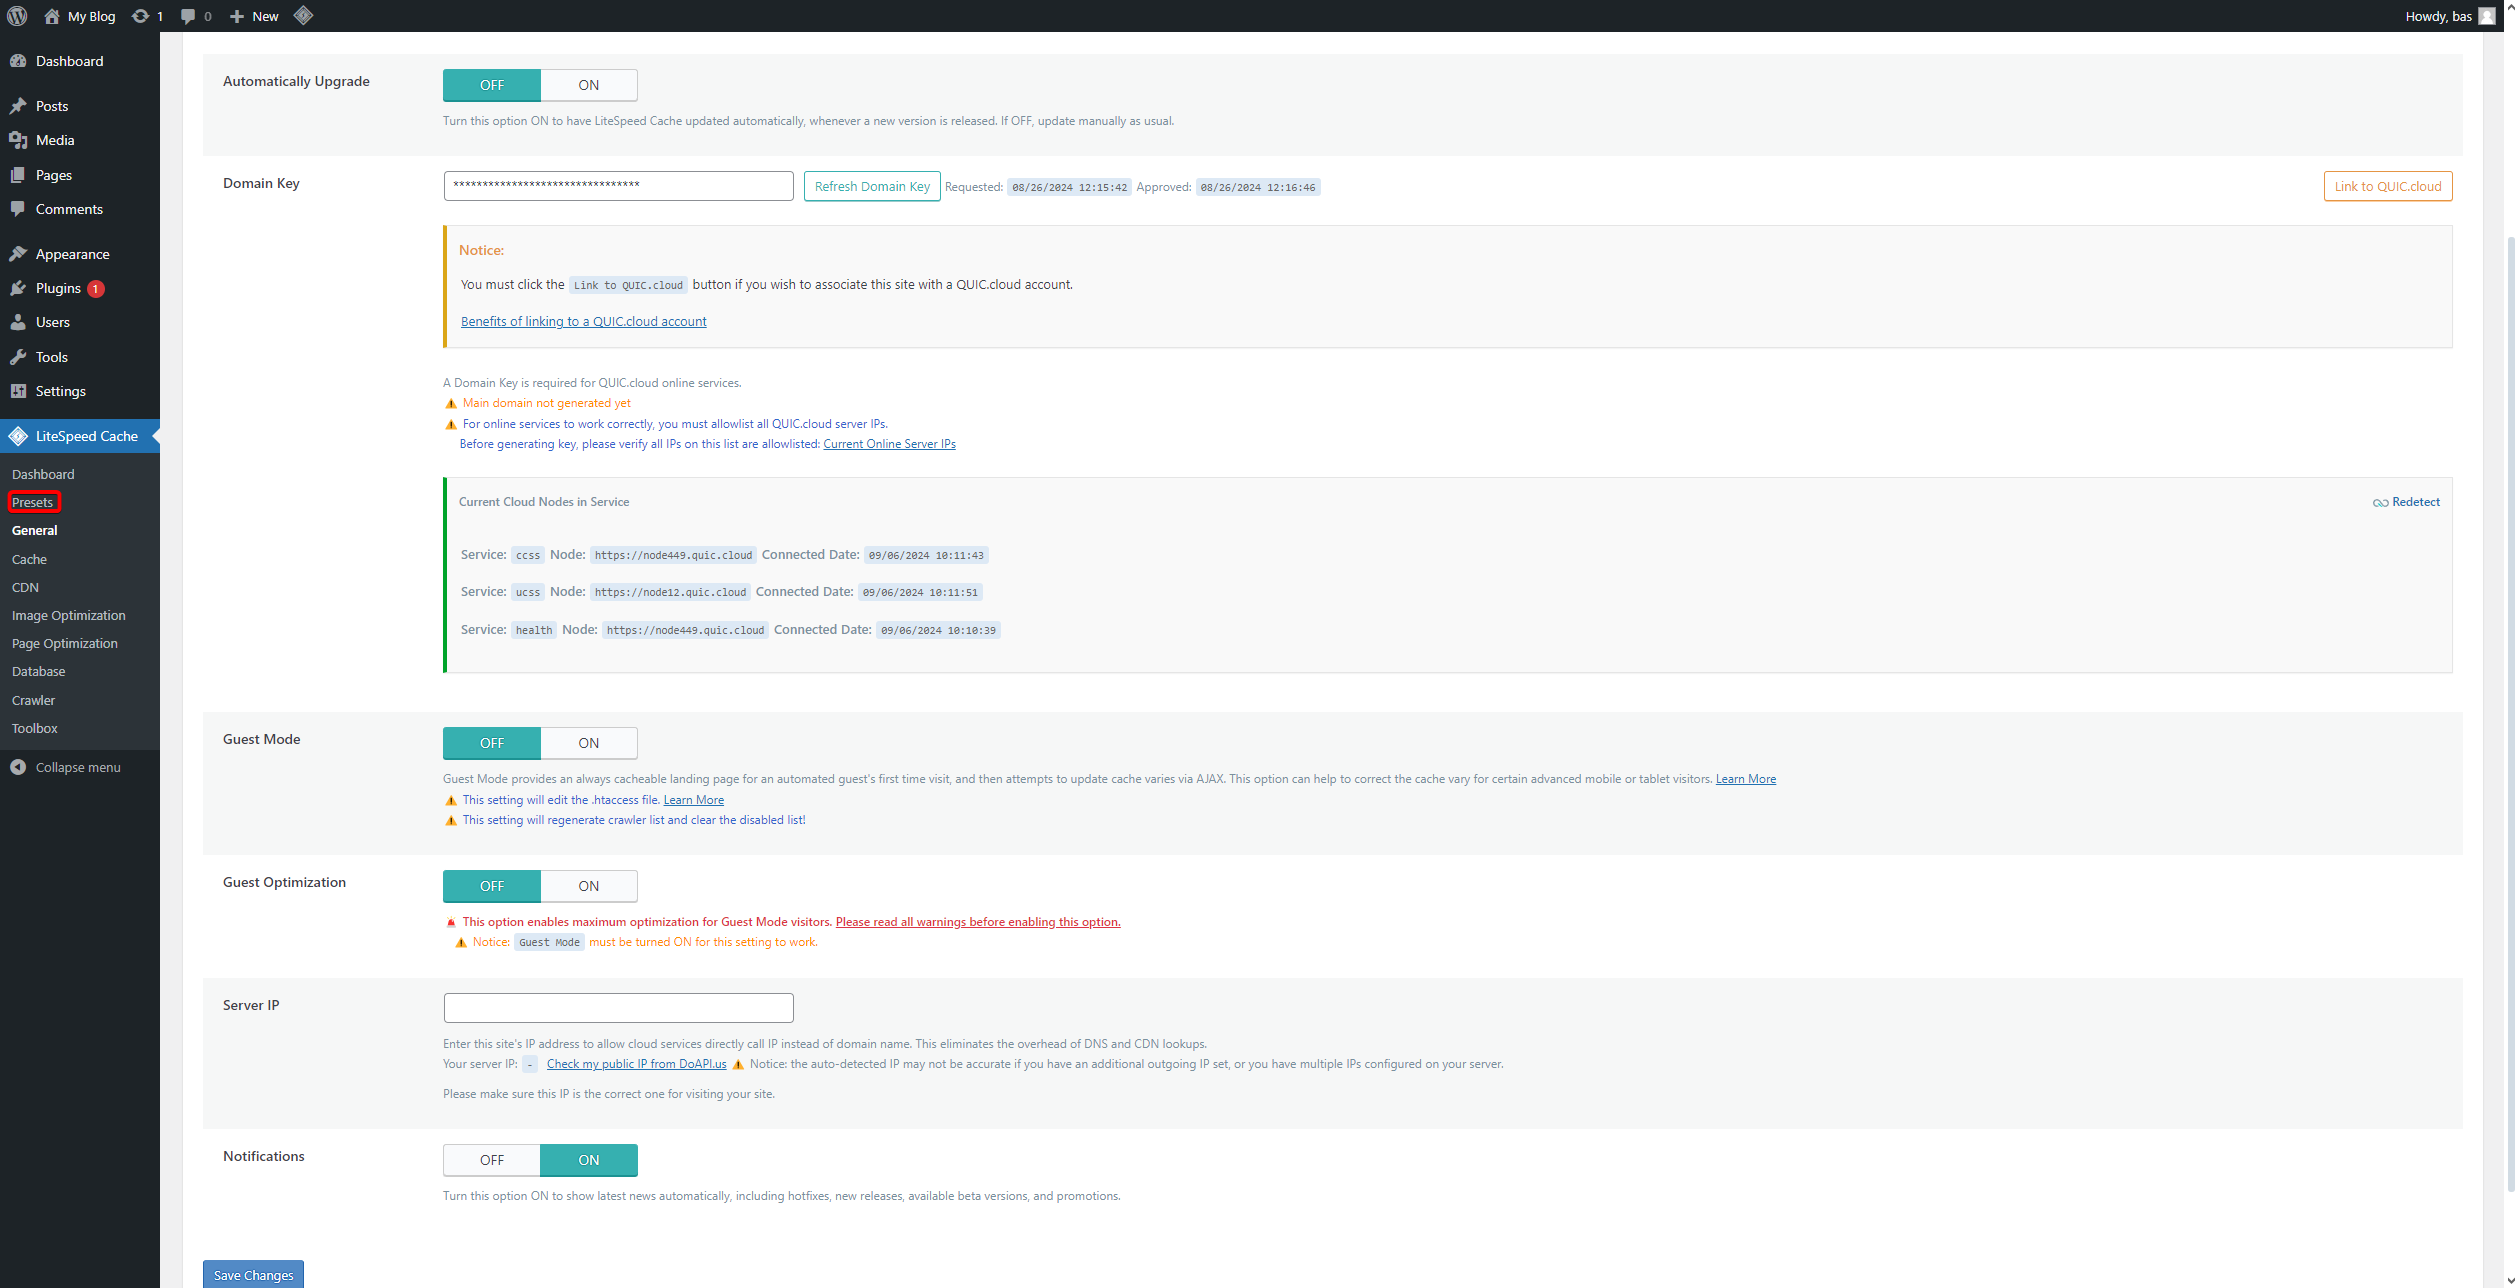
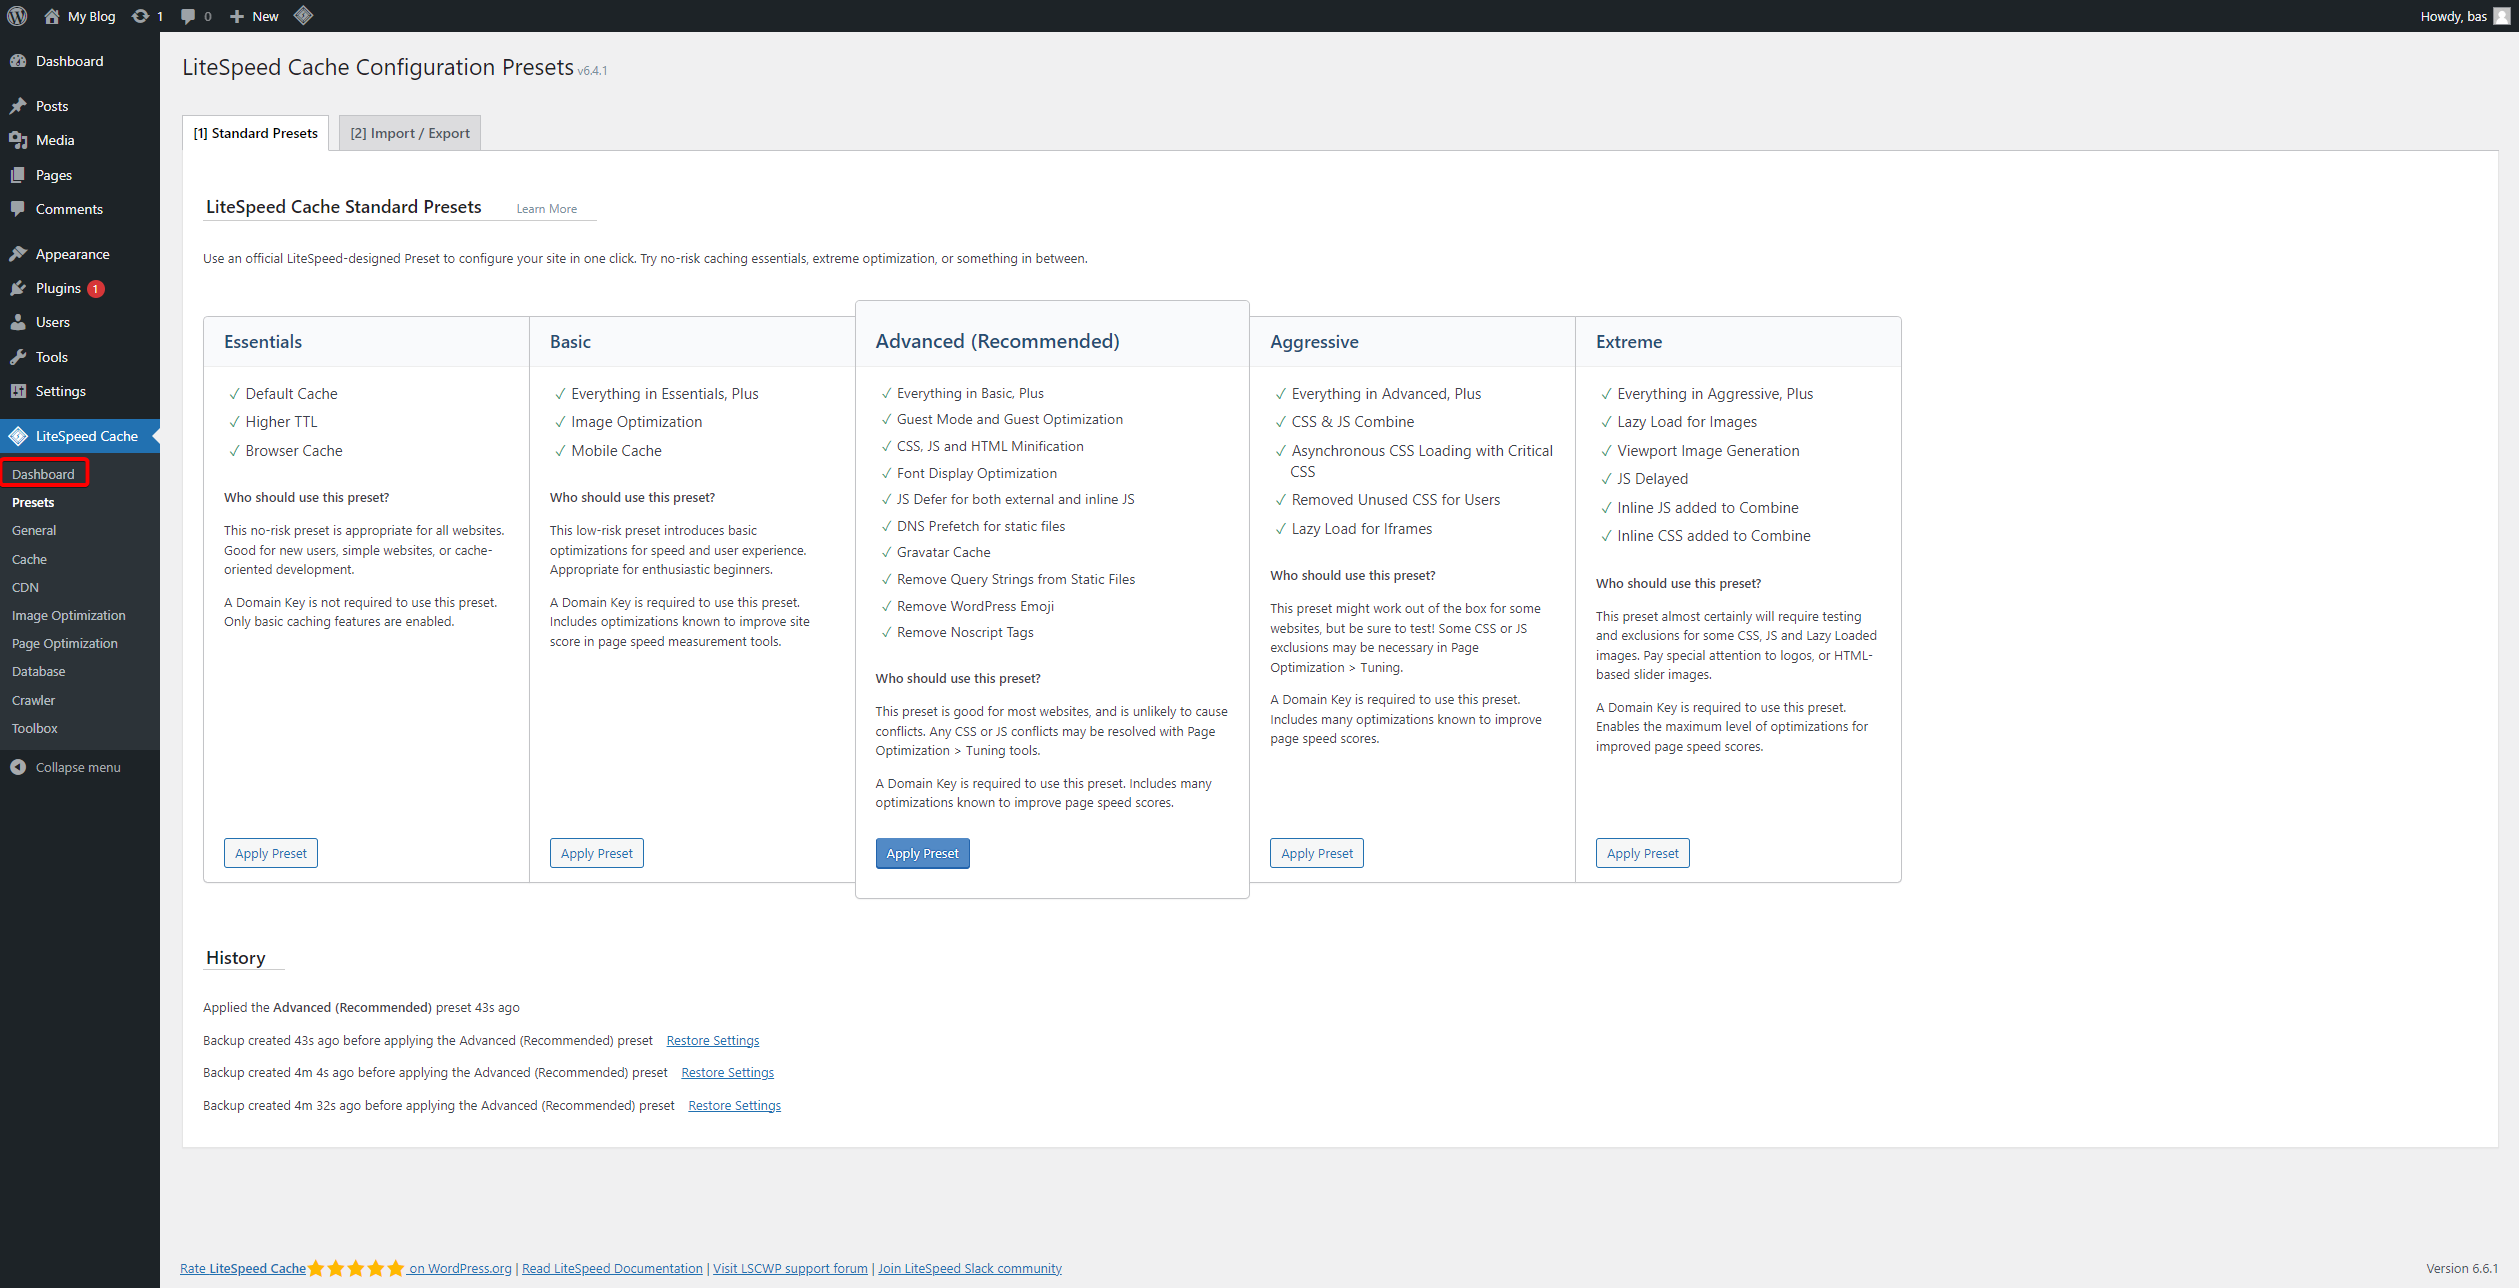
9. On the left side, click on Presets.
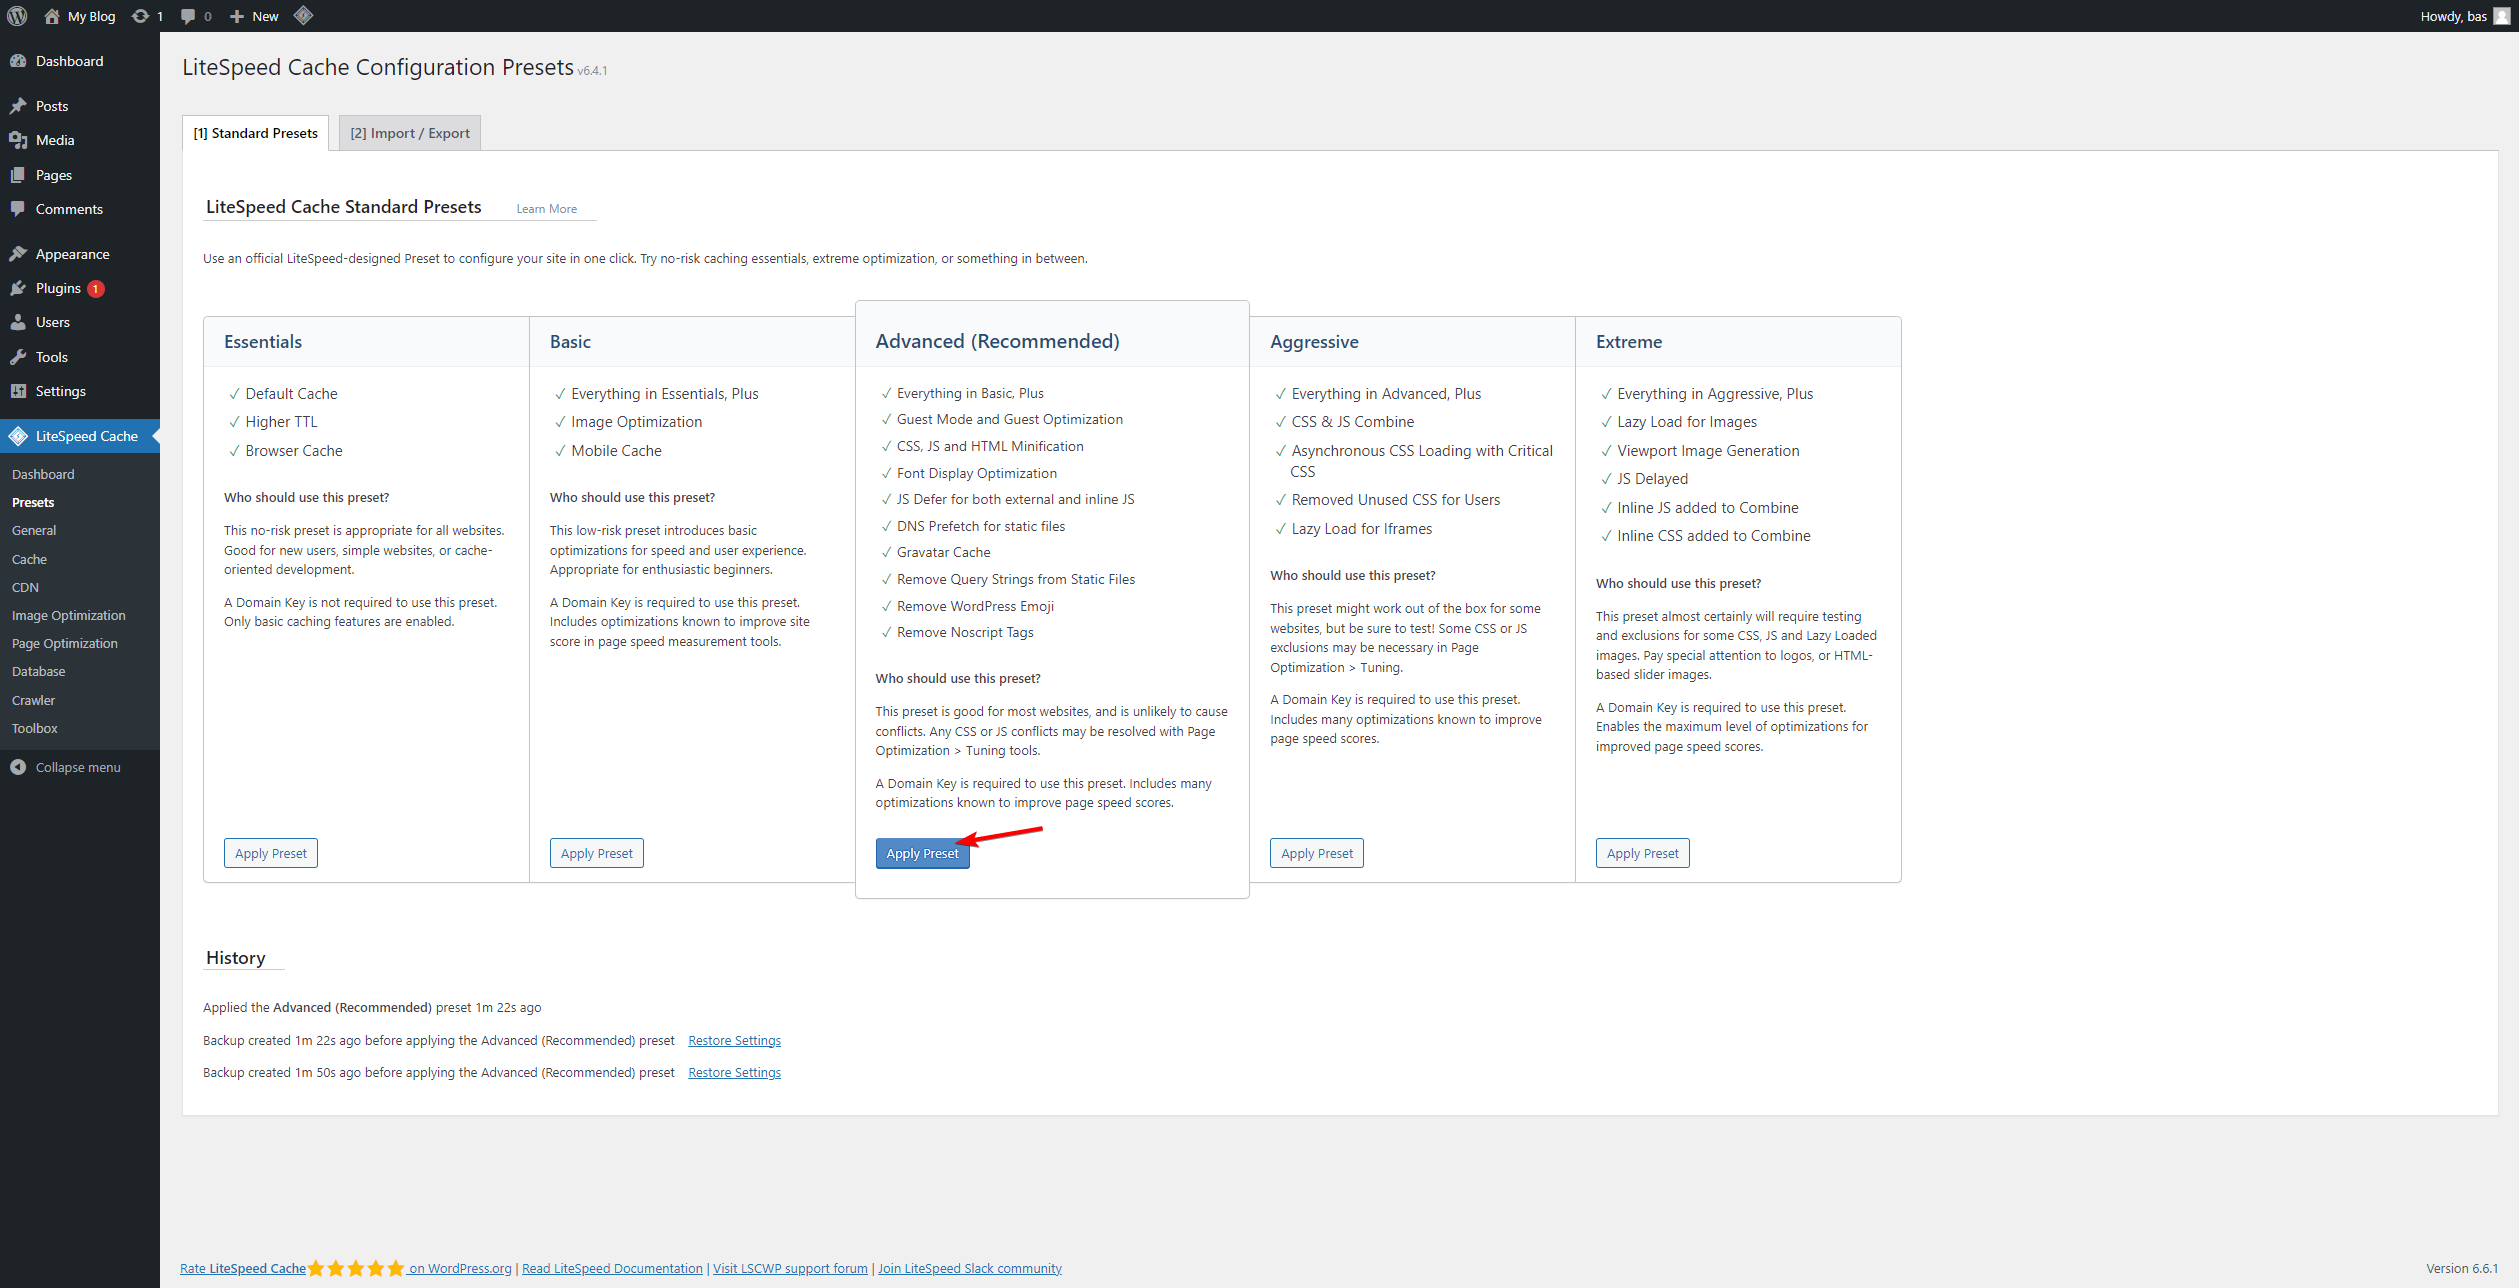
10. Select the desired preset and click Apply Preset.
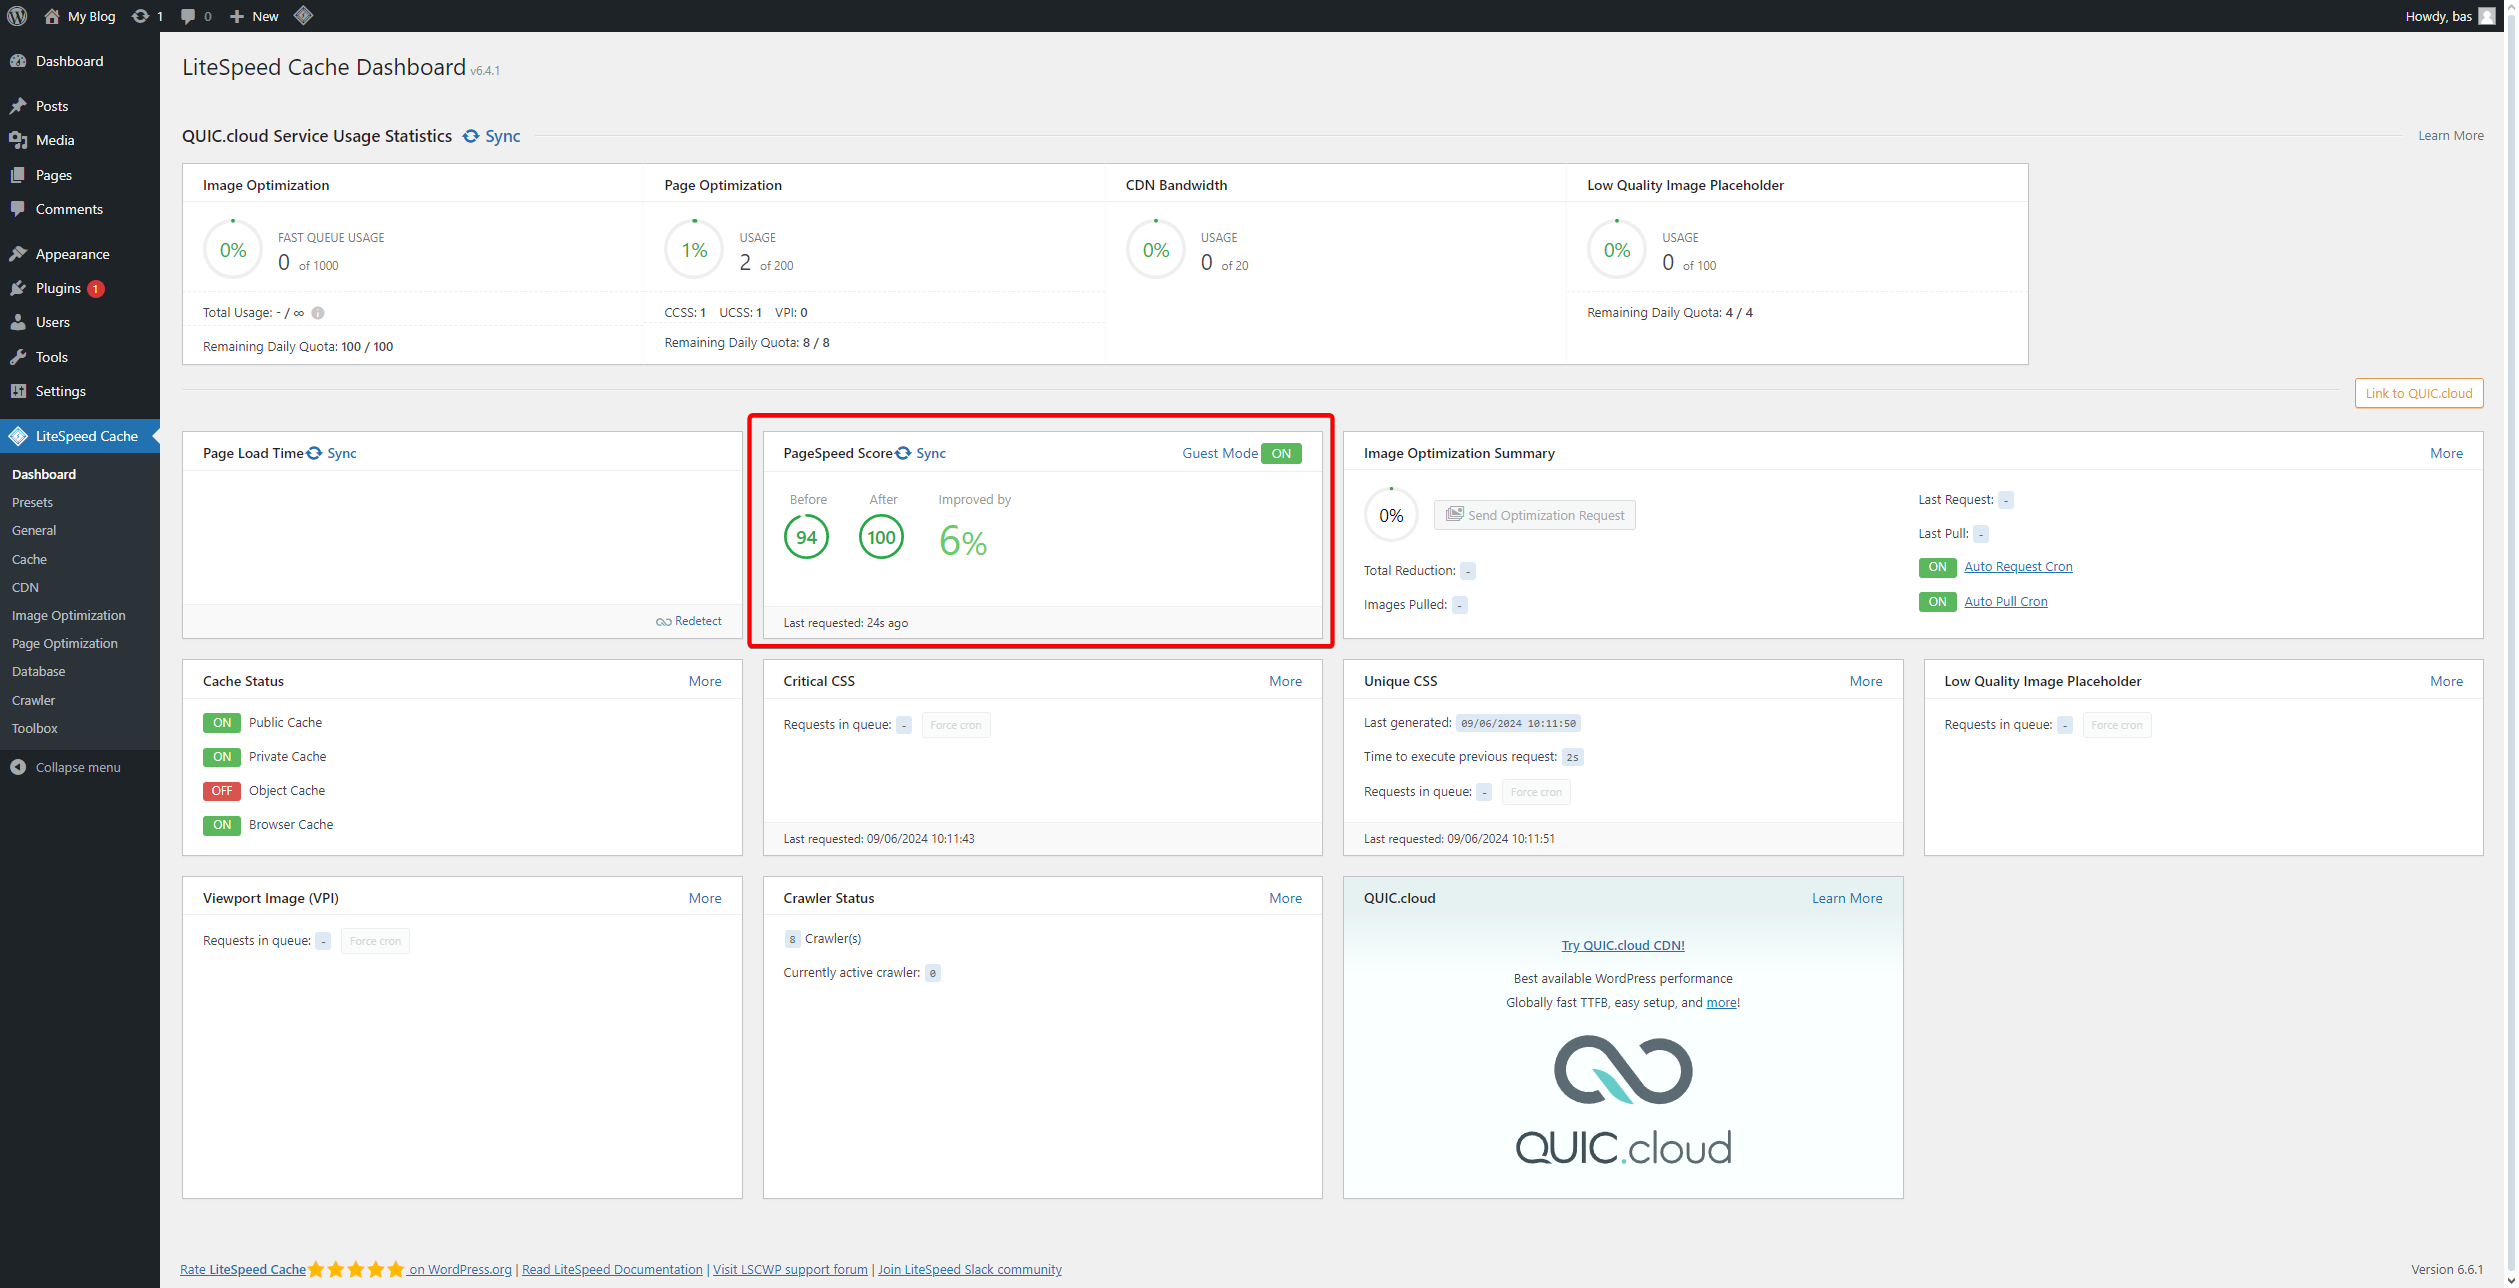
11. Go to the Dashboard.
12. You will now see your updated PageSpeed Score.
13. Once these steps are completed, LiteSpeed Cache should be active! You can verify it through this link: check.lscache.io.
