How do I install Windows on my VPS?
This article explains how to install Windows on your VPS.
This article explains how to install Windows on your VPS.
-
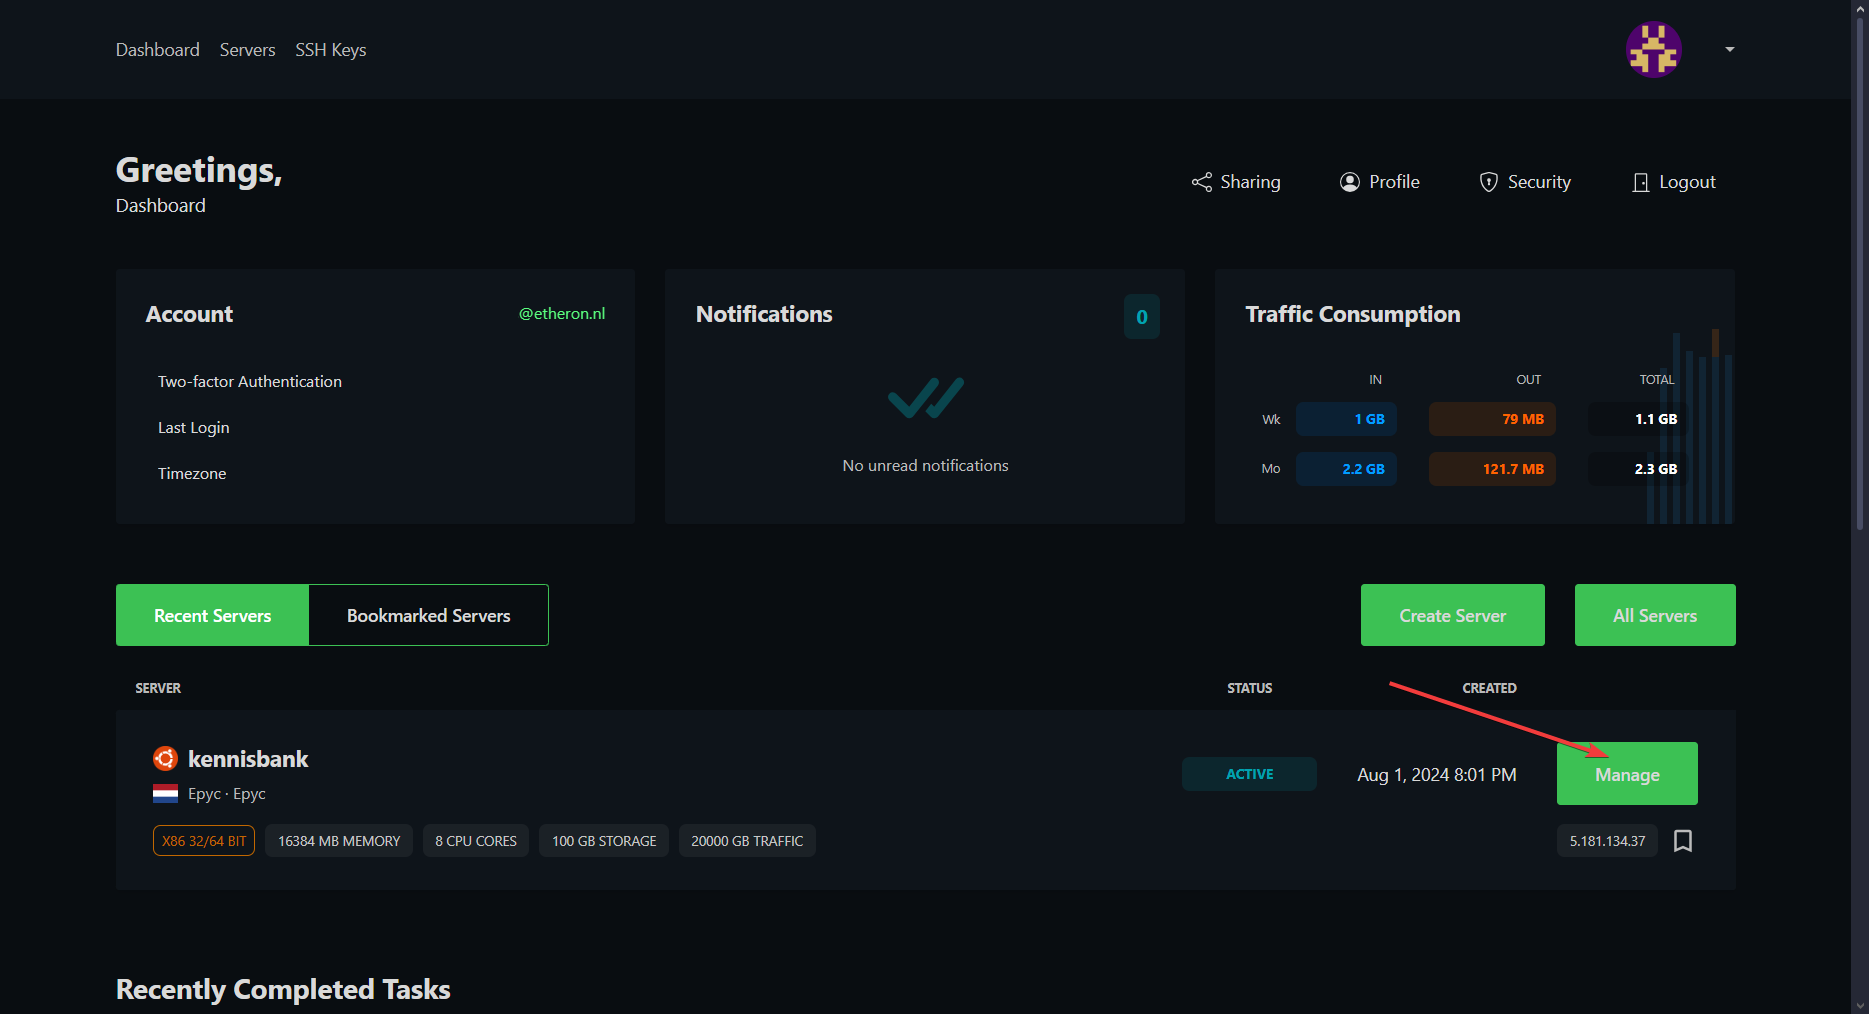
Go to the VPS panel and log in.
-
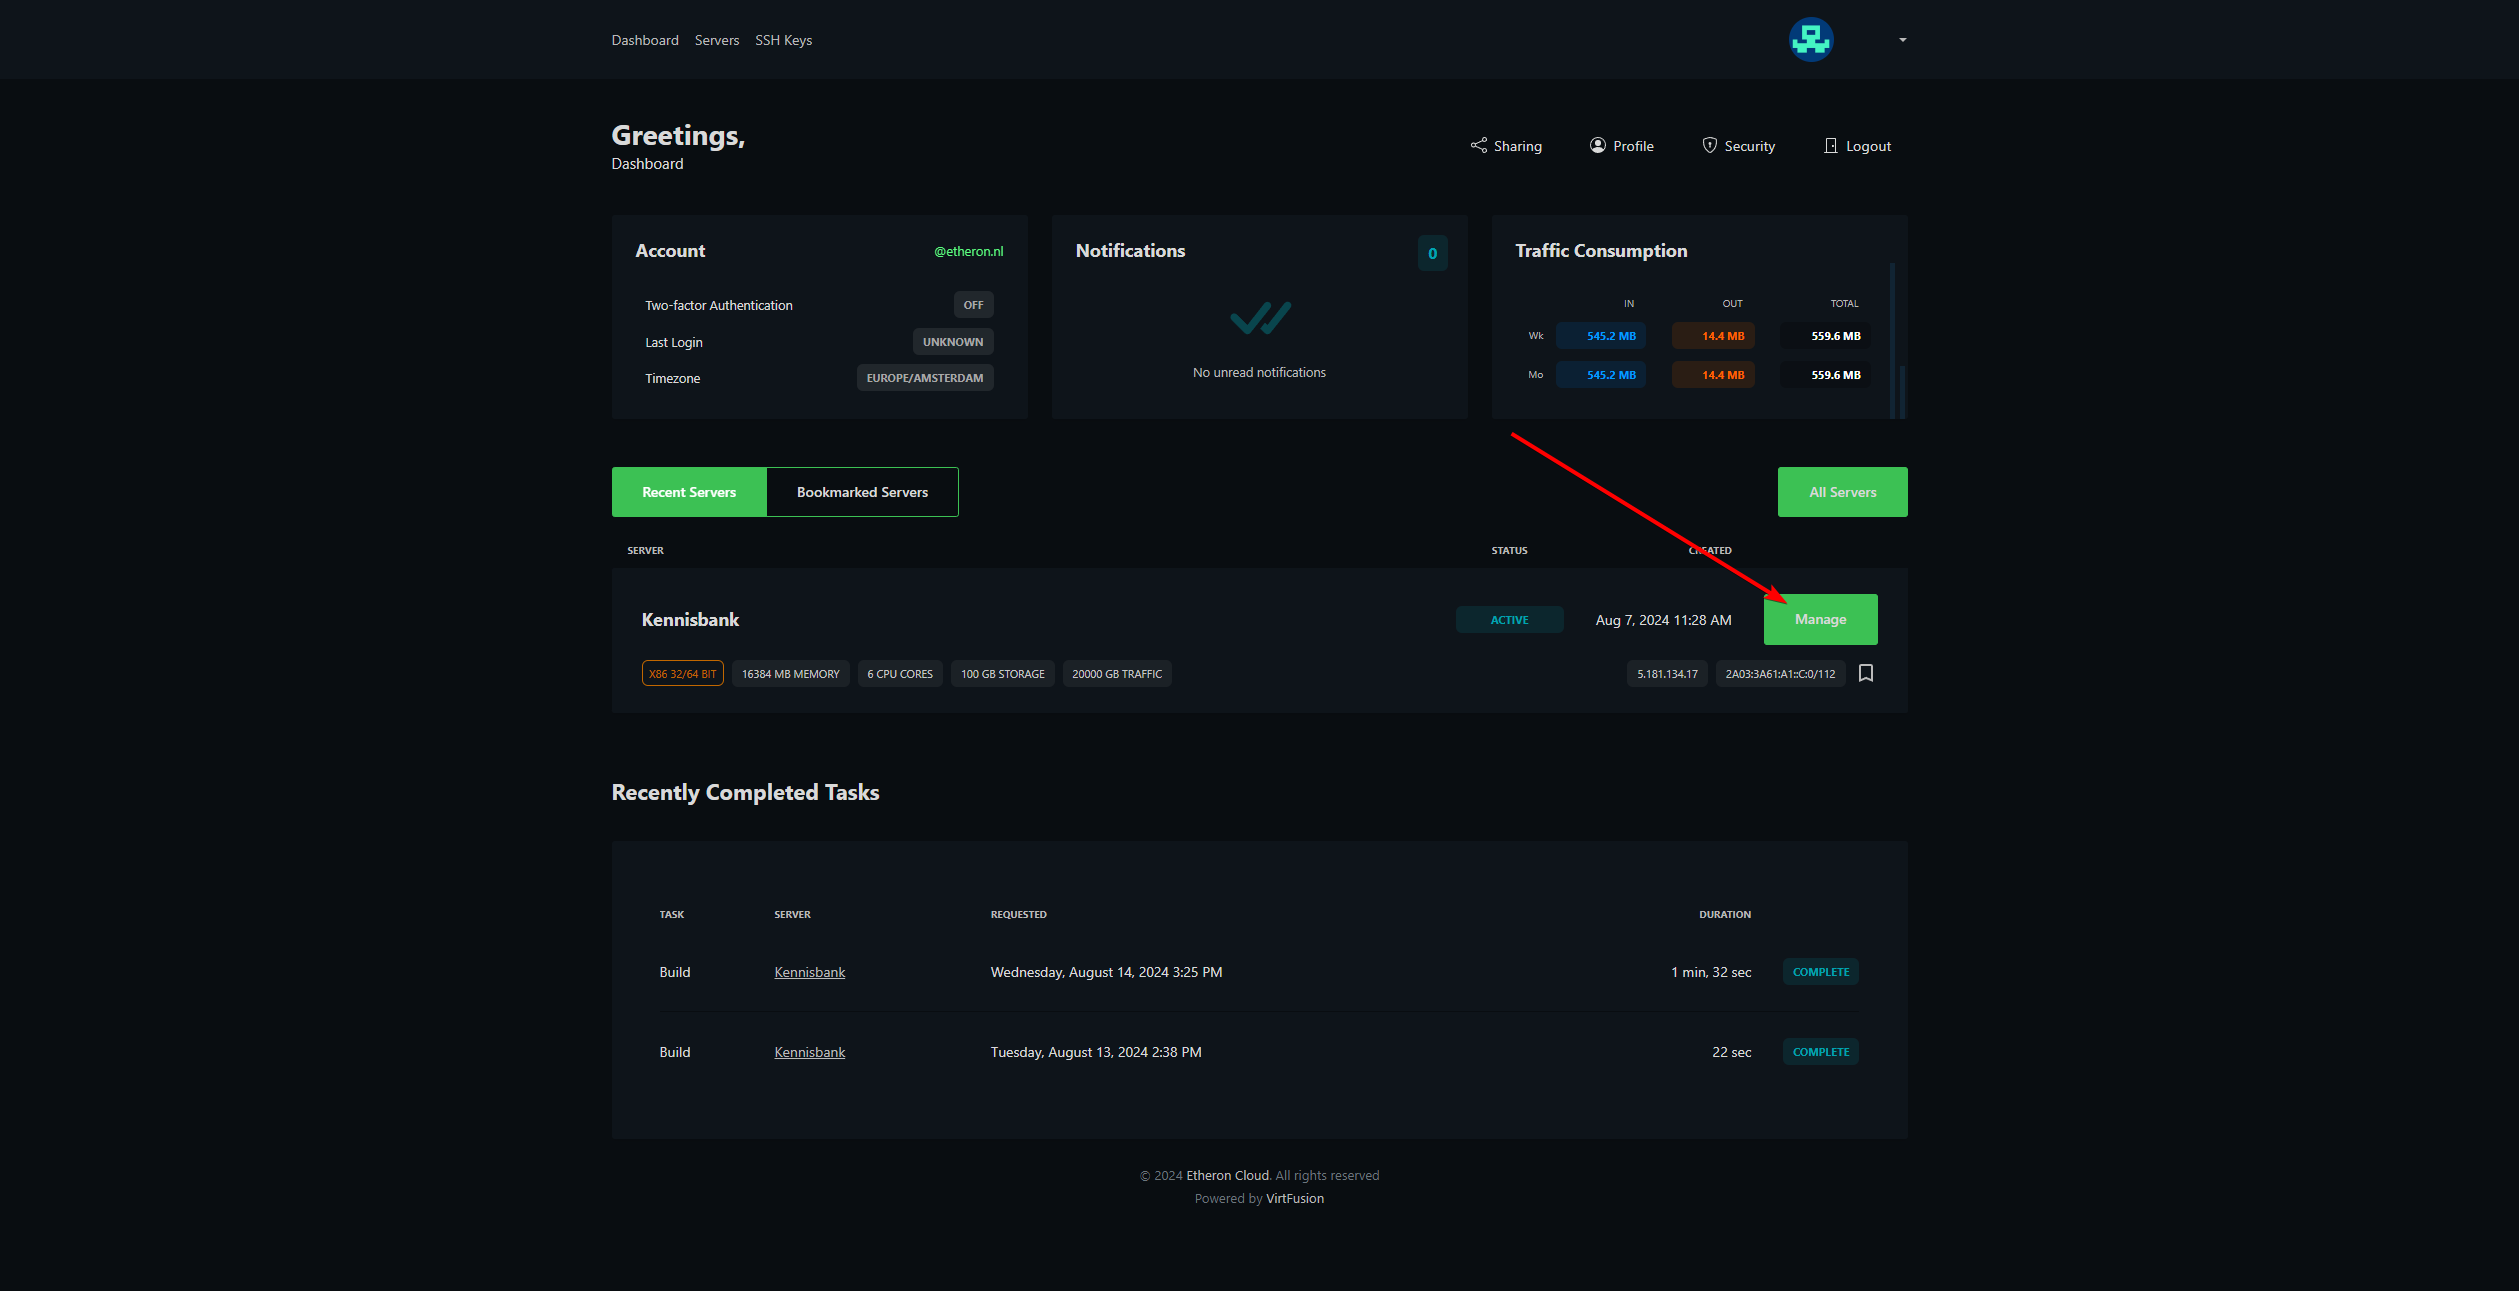
Click on **Manage **on the desired VPS.
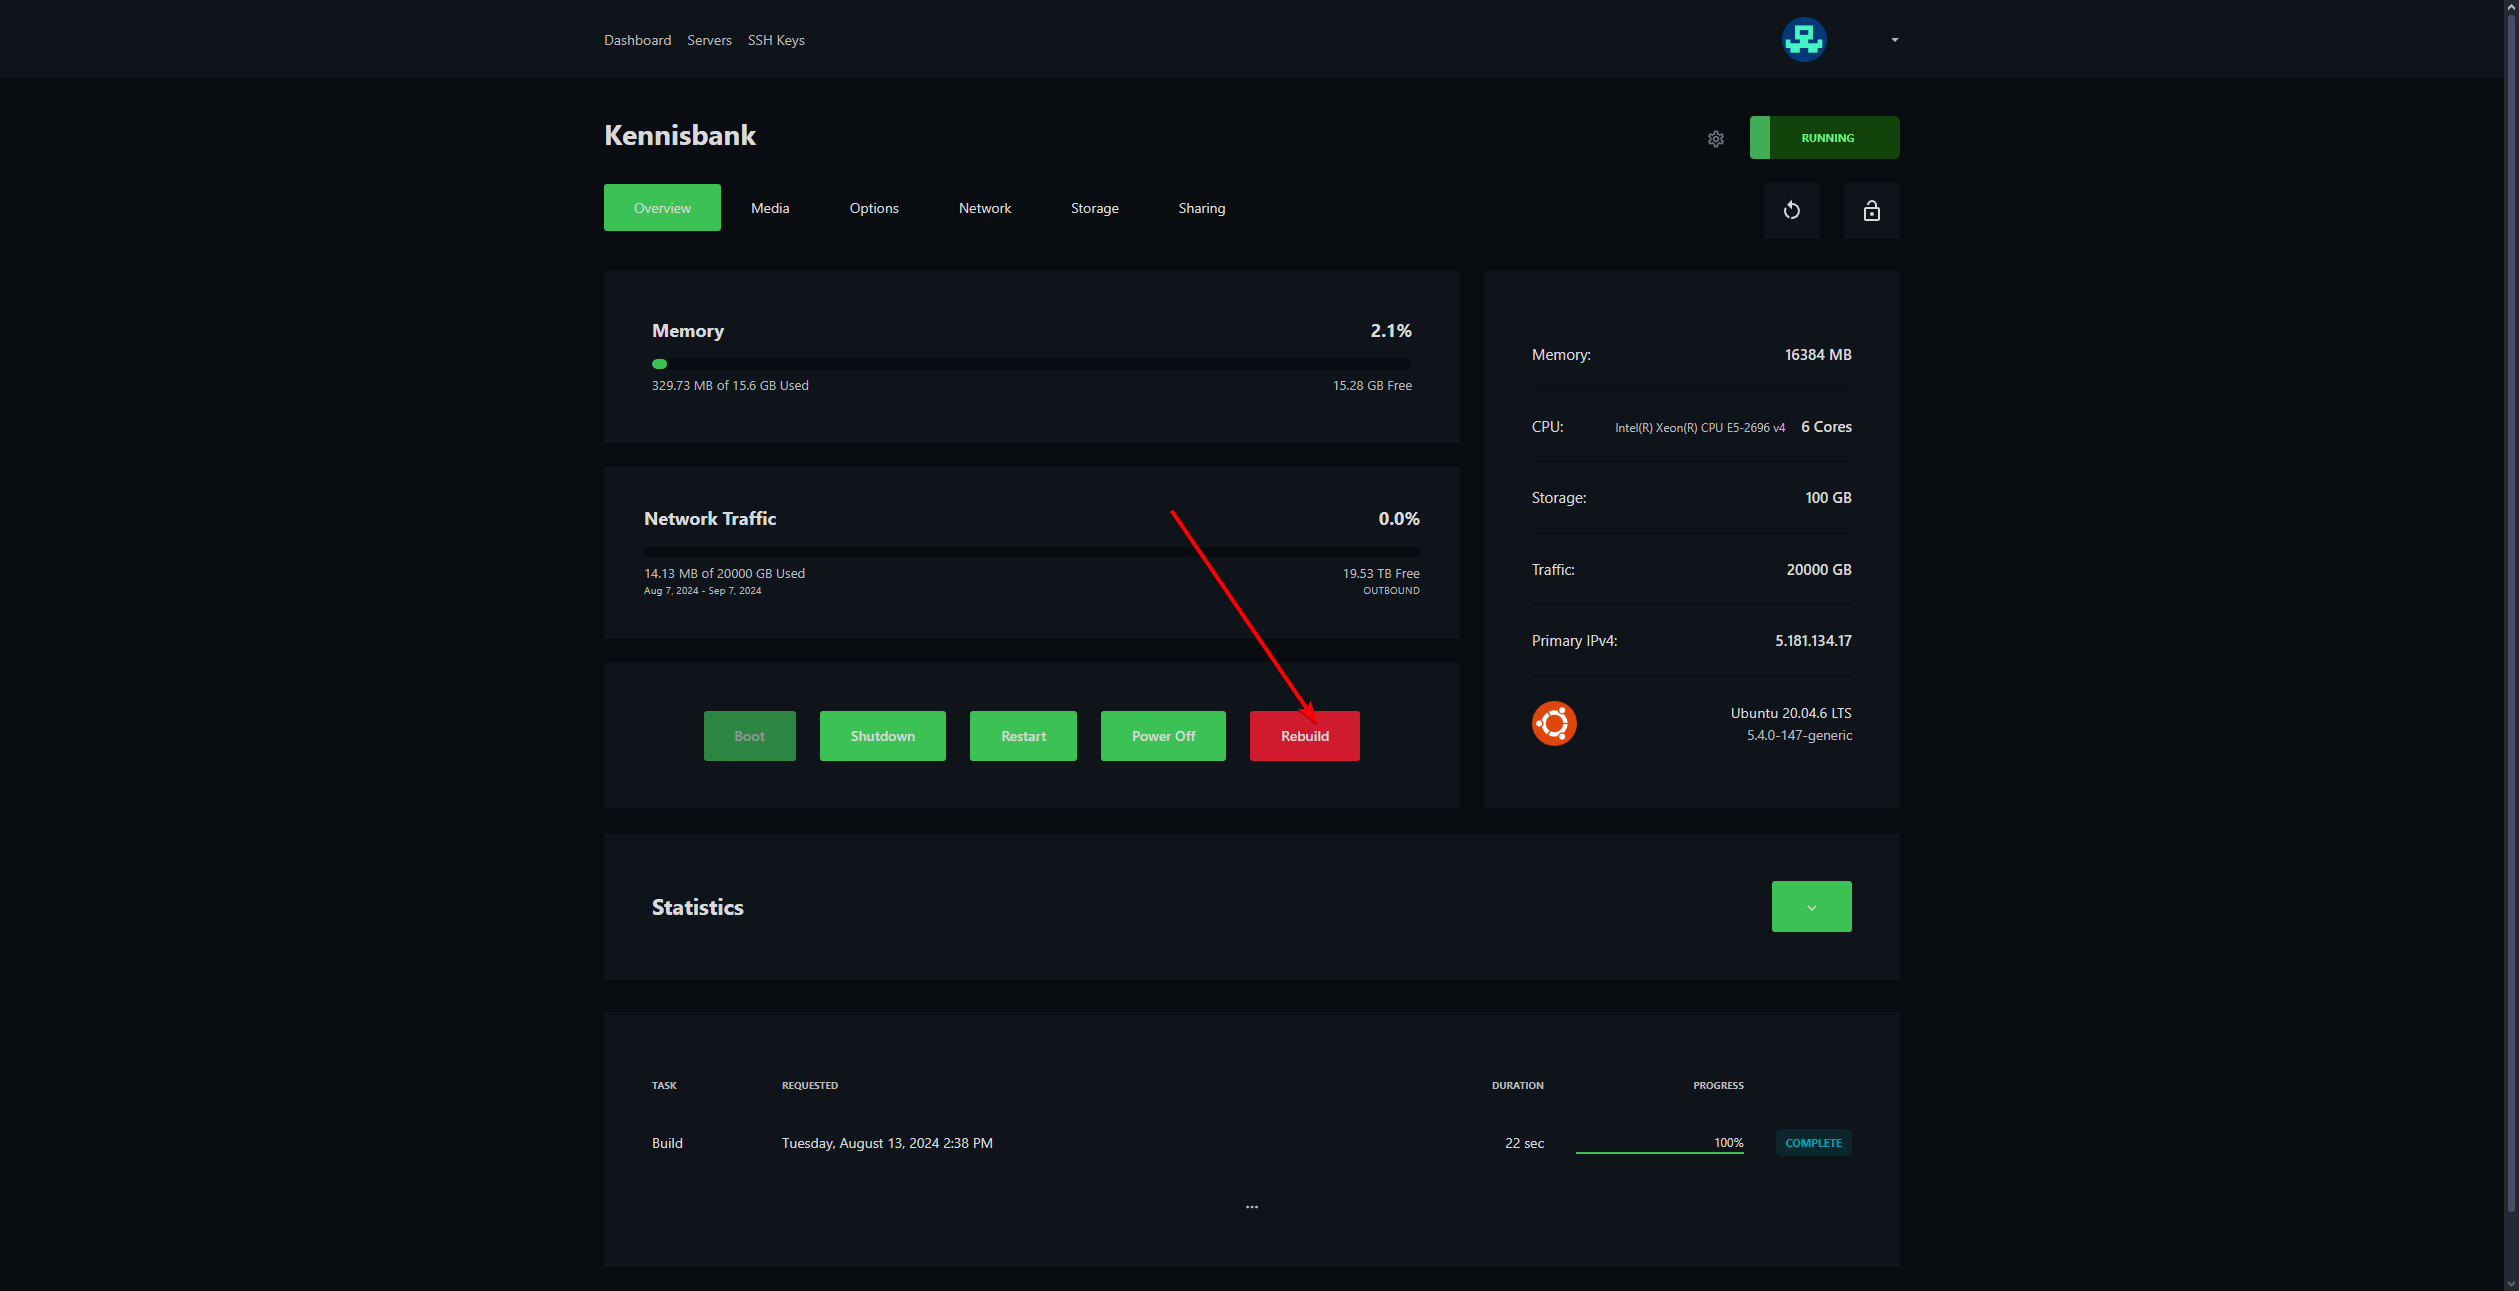
- Click on the red button labeled Rebuild.
All existing data will be lost after this action!
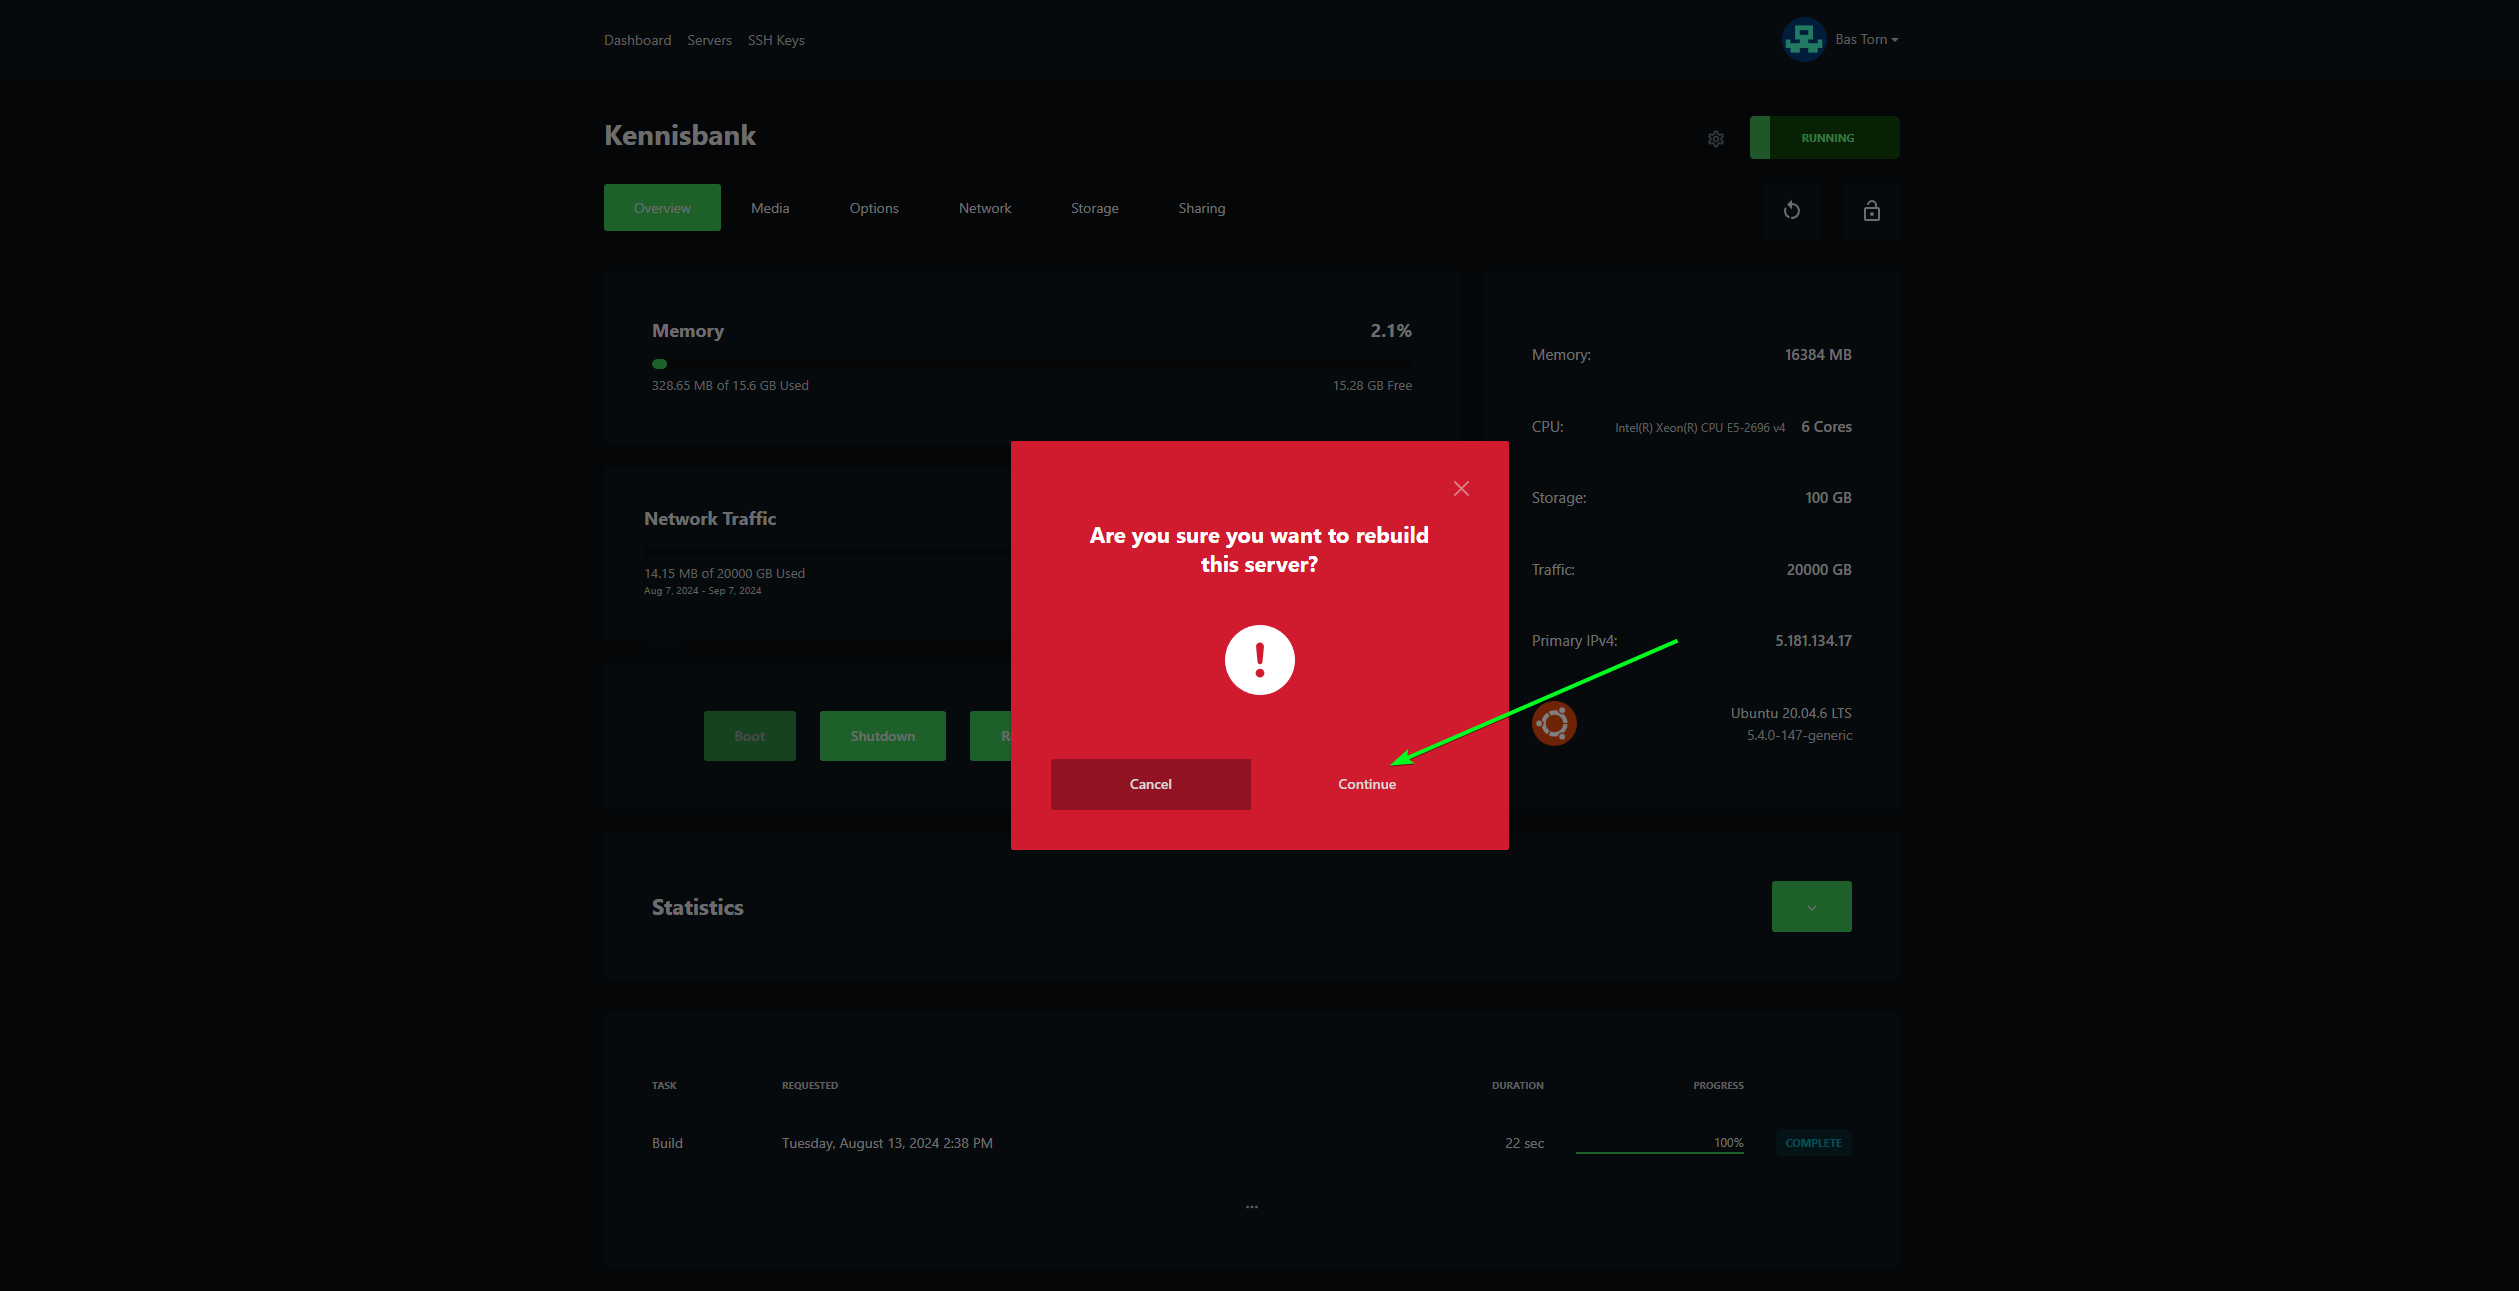
- Click on Continue to proceed.
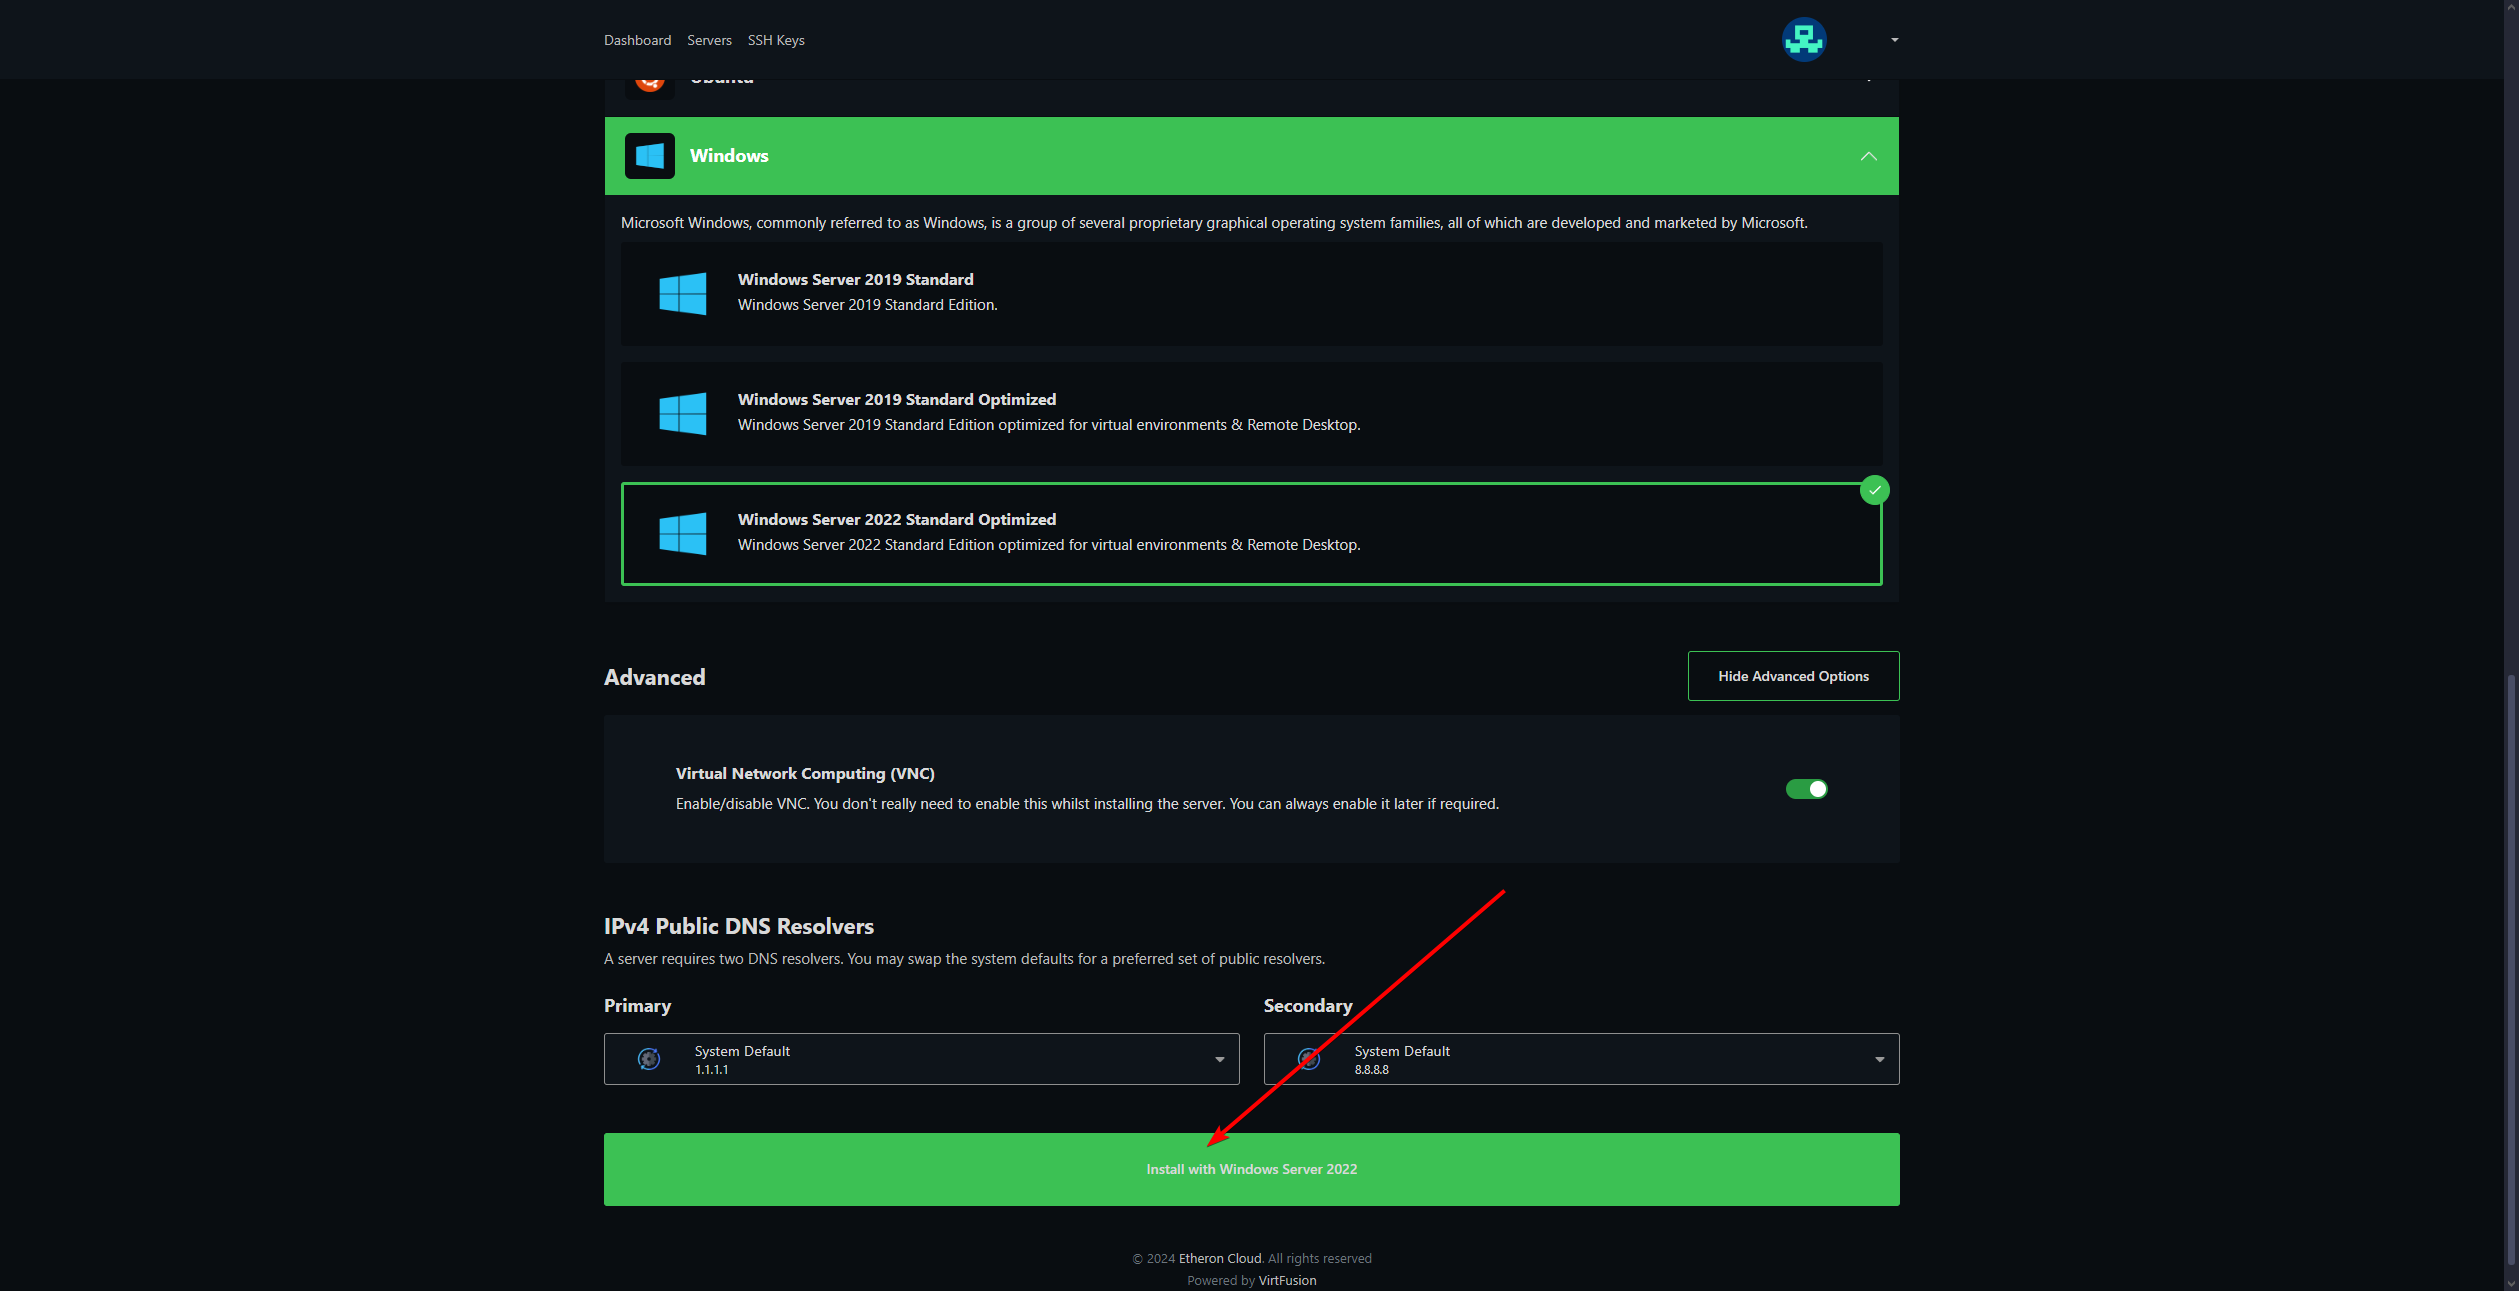
- Fill in the necessary information as required. If you’re unsure how to do this, click here and scroll down to Windows, then choose the desired version.

- Click on Advanced Options and enable VNC. This is useful for accessing Windows since Remote Desktop won’t be enabled by default.
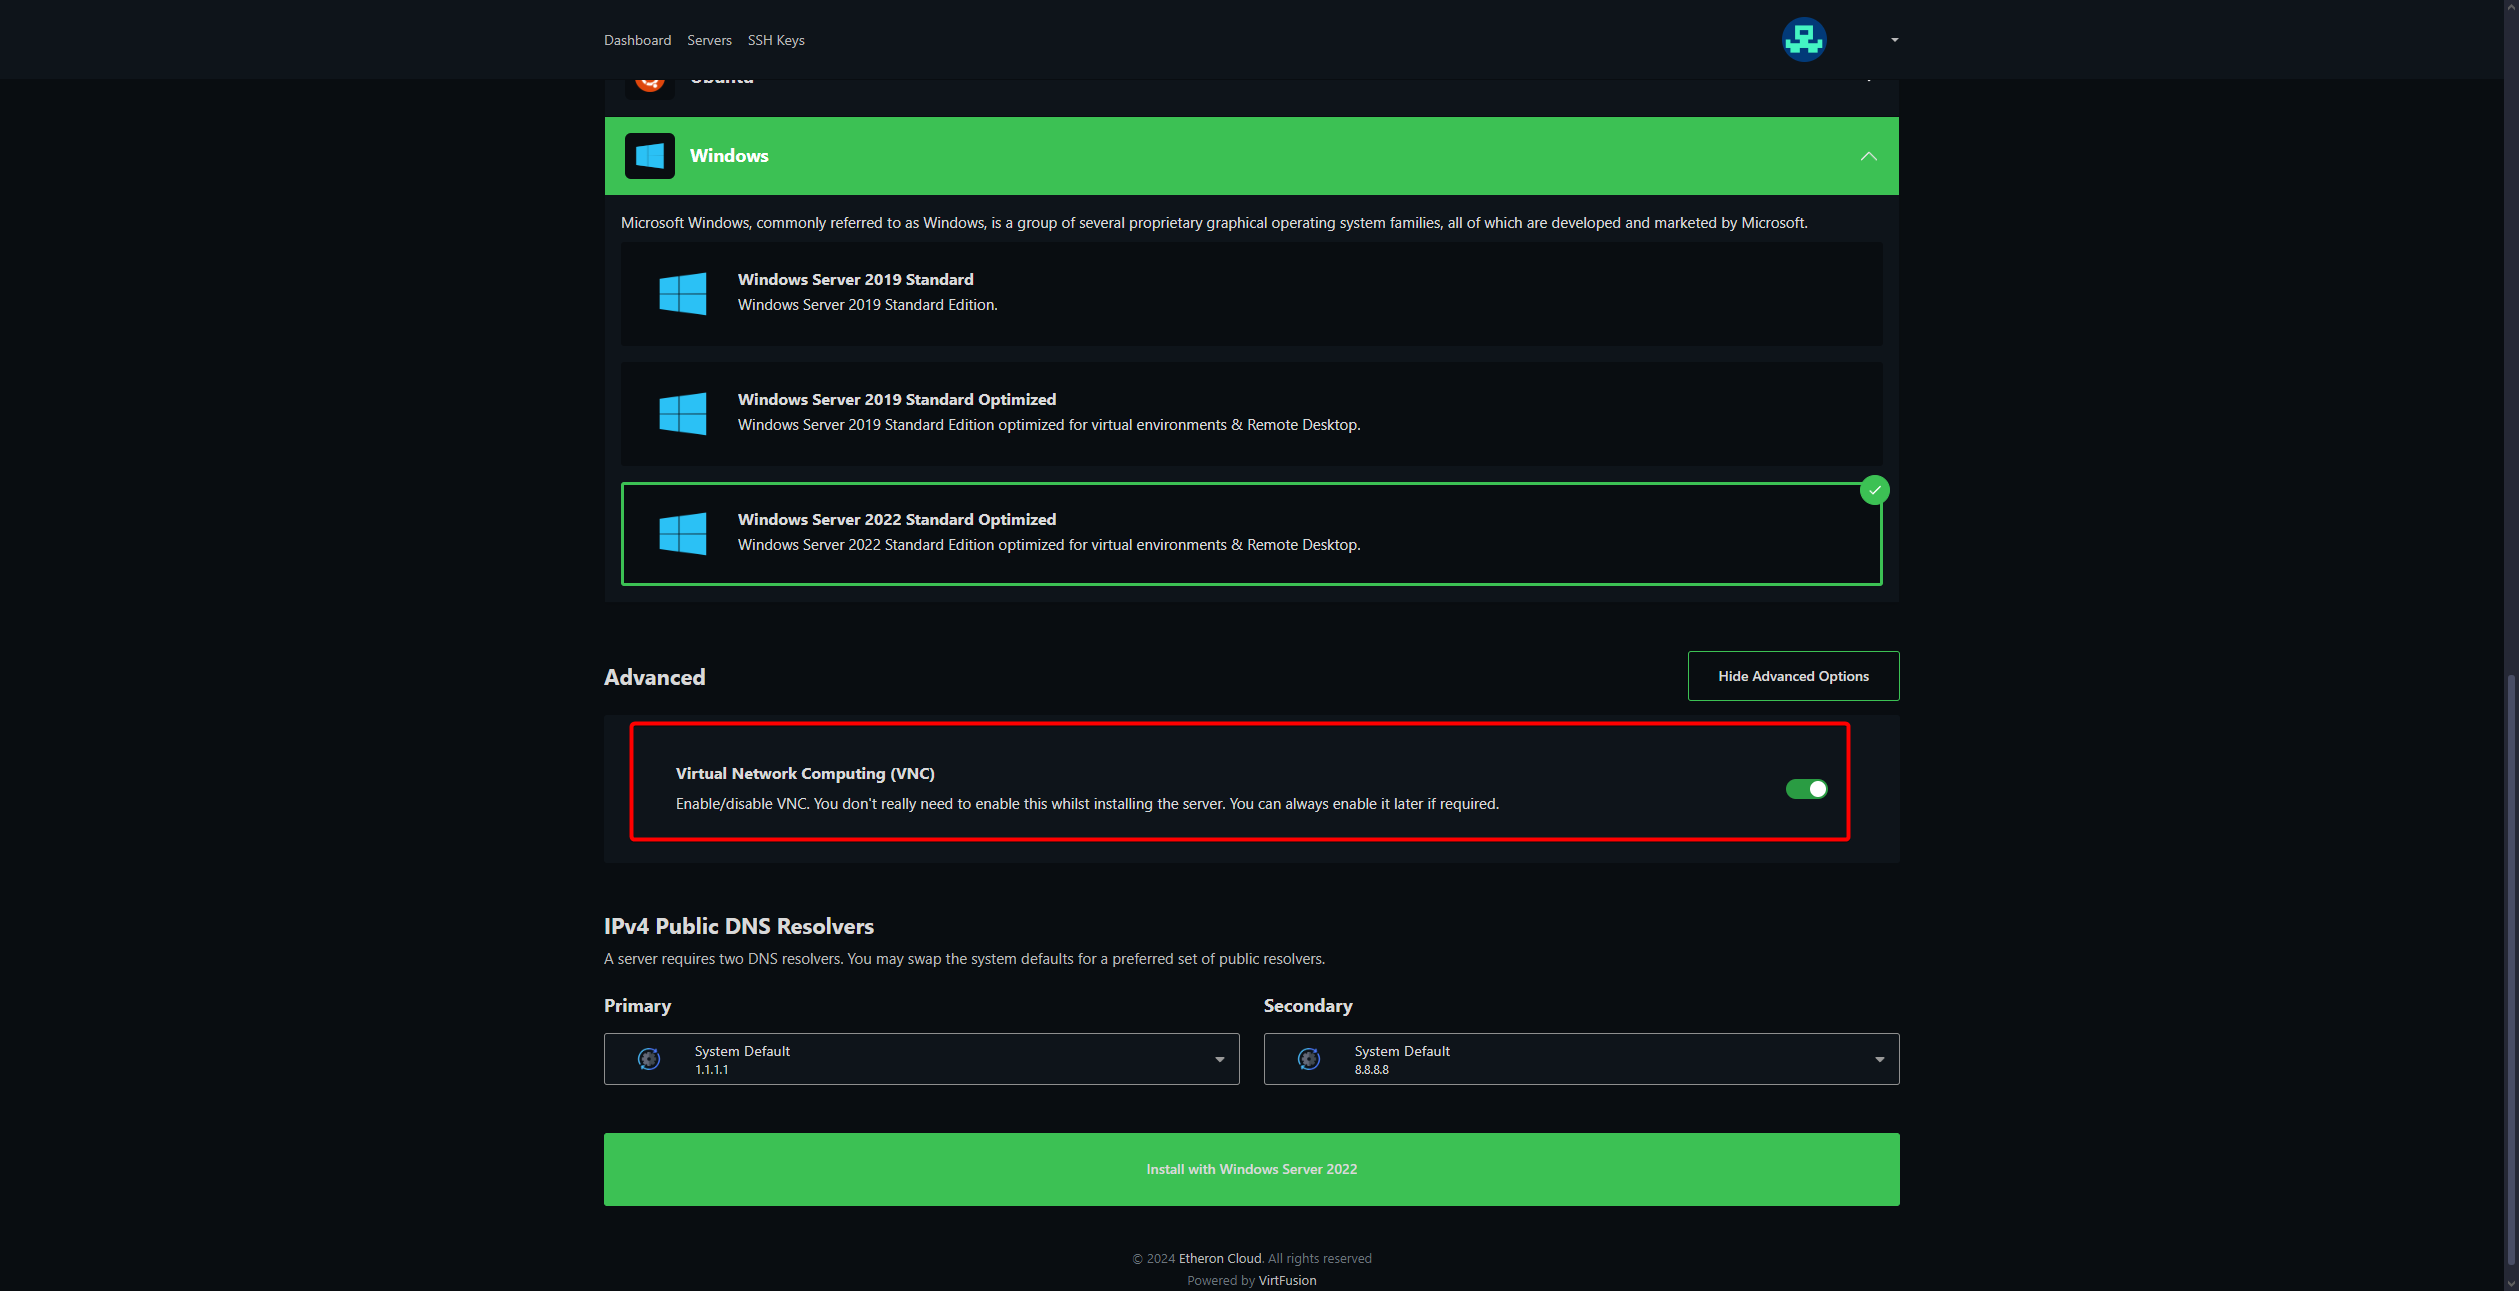
- Click on Install with Windows Server [your version].
- Click on Install now.
Set up Windows correctly
After installing Windows, additional setup is required as Remote Desktop won’t be available initially.
-
Go to your VPS in the panel.
-
Click on **Manage. **
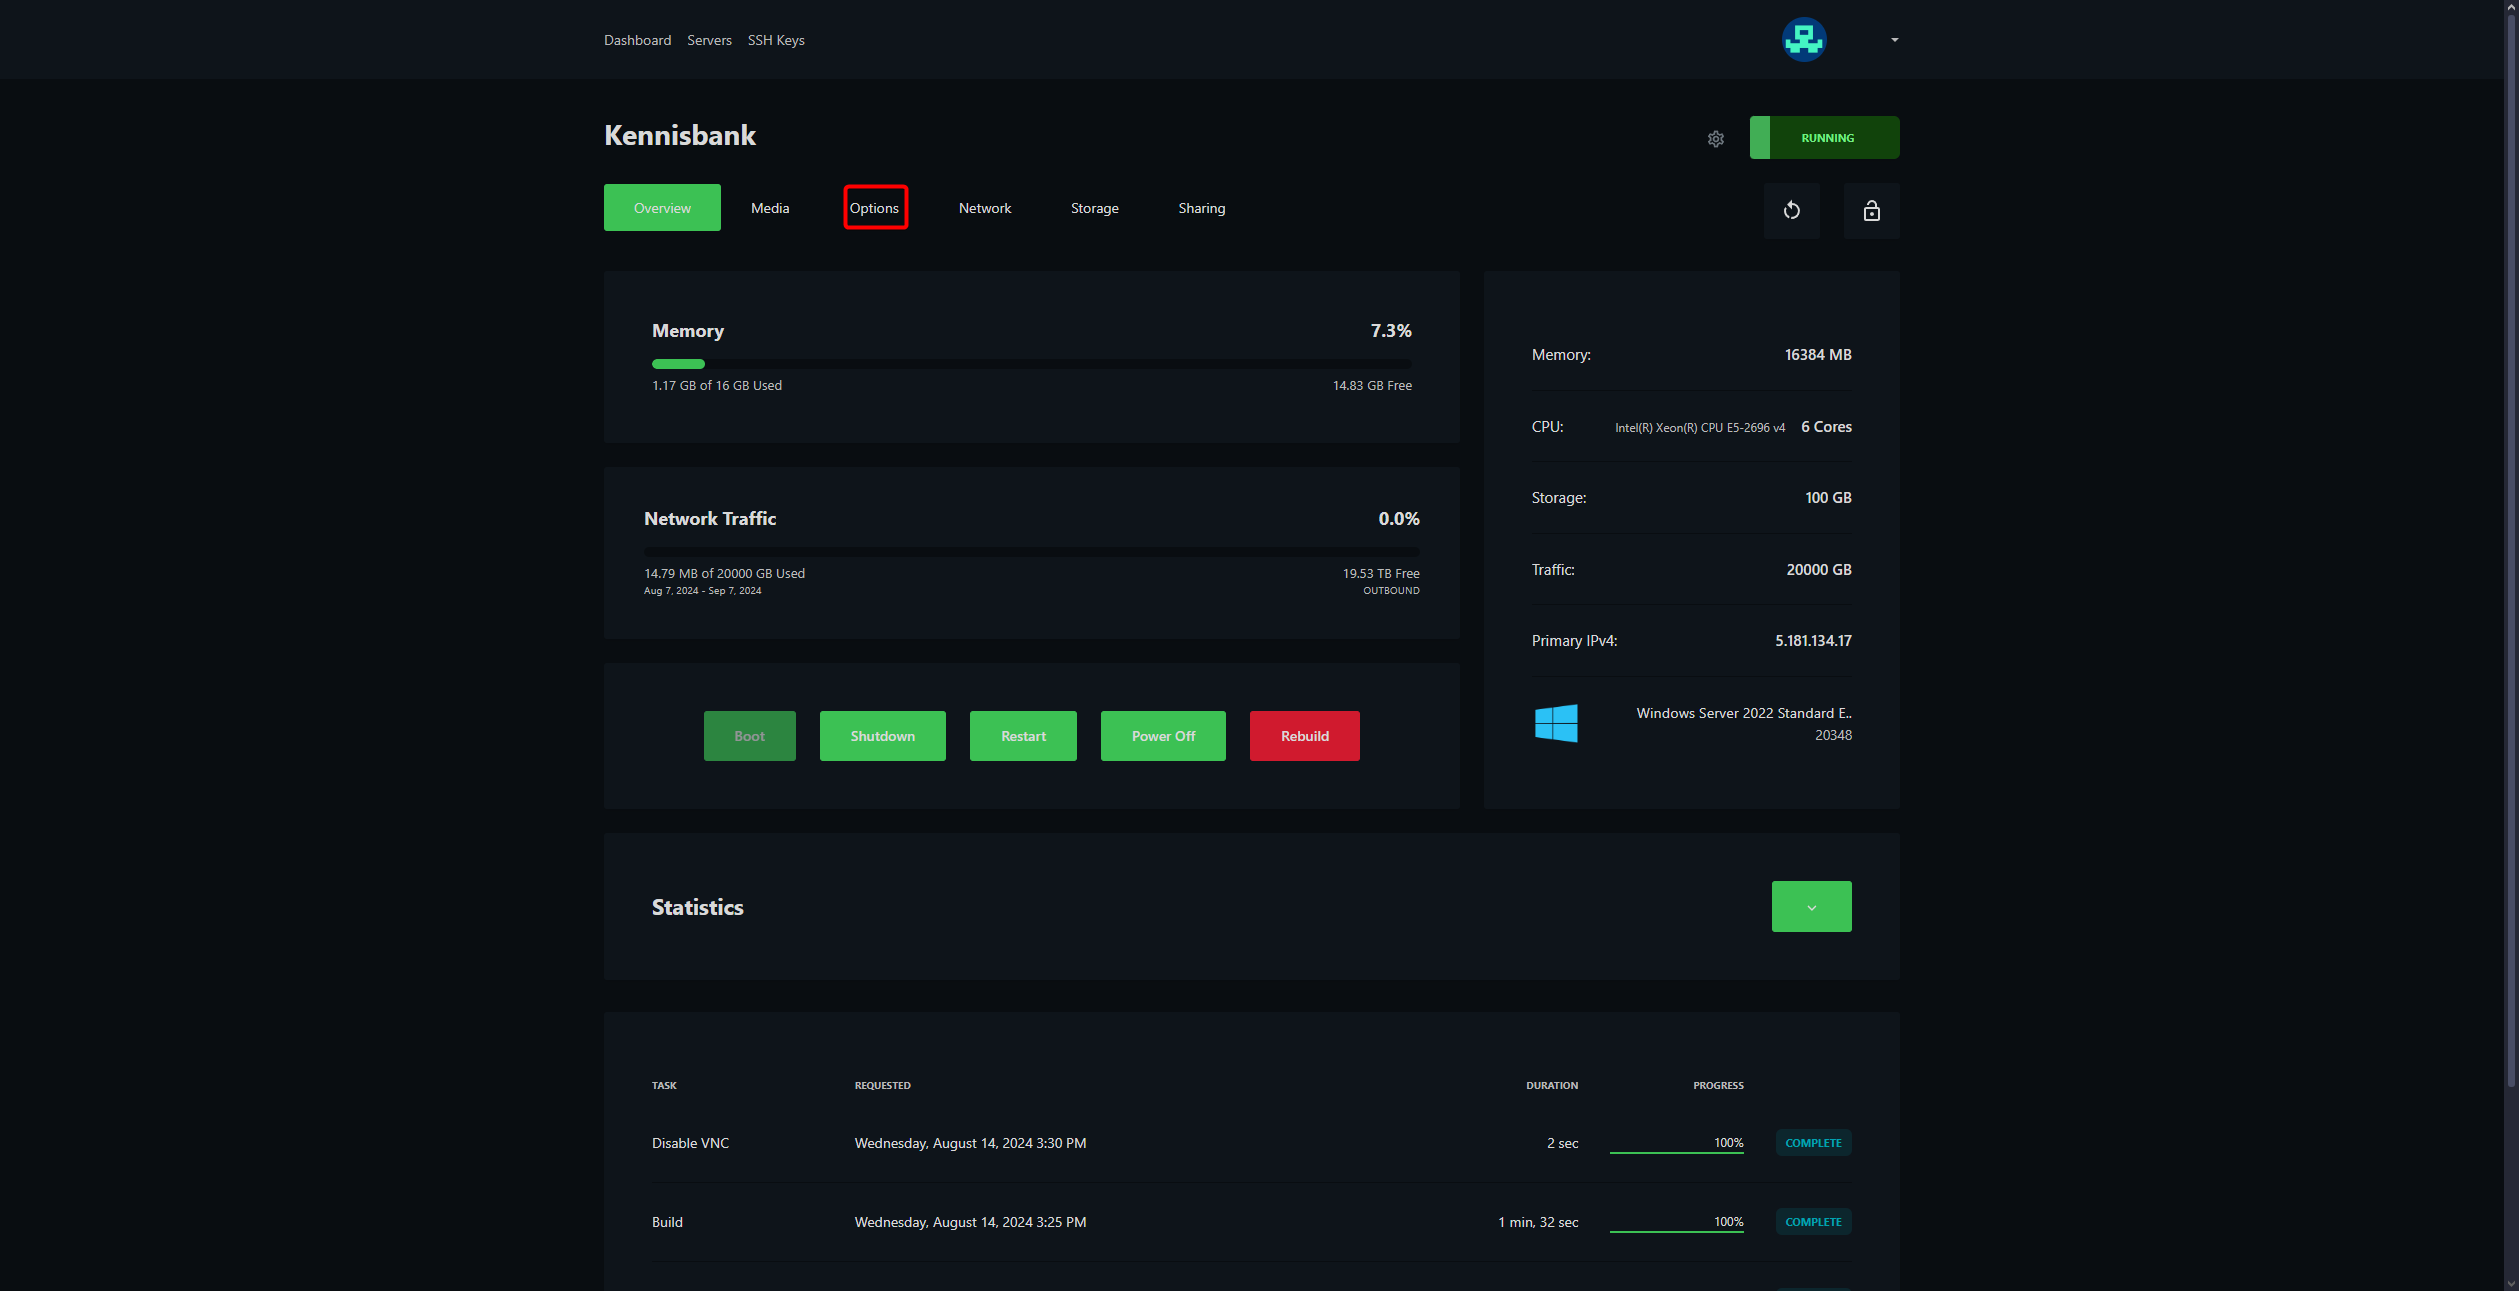
- Click on Options.
- Click on Enable VNC Access.
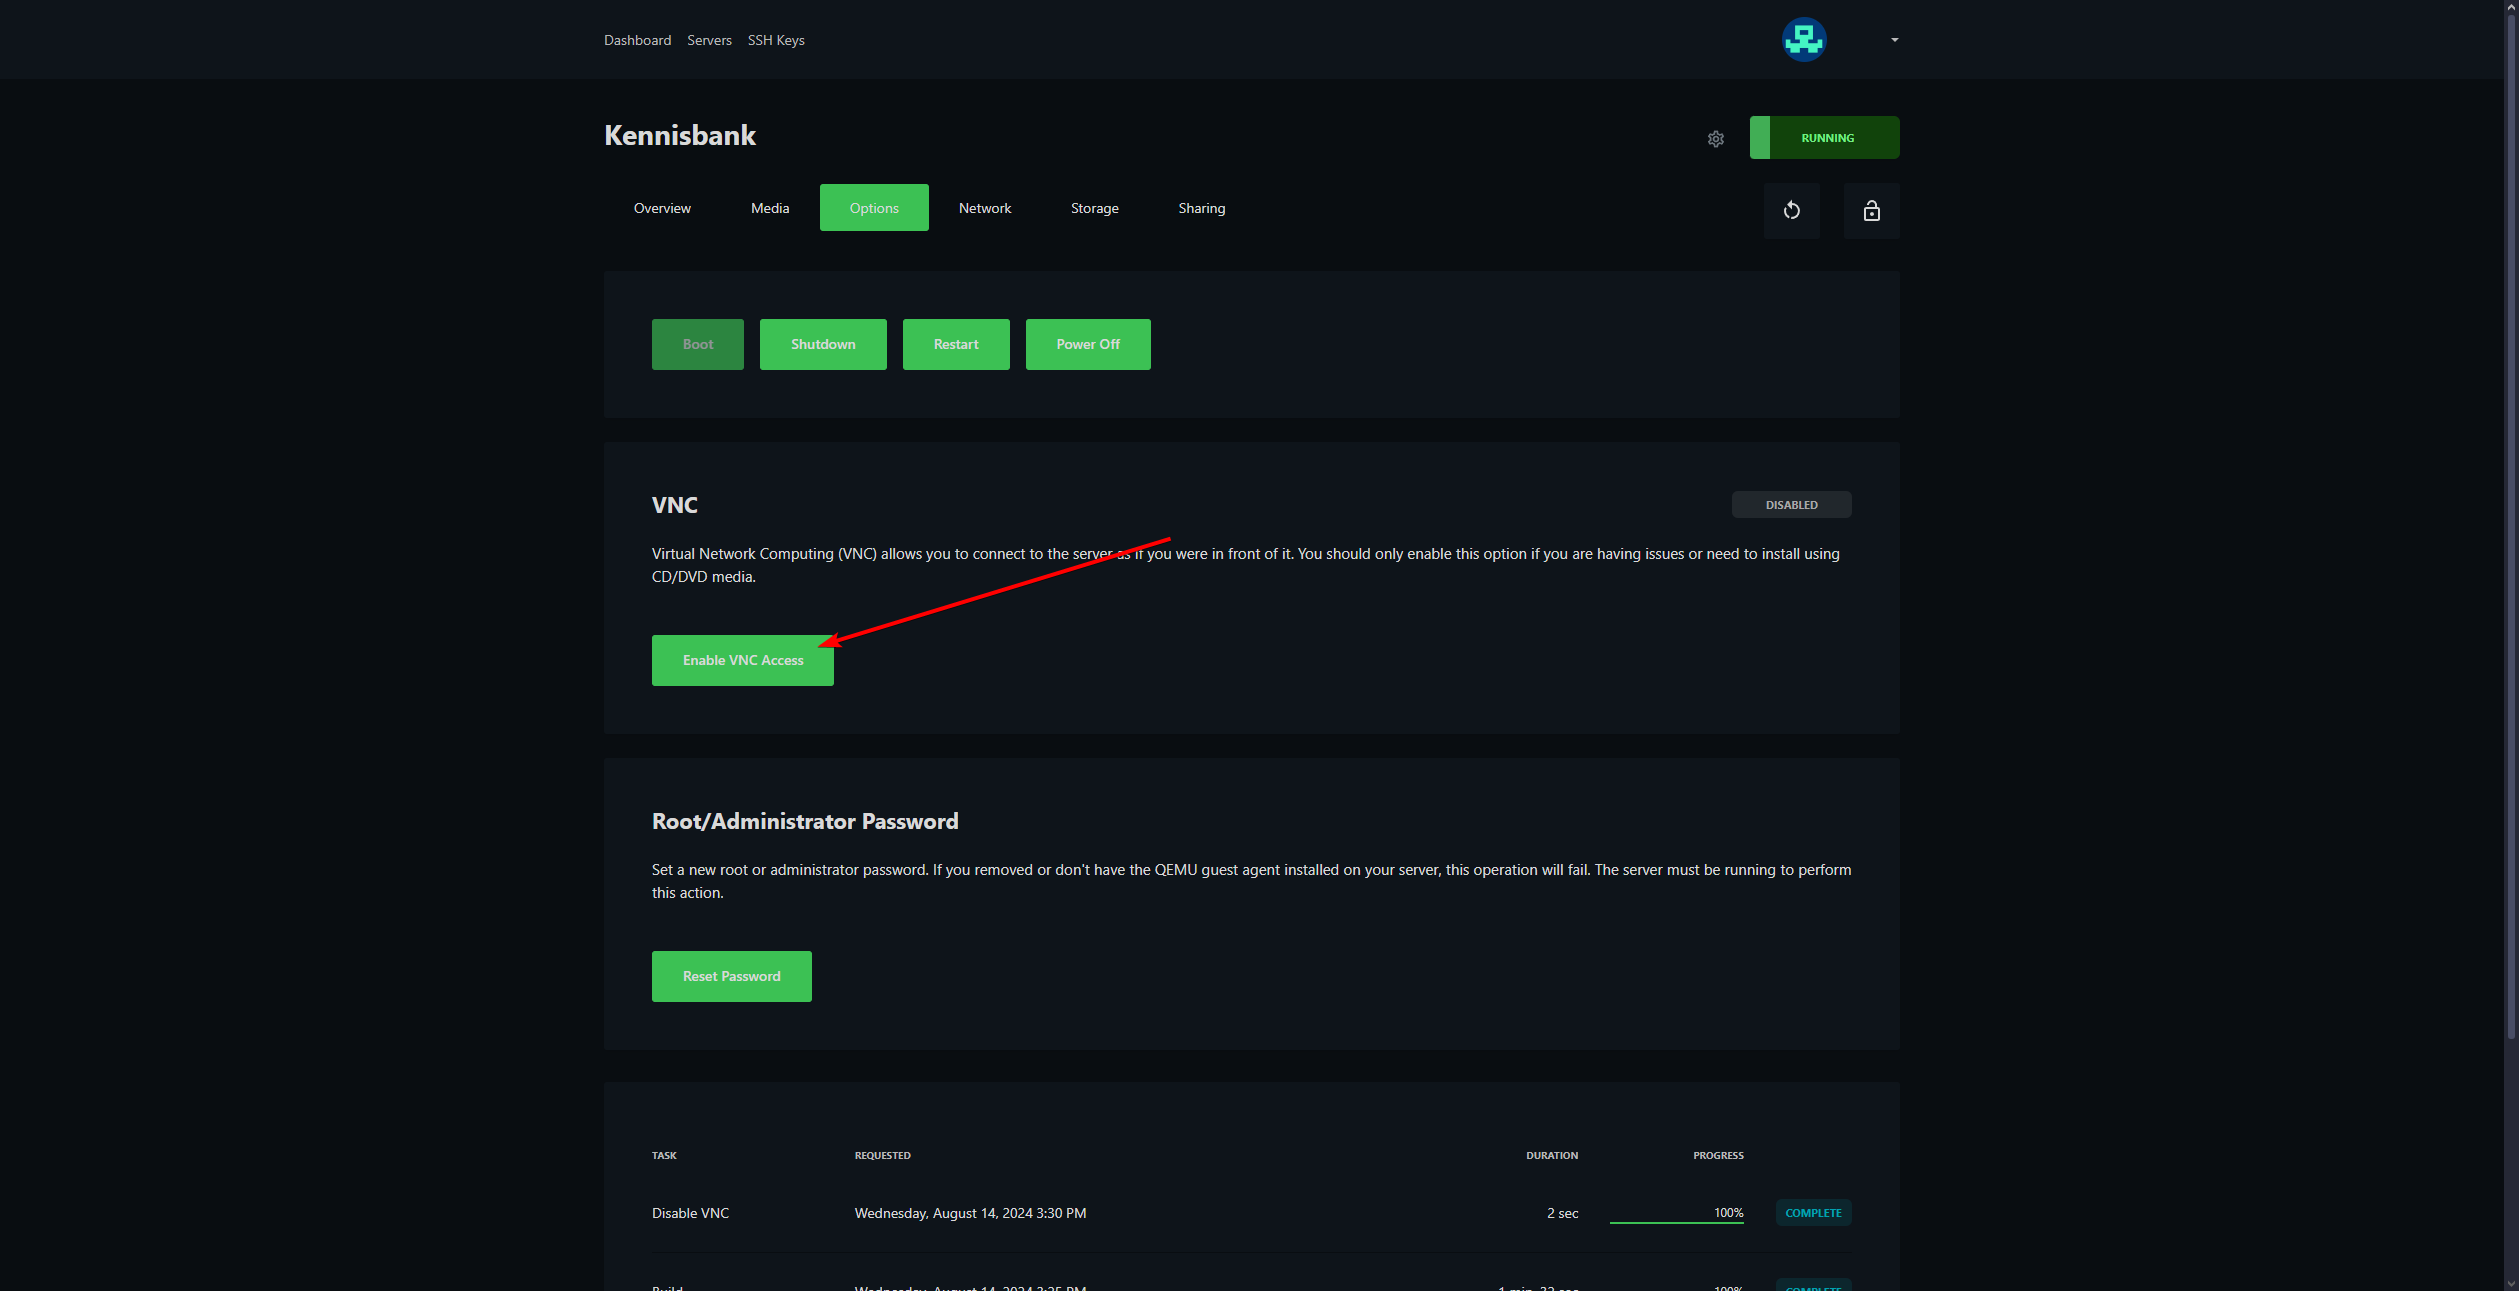
- Click on **Browser VNC **next.
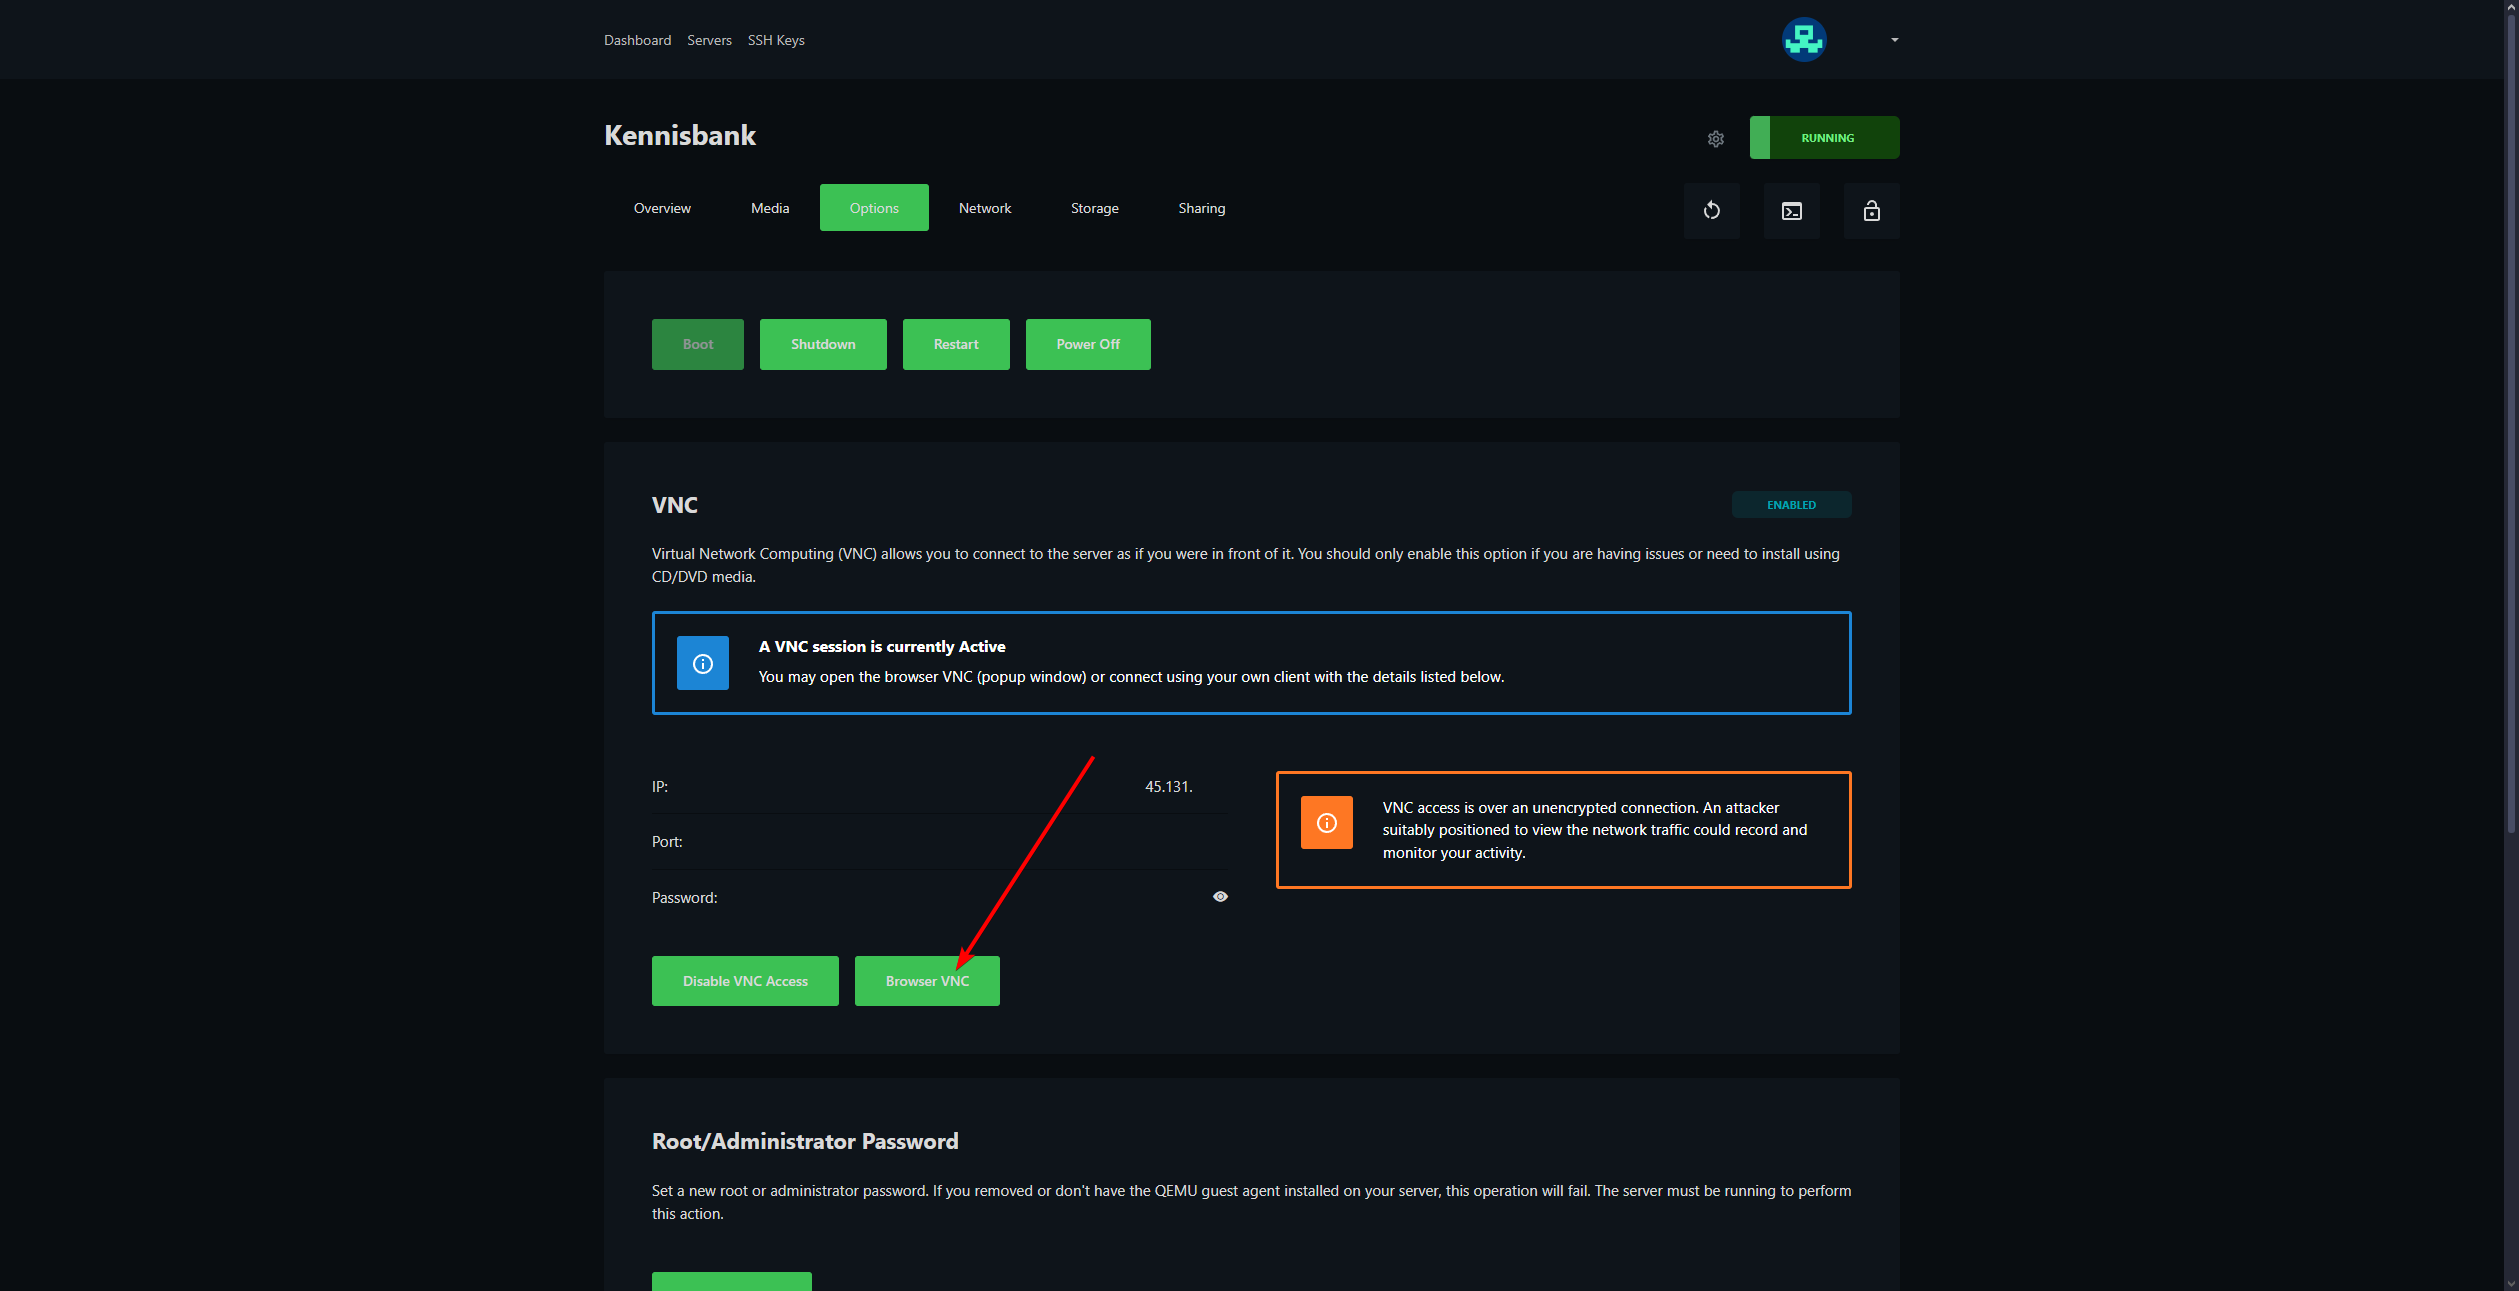
You're now connected to your VPS via VNC.
- To log in, press CTRL + ALT + DEL. This can be done via the VNC Client.
If the password isn’t working, reset it through the VPS panel. After resetting, the VPS must be shut down and restarted.
Windows license
If you have your own Windows license, set it up. If you want to use the Evaluation of Windows 2016, you can do so in the following way.
-
Click on the Windows logo at the bottom left and search for powershell
-
In powershell, type slmgr -rearm and press ENTER
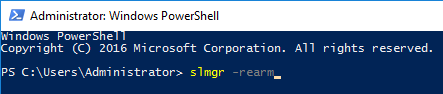
- Restart the VPS
Windows now has a 180-day trial period!
Enable remote desktop
-
Log in to your VPS with a VNC connection.
-
Open the Server Manager in Windows
-
Click on Local Server
-
Click the blue text Disabled next to Remote Desktop.
-
In the new window, check the option Allow remote connections to this computer and click OK.
Remote Desktop is now enabled!
Windows Remote Desktop
Search in the Windows of your PC Remote desktop. Or Remote Desktop. This allows you to easily connect to your VPS.
Fill in all the information needed to connect. Enter the IP address of your VPS after Computer:. The username is always Administrator.
Do you get an error when connecting? Then it may be that Remote desktop is not enabled yet.
Updating Windows
It is convenient and safer to update Windows to the latest version.
-
Go to Settings
-
Search for Update & Security
-
And click on Install updates (This can also be something else, like: Check for updates.)
The installation can take a while, you will often be asked to restart your VPS after all updates have been installed.
Everything worked out? If you have any questions, let us know!